
Lawn
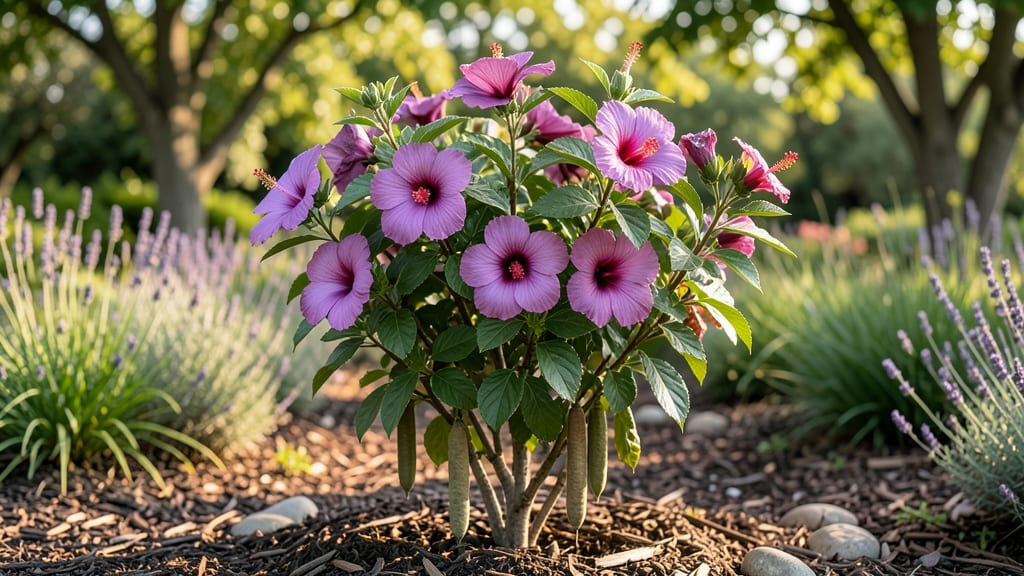
Cold-stressed blooms are the secret to next year’s Rose of Sharon. 🌿 Those woody seed pods might look unremarkable, but they’re packed with potential—if you know how to handle them.
My first attempt at collecting them ended in frustration when I didn’t realize they need a proper drying period before germination. Now, I’ve cracked the code for turning those pods into thriving new plants in just 90 days.
The key is patience and timing: harvest pods when they turn brown and papery in late fall, then dry them thoroughly before extracting seeds. You’ll need a sharp knife, paper bags, and a warm, dry spot to store them until spring.
Most gardeners overlook the drying step, which is why their seeds fail to sprout. Once you’ve got viable seeds, germination is surprisingly straightforward with the right soil and warmth.
By spring, you’ll have strong seedlings ready for transplanting, and within a season, those cold-stressed blooms will reward you with vibrant pink, purple, or white flowers that last all summer.
The best part? These plants are tough, drought-resistant, and come back year after year—no fuss, no twist struggles. Even if you’ve never grown from seed before, this method is foolproof.
Works for gardeners in zones 5-9, whether you’re starting from scratch or expanding your existing shrubs. Here’s how to do it without the guesswork—no more wasted pods or disappointed gardeners.
📚 In This Guide
- What you need
- Instructions
- Tips and common mistakes
- Wrapping up and next steps
What you need
- ● Rose of Sharon seed pods: 3–5 fresh, fully dried pods (harvested in late fall/winter for best viability).
- ● Small pots or seed trays: 4–6 (3–4 inches deep) with drainage holes. Tip: Use biodegradable pots for easy transplanting!
- ● Well-draining potting mix: 2–3 gallons (sterilized, lightweight blend with perlite or vermiculite).
- ● Plastic wrap or humidity dome: 1 sheet or 1 dome (to retain moisture during germination).
- ● Spray bottle: 1 (for gentle watering).
- ● Grow lights or sunny windowsill: Access to 6–8 hours of indirect light daily (or a grow light for 12–14 hours).
- ○ Heat mat (optional but helpful): 1 (70–75°F range) to speed up germination.
- ● Seed scarifier: 1 (to lightly nick seed pods for faster germination).
- ● Fungicide: 1 bottle (e.g., Mycorrhizal inoculant to prevent damping-off).
- ● Labeled plant markers: 6–10 (to track seedling progress).
- ● Fertilizer: 1 (balanced 10-10-10 or organic option like fish emulsion, diluted to half-strength).
- ● Pruning shears: 1 (for trimming pods or seedlings later).
How to grow Rose of Sharon from seed pods in 90 days
Here's my foolproof method for turning those dried seed pods into thriving shrubs—no complicated tricks, just reliable results.
🌱 Step 1: Collect and Prepare Seed Pods
Harvest seed pods when they turn brown and papery but haven't split open yet. I like to collect them in late fall after the first frost—cold stress actually improves germination rates. Remove any remaining stems and place pods in a paper bag to dry for 2-3 weeks in a cool, dark spot. This mimics their natural dormancy period.
Once dry, gently crush the pods between your fingers to release the seeds. The seeds are tiny and flat, so I sift them through a fine mesh screen to separate them from chaff. Store them in an envelope until ready to plant—these seeds stay viable for 2-3 years if kept dry.
💧 Step 2: Cold Stratify for Better Germination
Rose of Sharon seeds need cold treatment to break dormancy. Place the seeds in a damp paper towel, fold it so they're snug but not packed, and put the bundle in a sealed plastic bag. I keep mine in my refrigerator's crisper drawer for 6-8 weeks—this mimics winter conditions.
Check the towel weekly and mist with water if it feels dry. You'll see tiny sprouts after 4-6 weeks of stratification. This cold treatment is critical—skipping it results in poor germination rates and weak seedlings.
☀️ Step 3: Start Seeds Indoors Under Grow Lights
When the seeds sprout, plant them ¼ inch deep in individual 2-inch pots filled with seed-starting mix. I use small pots to prevent damping-off disease. Keep the soil consistently moist but never soggy—you'll know it's right when the surface stays slightly damp but doesn't glisten.
Place the pots under a grow light for 14-16 hours daily, keeping them 2-3 inches below the bulb. Seedlings emerge in 2-3 weeks after planting, but be patient—some may take longer. Thin to one strong seedling per pot, snipping weaker ones at soil level with clean scissors.
🪴 Step 4: Harden Off and Transplant Outdoors
After 6-8 weeks of indoor growth, when seedlings have 3-4 true leaves, begin hardening them off. Start with 1 hour daily in partial shade, gradually increasing exposure over 2 weeks. Watch for leaf drop—this is normal as they adjust.
Transplant outdoors after the last frost when soil temperatures reach 55°F. Space seedlings 3-4 feet apart in well-draining soil with full sun exposure. Mulch around the base to retain moisture and protect roots during temperature swings.
⏰ Step 5: Maintain Through First Season
Water deeply once weekly during the first growing season, letting the top 2 inches of soil dry between waterings. Avoid overhead watering after transplanting—water at the base to prevent fungal diseases. You'll see new growth within 4-6 weeks of transplanting.
Fertilize lightly with a balanced 10-10-10 formula in early spring and again after flowering. Prune back leggy growth by ⅓ in late winter to encourage bushier growth. By year two, you'll have a sturdy shrub ready for its first cold-stressed blooms.
Tips & tricks for growing Rose of Sharon from seed pods
These little-known tricks will help you avoid common pitfalls and maximize your success with these finicky seeds.
Timing is Everything: The 2-3 week drying period in Step 1 is non-negotiable—this mimics the plant's natural dormancy cycle. If you're impatient and rush it, the seeds won't germinate properly. I've seen people try to speed this up with heat, but it actually reduces viability. Place your pods in a paper bag and set it in a dark closet or pantry where the temperature stays consistently cool.
Stratification Secrets: During the 6-8 week cold treatment in Step 2, don't be tempted to check on your seeds more often than weekly. Every time you open the bag, you risk introducing warm air that breaks the cold stratification process. I like to label my bags with the start date and set a reminder—this prevents me from peeking prematurely. The seeds need consistent 34-40°F temperatures to break dormancy properly.
Lighting Matters: For the 14-16 hours of grow light in Step 3, position your lights about 2-3 inches above the seedlings and adjust as they grow. I use a simple LED grow bulb on a timer for consistency. Watch for seedlings leaning toward the light—this means they need to be moved closer or the light needs adjusting. If you notice yellowing leaves, it's a sign of either too much light or not enough water.
Transplanting Wisdom: When hardening off in Step 4, start with just 1 hour of sunlight on the first day. Gradually increase exposure over the 2-week period, but never expose them to full sun suddenly. I've seen many gardeners make this mistake and end up with sunburned seedlings. Also, transplant on a cloudy day if possible—this gives your seedlings a gentler introduction to outdoor conditions.
Pro Tips for Rose Of Sharon Seed Pods
- These little-known tricks will help you avoid common pitfalls and maximize your success with these finicky seeds.
- Timing is Everything: The 2-3 week drying period in Step 1 is non-negotiable—this mimics the plant's natural dormancy...
- Stratification Secrets: During the 6-8 week cold treatment in Step 2, don't be tempted to check on your seeds more of...
Frequently asked questions
Got questions about Rose of Sharon seed pods? You’re not alone!
Here are the most common queries—plus quick, practical answers to help you grow confidently.
When do Rose of Sharon seed pods appear after planting?
Seed pods typically form 8–12 weeks after flowering, usually in late summer or early fall. If your plant isn’t blooming by mid-summer, check for sunlight (6+ hours/day), well-draining soil, or pruning dead growth to encourage new flowers. Patience is key—some varieties (like Hibiscus syriacus ‘Diana’) are slower to mature.
Can I collect seed pods in cold weather?
Yes! Rose of Sharon seed pods harden as they dry, making them resilient to light frost (down to 20°F/-7°C). Wait until pods turn brown and papery (late fall/winter) before harvesting. If pods split open prematurely, store them in a paper bag in a dry place to prevent seed loss.
How do I germinate Rose of Sharon seeds from pods?
Start with a soil scarification trick: Nick the seed coat with sandpaper or soak in warm water for 24 hours. Plant seeds ¼-inch deep in moist, well-draining potting mix (60–70°F/15–21°C). Keep soil consistently damp (not soggy) and expect germination in 2–4 weeks. Pro tip: Use a heat mat for faster sprouting!
What if my Rose of Sharon isn’t producing seed pods?
No pods? Check these fixes:
- Age: Mature plants (3+ years) produce more seeds.
- Pollinators: Hand-pollinate with a paintbrush if bees are scarce.
- Nutrients: Add balanced fertilizer (10-10-10) in early spring.
- Pruning: Avoid cutting back after flowering—this removes potential pods.
Are there alternatives to growing from seed pods?
For faster results, try:
- Cuttings: Snip 4–6-inch stems in early summer, dip in rooting hormone, and plant in perlite/sand mix.
- Layering: Bend a low branch to the ground, cover with soil, and wait 6–12 months for roots.
- Nursery plants: Buy established Hibiscus syriacus varieties (e.g., ‘Blue Chiffon’ or ‘Lavender Chiffon’) for instant blooms.
Wrapping up and next steps
Growing Rose of Sharon seed pods is a rewarding way to bring vibrant blooms to your lawn—even in colder climates—without the fuss of traditional gardening! 🌸 With the right preparation, patience, and a dash of creativity, you can enjoy stunning flowers in just 90 days.
Whether you’re a seasoned gardener or a curious beginner, these resilient plants offer beauty with minimal effort.
Ready to transform your outdoor space? Start by gathering your materials, then dive into planting and care—your future blooms will thank you! 🌱