
Lawn
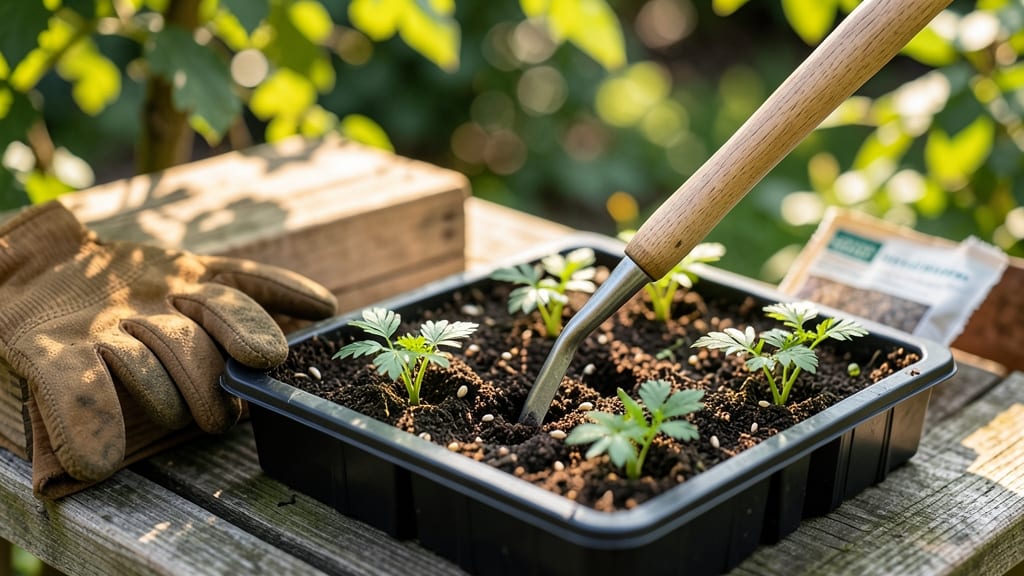
A seed dibber tool turns messy seed planting into straight rows with perfect spacing. 🌱 I used to struggle with uneven seedlings, but this simple tool changed everything—now my flowers and veggies grow in neat, productive lines instead of chaotic clumps.
The tool looks like a long pencil with a pointed tip, but its purpose is game-changing: it creates evenly spaced holes for tiny seeds. Most gardeners overlook it, but it’s perfect for crowded beds where seedlings compete for space.
You’ll see the difference immediately—no more thinning or wasted seeds. For small seeds like marigolds or lettuce, it’s a must-have. Even for larger seeds, it speeds up planting and ensures consistent germination. The best part? It costs just a few dollars and fits in any gardening toolkit.
Compared to fingers or rulers, a dibber saves time and frustration. Skip the guesswork and plant with confidence—your garden will thank you with stronger, healthier plants.
📚 In This Guide
- What you need
- Instructions
- Tips and common mistakes
- Wrapping up and next steps
What you need
- ● Seed dibber tool (wooden, plastic, or metal—choose based on durability needs): Length: 6–12 inches (adjustable or fixed) Spacing markers: Customizable (e.g., 12", 18", 24") or pre-set Material: Lightweight but sturdy (e.g., bamboo, aluminum, or reinforced plastic)
- ● Seeds (choose fast-growing varieties for quick results): Quantity: Enough for your planned rows (check seed packet spacing guidelines) Type: Small seeds (e.g., marigolds, basil, lettuce) or larger seeds (e.g., beans, sunflowers)
- ● Garden soil: Type: Well-draining, loose soil (amend with compost if needed) Depth: 2–3 inches deep for most seeds
- ● Watering can or hose with a gentle spray nozzle (to avoid washing seeds away).
- ● Measuring tape or ruler (for marking out rows before planting).
- ○ Gloves (optional but recommended for comfort and hygiene).
- ● A seedling tray or biodegradable pots for starting seeds indoors before transplanting.
- ● An erosion shield or mulch to protect newly planted seeds from wind or birds.
- ● A notebook to track planting dates, seed types, and spacing for future reference.
- ● Knee pads or a small stool for comfort during long planting sessions.
How to use a seed dibber tool for perfectly spaced plantings
This handy tool transforms messy seed drops into neat, even rows—here's how to master it.
🌱 Step 1: Prepare Your Soil and Mark Rows
Start by clearing debris from your planting area and working the soil to a fine, crumbly texture. I like to use the back of a rake to create a smooth, level surface—this prevents seeds from sinking unevenly when you press the dibber down. For rows, snap a string line between stakes or use a garden hose laid flat in the ground to create perfectly straight guides.
Measure your spacing needs—most annuals and perennials thrive with 12-18 inches between plants, while smaller flowers like marigolds can go every 6-8 inches. Use a measuring tape to mark these intervals along your string line. This step ensures your dibber will create consistent spacing without guesswork.
🌱 Step 2: Load the Dibber and Plant Seeds
Fill a small cup or spoon with your seeds—just enough for a few rows at a time. Hold the dibber like a pencil, with your dominant hand gripping the handle for control. Press the pointed tip firmly into the soil at your first marked interval, then lift straight up to create a clean hole. I angle the dibber slightly forward to make extraction easier, especially in hard or rocky soil.
Drop 1-2 seeds into each hole (depending on seed size) and cover lightly with soil using the dibber's flat base. Press gently to secure seeds at the correct depth—usually twice the seed diameter. For tiny seeds like snapdragons, I like to pre-mix them with sand so they're easier to handle and distribute evenly.
💧 Step 3: Maintain Even Moisture After Planting
Water gently with a fine rose attachment on your hose—aim for a light mist that doesn't disturb the newly planted seeds. The dibber's precision means you won't need to water heavily to settle seeds, but keep the soil consistently moist until germination. I set a reminder to check moisture daily, especially in hot weather, because uneven watering can cause seeds to shift or dry out.
Watch for the first signs of sprouts—usually within 7-14 days depending on the plant. You'll notice tiny green tips pushing through the soil, and that's your cue to reduce watering slightly. At this stage, I avoid using the dibber near seedlings to prevent accidental damage to tender stems.
✂️ Step 4: Thin Seedlings for Optimal Growth
Once seedlings have 2-3 true leaves (not just the initial seed leaves), use your dibber to carefully mark the strongest plant in each hole. Gently pull the weaker seedlings by hand—this is where the dibber's precision pays off, as you already have perfect spacing. I do this on a cloudy day to reduce transplant shock, and I use the dibber's flat edge to gently firm soil around the remaining plants.
After thinning, give your plants a light watering to help them recover. The dibber's even spacing means you won't have to worry about overcrowding, and your flowers will develop strong stems and vibrant blooms. This step is crucial for preventing disease and ensuring each plant gets enough nutrients and sunlight.
🌿 Step 5: Use the Dibber for Ongoing Plant Care
Your seed dibber isn't just for planting—it's a versatile tool for the entire growing season. Use it to create holes for transplanting seedlings, making it easy to maintain your garden's layout. I also use the dibber to gently loosen soil around established plants without disturbing roots, which helps with water absorption and aeration.
For larger plants, the dibber can help create planting pockets for bulbs or root cuttings. Just press it into the soil to the desired depth, then fill with soil and plant material. This keeps your garden looking neat and organized while giving each plant the space it needs to thrive. Keep your dibber clean and store it in a dry place to ensure it lasts for many seasons of precision planting.
Tips & tricks for perfect seed dibber plantings
These little tricks will turn your seed dibber from a basic tool into your gardening game-changer!
Soil Prep Secret: Before pressing the dibber into soil, run your fingers through it to check moisture. Dry soil will cause seeds to sink too deep—aim for dampness like a wrung-out sponge. I also like to sprinkle a thin layer of compost over the planting area first; this gives seeds a nutrient boost right from the start and prevents soil compaction around the dibber's holes.
Dibber Angle Matters: When pressing the dibber into hard or rocky soil, angle it slightly forward (about 15 degrees). This creates a cleaner hole with less resistance, especially helpful when planting in clay-heavy or compacted soil. I learned this the hard way after struggling with stubborn ground—now my dibber glides right in! The forward angle also helps extract the tool without dragging soil back into the hole.
Seed Mixing Hack: For tiny seeds like marigolds or snapdragons, pre-mix them with fine sand in a 1:3 ratio (seeds to sand). This creates a "seed cocktail" that's easy to scoop and distribute evenly. I use a small paper cup for mixing—just shake it gently over the dibber holes. The sand helps seeds stay separated and prevents clumping when planting. This trick saves time and ensures you don't accidentally plant seeds too close together.
Thinning Timing: When thinning seedlings in Step 4, wait until they have 2-3 true leaves (not just the initial seed leaves) and do it on an overcast day. The dibber's flat edge works perfectly for gently firming soil around remaining plants after thinning. I always water lightly before thinning—this makes pulling weaker seedlings easier and reduces transplant shock for the plants you're keeping. The dibber's precision means you won't have to guess about spacing during this critical step.
Pro Tips for Seed Dibber Tool
- These little tricks will turn your seed dibber from a basic tool into your gardening game-changer!
- Soil Prep Secret: Before pressing the dibber into soil, run your fingers through it to check moisture. Dry soil will ...
- Dibber Angle Matters: When pressing the dibber into hard or rocky soil, angle it slightly forward (about 15 degrees)....
Frequently asked questions
Got questions about using a seed dibber tool? You’re not alone! Whether you're a gardening newbie or a seasoned pro, these FAQs will help you master precision planting like a pro.
What exactly does a seed dibber do?
A seed dibber is a simple tool with a pointed tip that creates evenly spaced holes in soil for seeds. It ensures proper spacing, reduces overcrowding, and helps seeds germinate more efficiently. Think of it as a gardener’s ruler for seeds!
When is the best time to use a seed dibber?
The best time to use a seed dibber is during the planting season—spring or fall, depending on your climate and seed type. For annuals and vegetables, aim for early spring after the last frost. For perennials, follow their specific planting guidelines. Always check soil temperature for optimal results!
Can I make a seed dibber at home if I don’t have one?
DIY options include using a pencil, a skewer, or even a wooden dowel with a pointed end. For a reusable tool, hammer a nail into a wooden handle or repurpose an old broomstick. Just ensure the tip is sharp enough to pierce the soil without tearing it.
How deep should I plant seeds with a dibber?
Depth depends on the seed size! A general rule is to plant seeds 2-3 times their diameter deep. Tiny seeds (like lettuce or petunias) need just a light cover, while larger seeds (like beans or marigolds) can go deeper. Always check the seed packet for specific instructions—it’s your best guide!
What should I do if my dibber keeps clogging or bending?
Clogging or bending usually happens with damp or hard soil. To fix it, sharpen the tip regularly with a file or sandpaper. For stubborn soil, dip the tip in water to soften it before use. If bending occurs, reinforce the handle with duct tape or replace it with a sturdier material like metal or thick wood.
Can I use a seed dibber for transplanting seedlings?
While a dibber works best for seeds, you can use it to create holes for small seedlings too! Just make sure the hole is wide enough to accommodate the root ball without damaging it. For larger seedlings, a trowel might be more practical, but a dibber can still help with precision placement.
Wrapping up and next steps
Mastering the use of a seed dibber tool transforms your gardening game—turning chaotic planting into stunning, evenly spaced blooms with minimal effort! Whether you're a beginner or a seasoned green thumb, this simple tool helps you achieve professional results in your lawn or garden beds. 🌱
Ready to elevate your planting? Grab your dibber, mark your grid, and start sowing with confidence. Your future garden will thank you! Next, explore seed spacing guides or dive into post-planting care to keep those seeds thriving.