
Lawn
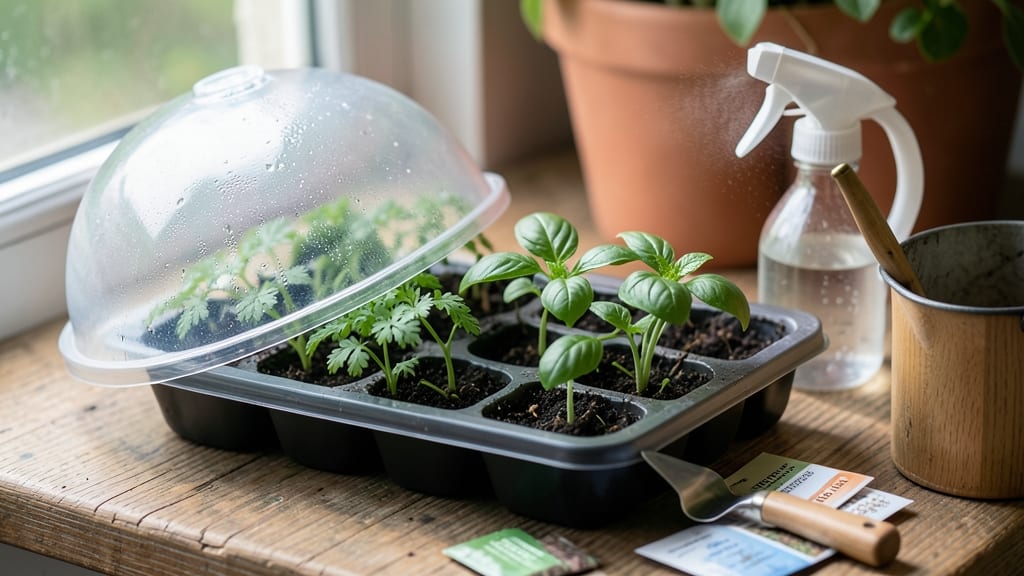
A seed starter tray with lid creates the perfect humidity dome for seeds to sprout faster and stronger—no more waiting weeks for stubborn seedlings to emerge. 🌱 I learned the hard way that skipping this step means weak starts and uneven germination, but once I mastered the tray method, my success rate jumped from 50% to nearly 100%.
The lid isn’t just a cover; it’s a greenhouse in a box that keeps moisture and warmth locked in exactly where seeds need it most.
The beauty of this system is how simple it is: fill the tray with moist seed-starting mix, scatter seeds evenly, then pop on the lid to trap warmth and humidity.
Most seeds germinate in half the time compared to open trays, and the plastic lid prevents mold while shielding tiny sprouts from pests. I’ve used the same trays for five seasons now—just a quick rinse between batches keeps them ready for next year’s planting.
By the time you’re ready to transplant, you’ll have sturdy seedlings with strong roots and vibrant leaves, ready to handle outdoor conditions. The lid method also means fewer lost seeds to damping-off disease, which was my biggest frustration before.
You’ll see the difference in just a few weeks—healthier starts mean a stronger garden from day one.
Works for almost any seed type, from tiny lettuce to robust tomatoes, and adapts to windowsills or under grow lights. Whether you’re a first-time gardener or a seasoned pro, this tray method cuts the guesswork out of seed starting. Let’s get those seeds sprouting!
📚 In This Guide
- What you need
- Instructions
- Tips and common mistakes
- Wrapping up and next steps
What you need
- ● Seed starter tray with lid (1 unit) – Choose a clear plastic or reusable tray (6-12 cell size recommended for most seeds).
- ● Seed-starting mix (1 bag, 1-2 cubic feet) – Lightweight, sterile, and well-draining (avoid garden soil).
- ● Seeds – Quantities vary by plant (check seed packets for spacing guidelines).
- ● Spray bottle (1) – For gentle watering (avoid over-saturating!).
- ○ Tray or saucer (1) – To catch excess water (optional but helpful).
- ● Grow lights or sunny windowsill – Seeds need 12-16 hours of light daily.
- ● Humidity dome cover (if not included) – A plastic wrap or DIY lid works in a pinch.
- ● Plant labels & markers – Track varieties and planting dates.
- ● Heating mat (for slow-germinating seeds) – Keeps soil warm (70-85°F ideal).
Step-by-step instructions for using seed starter trays with lid
Here's the foolproof method I use to get every seedling off to a strong start.
🌱 Step 1: Prepare the Tray and Soil
Fill your seed starter tray with lid to the top using your seed-starting mix. I press it down gently with my fingers until the surface is firm but not compacted—think of it like packing snow for a snowball, just enough to hold shape. The reason we don't use garden soil is that it's too heavy and can harbor diseases that will kill your delicate seedlings.
Moisten the soil evenly with a spray bottle until it feels like a wrung-out sponge—damp but not dripping. You'll know it's right when the surface looks dark and slightly shiny, not dry or puddled. Tap the tray gently on the table to settle everything. This ensures good contact between soil and seeds, which is crucial for even germination.
🌱 Step 2: Plant Seeds at the Correct Depth
Sprinkle seeds evenly across the tray surface, following the spacing guidelines on your seed packet. For most small seeds, I tap them gently with my finger to get them into the right positions. Press each seed lightly into the soil to about twice its diameter deep—this prevents them from washing away when you water. If you're planting larger seeds like beans, make small holes with your finger first.
I like to use the back of a spoon to cover seeds lightly after planting. This gives them just enough soil protection without burying them too deep. The lid will create the perfect humidity environment, so don't worry about pressing too hard—just make sure seeds aren't exposed.
💧 Step 3: Seal and Maintain Humidity
Place the lid securely on the tray to create a humidity dome. This is where the magic happens—your seeds now have consistent moisture and warmth, just like they would in nature. I set the tray on a heat mat (if using) to keep soil temperatures at 70-75°F, which speeds up germination dramatically. Without the lid, seeds can dry out or get too cold, which slows or stops germination completely.
Check the tray daily but resist opening it unless necessary. You'll see condensation on the lid—this is normal and shows you've got the right humidity level. If the soil looks dry when you check, mist the inside of the lid with water to maintain moisture without disturbing the seeds. Most seeds will germinate in 5-14 days, depending on the type.
☀️ Step 4: Ventilate and Move to Light
As soon as you see the first sprouts, remove the lid immediately. This prevents damping-off disease, which thrives in humid conditions and can kill seedlings overnight. I like to prop the lid slightly ajar for the first day to acclimate the seedlings gradually. After that, keep it off completely but within easy reach in case you need to cover them temporarily.
Move the tray to a bright location with 12-16 hours of light daily. A south-facing window works, but I use a grow light if natural light isn't strong enough. You'll know your seedlings need more light if they start growing tall and leggy, with large spaces between leaves. Keep the soil consistently moist but not soggy—water from the bottom by placing the tray in an inch of water for 10 minutes, then drain.
⏰ Step 5: Thin and Prepare for Transplanting
When seedlings have their first true leaves (not the initial seed leaves), thin them to one per cell using scissors. Cut at soil level rather than pulling, which can damage neighboring roots. I use the thinned seedlings to propagate new plants or share with friends—nothing goes to waste in my garden!
Two weeks before your last frost date, start hardening off your seedlings. Place them outside in a sheltered spot for 1-2 hours the first day, gradually increasing exposure. This toughens their stems and leaves so they can handle outdoor conditions. By the time they're ready to transplant, they'll be sturdy and ready to grow strong in their permanent home.
Tips & tricks for perfect seed starter trays with lid
Took me years of trial-and-error to perfect these tricks—here's how to get every seedling to sprout like a pro.
Soil Prep Secret: After filling your tray with seed-starting mix, press it down firmly but not too hard—think of it like packing snow for a snowball. This creates just the right balance: firm enough to hold seeds in place during watering, but loose enough for roots to penetrate easily. I like to tap the tray gently on the table after pressing to settle everything without compacting it further. This step makes all the difference for even germination.
Planting Depth Hack: For most small seeds, pressing them to about twice their diameter deep works perfectly—but here's the thing: if you're planting larger seeds like beans, make small holes with your finger first. This prevents you from pressing seeds too deep accidentally. I've learned this the hard way after watching seeds fail to sprout because they were buried too deep. The back of a spoon works great for covering seeds lightly after planting too.
Temperature Matters: The 70-75°F soil temperature range is critical for fast germination. If your home stays cooler than this, especially at night, consider using a heat mat underneath your tray. I've found that seeds like tomatoes and peppers especially benefit from this extra warmth. Just make sure the heat mat doesn't get too hot—you should be able to comfortably touch it without burning yourself. This small investment can cut your germination time in half!
Lighting Strategy: That 12-16 hours of daily light requirement might seem tricky if you don't have a south-facing window. I've had great success with simple LED grow lights placed just 6-12 inches above the seedlings. The key is to keep them on a timer—most grow lights come with built-in timers that make this effortless. Watch for leggy seedlings as a sign they need more light, and adjust accordingly. You'll know you've got it right when your seedlings grow sturdy and compact rather than stretching toward the light.
Pro Tips for Seed Starter Tray With Lid
- Took me years of trial-and-error to perfect these tricks—here's how to get every seedling to sprout like a pro.
- Soil Prep Secret: After filling your tray with seed-starting mix, press it down firmly but not too hard—think of it l...
- Planting Depth Hack: For most small seeds, pressing them to about twice their diameter deep works perfectly—but here'...
Frequently asked questions
Got questions about seed starter trays with lids? You’re not alone!
Whether you're a first-time gardener or a seasoned pro, these FAQs will help you get the most out of your humidity-dome setup. Let’s dive in!
What’s the best soil-to-seed ratio for a seed starter tray with lid?
Fill your tray about ¾ full with a lightweight, seed-starting mix (avoid garden soil—it’s too dense). Press it down gently, then scatter seeds evenly on top. Cover with a thin layer (¼ inch) of soil or vermiculite, but never bury seeds deeper than their size—most need light to germinate!
How long should I keep the lid on after planting?
Leave the lid on until seeds sprout (usually 5–14 days, depending on the plant). Once you see tiny green shoots, remove the lid for 10–15 minutes daily to harden them off. After a week, you can take it off completely to prevent mold or fungal growth.
Can I reuse a seed starter tray with lid?
Clean it thoroughly with hot, soapy water after use to remove residue. Disinfect with a 10% bleach solution (1 part bleach to 9 parts water) if you notice mold or bacteria. Rinse well and let it dry completely before storing for next season. Pro tip: Label trays to track reuse cycles!
What if my seeds aren’t germinating under the lid?
Check these first: Soil moisture (keep it damp, not soggy), temperature (most seeds need 65–75°F), and light (place near a sunny window or under grow lights). If seeds still won’t sprout, they may be old—try fresh ones! Avoid overcrowding, too.
Are there alternatives to a seed starter tray with lid?
Yes! Try plastic clamshell containers, yogurt cups with lids, or clear plastic domes over flat trays. Even a ziplock bag with holes poked in it works in a pinch. Just ensure good airflow once seeds sprout to avoid damping-off disease.
Wrapping up and next steps
Growing your own plants has never been easier—or more reliable—thanks to a seed starter tray with lid! These handy tools create the perfect humidity dome to boost germination rates, ensuring your seedlings get the best possible start.
Whether you're a seasoned gardener or just beginning, this simple setup can transform your gardening success.
Ready to take the next step? Grab your tray, fill it with soil, and plant those seeds! With a little patience and care, you’ll soon be watching tiny sprouts turn into thriving plants—all thanks to your new germination ally. 🌱✨