
Propagation
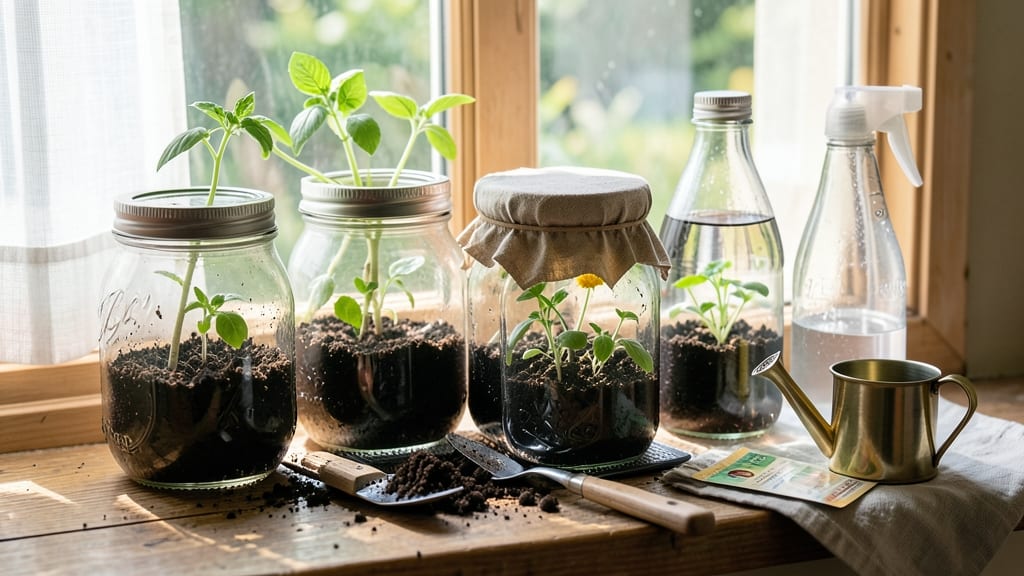
Your kitchen cabinets hold the perfect seed-starting solution—old jars can transform into a zero-waste greenhouse that outsmarts expensive seedling setups. 🌱 I’ve used everything from pasta sauce jars to jam containers, and the results speak for themselves: sturdy, self-contained growing chambers that keep humidity just right while preventing the dreaded "damping off" that kills seedlings.
The secret lies in the jar’s shape—wide mouths let you plant multiple seeds at once, while the glass walls create a mini greenhouse effect that speeds up germination. You’ll need just a few household items: jars (any size), a sharp knife or scissors, and a spray bottle for gentle watering.
No fancy equipment, no wasted space—just repurposed glass and a little patience.
By week three, you’ll watch those first true leaves unfurl, protected from drafts and overwatering. The jars make it easy to monitor soil moisture (just lift and peek) and provide natural light from any sunny windowsill. Plus, transplanting becomes a breeze—just slide the seedling out with its intact root ball.
This method works for everything from tiny herbs to towering tomatoes, and it’s especially great for beginners who’ve lost seedlings to mold or leggy growth. The key is keeping the jar lids slightly ajar for airflow—just enough to prevent condensation buildup while maintaining that greenhouse warmth.
Ready to turn trash into thriving seedlings?
📚 In This Guide
- What you need
- Instructions
- Tips and common mistakes
- Wrapping up and next steps
What you need
- ● Old jars: 4–12 clean, reusable jars (e.g., pasta sauce, jam, or spaghetti sauce jars). Size matters! Choose jars with wide mouths (3–4 inches) for easy seedling access.
- ● Seeds: Your favorite flower, herb, or vegetable seeds. Check seed packets for planting depth and spacing tips.
- ● Potting mix: A lightweight, sterile seed-starting mix (avoid garden soil—it’s too dense!). A 5–10 quart bag should suffice for 4–6 jars.
- ● Scissors or knife: For cutting drainage holes in jar lids (if not pre-drilled).
- ● Spray bottle: With water to keep the mix moist without over-saturating it.
- ○ Optional but helpful: Plastic wrap or clear plastic bags to create a mini greenhouse effect.
- ● A permanent marker to label jars (e.g., seed type + date planted).
- ● Tweezers for delicate seeds or tiny seedlings.
- ● Grow lights or a sunny windowsill (south-facing is ideal!).
Step-by-step instructions for creating a zero-waste seed starting greenhouse
Here's how to repurpose old jars into a functional, eco-friendly greenhouse for your seedlings.
🪴 Step 1: Select and Prepare Your Jars
Choose clean, food-grade jars with lids—mason jars work perfectly. Remove any labels to avoid residue that could inhibit seedling growth. I like to sterilize them by boiling for 10 minutes to kill any lingering bacteria or fungi. This ensures a clean start for your seeds.
Let the jars cool completely before use. The reason for this is that hot glass can shock seeds and prevent proper germination. You'll see condensation form on the inside when you place them over your planted seeds—this is normal and actually helps maintain humidity.
🌱 Step 2: Plant Seeds in Your Growing Medium
Fill small containers or seed trays with a sterile seed-starting mix—never garden soil, as it's too dense and can harbor pathogens. I press the mix lightly into the container to create a firm but not compacted surface. This gives seedlings something to anchor into while allowing roots to spread easily.
Plant your seeds according to packet instructions, typically at a depth of twice the seed diameter. For example, tiny lettuce seeds go in just ¼ inch deep, while larger tomato seeds need ½ inch of coverage. Water gently with a spray bottle until the soil is evenly moist but not soggy.
💧 Step 3: Create the Jar Greenhouse
Place your planted container inside a shallow tray or saucer to catch any condensation that forms. Invert the jar lid and position it over the container, creating a mini greenhouse. The lid should be close enough to trap humidity but not touching the seedlings—about 1 inch above is ideal.
Set up your jars in a warm location with indirect light. A south-facing windowsill works well, but avoid direct sun, which can overheat the enclosed space. You'll notice condensation form on the inside of the jar—this is perfect for maintaining high humidity levels that seedlings need to thrive.
☀️ Step 4: Monitor and Maintain Conditions
Check your seedlings daily for signs of condensation buildup. If the inside of the jar fogs up completely, it's time to remove the lid for 10-15 minutes to allow fresh air circulation. This prevents fungal diseases like damping-off, which can kill seedlings overnight.
Keep the soil consistently moist by watering gently from the bottom of the tray. You'll know it's time to water when the top inch of soil feels dry to the touch. Avoid overwatering—seedlings in enclosed spaces are especially vulnerable to root rot.
⏰ Step 5: Gradually Acclimate Seedlings
Once seedlings develop their first true leaves (not the initial seed leaves), start the acclimation process. Remove the jar lid for progressively longer periods each day. Begin with 30 minutes and gradually increase to full exposure over 7-10 days.
This process, called hardening off, prepares seedlings for life outside the greenhouse. You'll see them develop stronger stems and darker green leaves as they adapt. After a week of full exposure, your seedlings are ready to transplant into larger containers or the garden.
Tips & tricks for perfect seedling greenhouse setups
Transforming old jars into seedling greenhouses is one of those brilliant ideas that makes gardening accessible—and here's what I've learned to make it work flawlessly.
Sterilization Secret: The 10-minute boil for sterilizing jars isn't just about cleanliness—it's about creating the perfect sterile environment where seeds can germinate without competition from mold or bacteria. I like to use a colander to hold the jars in the boiling water for even heat distribution. After boiling, let them air-dry completely before use; any moisture left on the glass can create condensation that's too intense for delicate seedlings.
Lighting Strategy: While indirect light is ideal, I've found that placing your jar greenhouses on a windowsill with sheer curtains actually works better than direct sun. The curtains diffuse the light while still providing the warmth seedlings need. If you don't have a sunny window, a simple LED grow light on a timer (12-16 hours per day) will work wonders—just keep it about 6 inches above the seedlings to avoid overheating.
Condensation Control: That 10-15 minute ventilation window is crucial—it's when you're preventing damping-off disease by allowing fresh air circulation while still maintaining humidity. I set a timer on my phone to remind me when it's time to lift the lid. You'll know you've waited too long when you see black mold starting at the soil line; this is your signal to ventilate immediately.
Acclimation Timeline: The 30-minute to 7-10 day hardening-off process might seem long, but it's worth it. I like to create a schedule: Day 1: 30 minutes, Day 2: 1 hour, Day 3: 2 hours, and so on. This gradual approach mimics natural conditions and gives seedlings time to adjust their internal structures to handle outdoor conditions without shock.
Pro Tips for Seed Starting Old Jars
- Transforming old jars into seedling greenhouses is one of those brilliant ideas that makes gardening accessible—and h...
- Sterilization Secret: The 10-minute boil for sterilizing jars isn't just about cleanliness—it's about creating the pe...
- Lighting Strategy: While indirect light is ideal, I've found that placing your jar greenhouses on a windowsill with s...
Frequently asked questions
about repurposing old jars for seed starting—because every gardener deserves a little clarity!Can I use any type of jar for seed starting?
Most clean, glass jars with lids work—think pasta sauce jars, jam jars, or even baby food jars! Avoid plastic or jars with cracks, as they won’t regulate humidity or temperature well. Pro tip: Check for a snug lid to maintain moisture and prevent mold.
How long do seedlings need to stay in jars before transplanting?
Seedlings typically stay in jars for 4–6 weeks, until they develop 2–3 true leaves. Overcrowding can stunt growth, so monitor root development—if roots circle the jar, it’s time to transplant! Warning: Avoid letting them stay too long, or they’ll struggle when moved to soil.
What’s the best way to reuse jars after seed starting?
After use, sterilize jars with boiling water or vinegar to kill bacteria. Store them in a dry place for future seed starting or repurpose them for compost tea, homemade candles, or even DIY terrariums! Zero-waste win!
Why are my seedlings wilting or turning yellow?
Wilting often means overwatering (jars trap excess moisture), while yellowing can signal underwatering or poor drainage. Ensure lids are slightly ajar for airflow and place jars in a warm, sunny spot. Troubleshoot: If mold appears, increase ventilation immediately!
Are there alternatives if I don’t have jars?
Use plastic clamshells, toilet paper rolls, or even egg cartons for smaller seeds. For a greenhouse effect, cover with plastic wrap and poke tiny holes for airflow. Bonus: Yogurt cups with lids also work—just punch drainage holes!
Wrapping up and next steps
Starting seeds in old jars isn’t just a clever way to repurpose—it’s a sustainable, budget-friendly, and effective method to give your seedlings the perfect head start! With minimal effort and zero waste, you’ve got a DIY greenhouse that’s gentle on the planet and your wallet. 🌱✨
Ready to level up your gardening game? Once you’ve mastered the jar technique, try experimenting with different jar sizes, soil mixes, or even adding labels for organization. Happy growing!