
Lawn
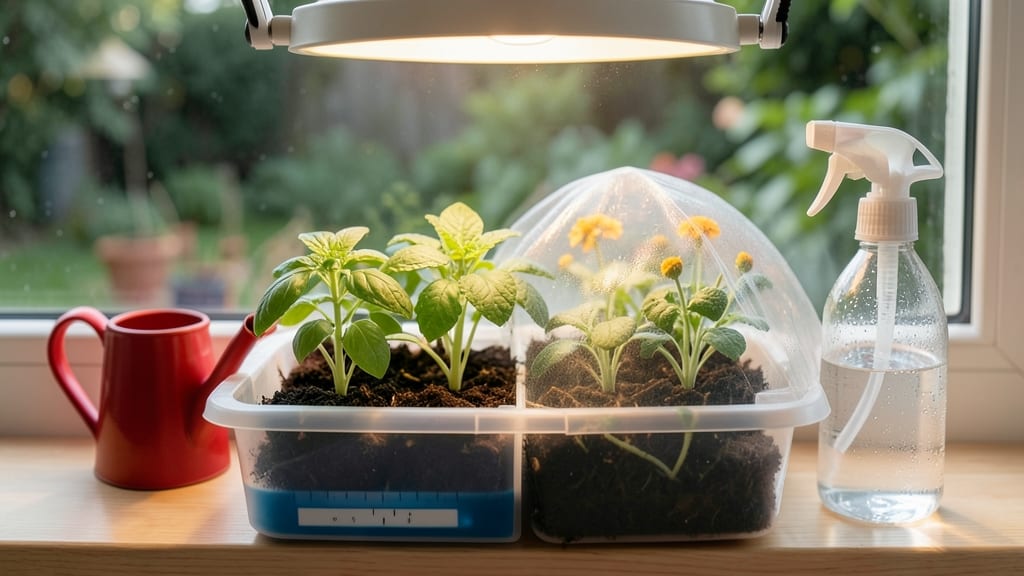
A self-watering seed starter turns finicky germination into a set-it-and-forget-it success. 🌱 Honestly, I've drowned more seedlings than I'd like to admit, but this system changes everything—consistent moisture without the guesswork or soggy trays.
The magic happens through a simple reservoir system that keeps soil evenly damp. You'll need a starter tray with a water reservoir, seed-starting mix, and your favorite seeds—no fancy tools required. Even my black thumb can't kill these with the right setup.
You'll see sprouts emerge in 7-14 days (depending on the seed) with zero fuss. The roots stay healthy, the soil stays just moist enough, and you avoid the heartbreak of moldy trays or dried-out seeds.
Perfect for beginners, busy gardeners, or anyone tired of seedling casualties. Once you try it, you'll never go back to the old way—here's how to get started right.
📚 In This Guide
- What you need
- Instructions
- Tips and common mistakes
- Wrapping up and next steps
What you need
- ● Clear plastic bottle (16–20 oz): Choose a clean, empty bottle (e.g., soda or water bottle) with a cap.
- ● Scissors or utility knife: For precise cutting—safety first!
- ● Potting soil (seed-starting mix): 1 small bag (1–2 quarts) of lightweight, sterile soil.
- ● Seeds: Your favorite flowers, veggies, or herbs—start with 3–5 seeds per bottle.
- ● Water: Room-temperature, filtered water if possible.
- ○ Optional but helpful: Label markers: To track seed types (especially useful if testing multiple varieties!).
- ● Ruler or measuring tape: For marking cut lines (1–2 inches from the bottle’s base).
- ● Hole punch or nail: To create drainage holes (if your bottle lacks them).
- ○ Spray bottle (optional): For gentle watering during the germination phase.
- ○ Tray or saucer (optional): To catch excess water and maintain humidity.
Step-by-Step instructions for building a DIY self-watering seed starter
Here’s my go-to method for creating a self-watering seed starter that keeps moisture consistent and eliminates guesswork.
🪴 Step 1: Gather Materials and Prepare the Base
You’ll need a clear plastic container with a lid (like a takeout box), a piece of landscape fabric, and a small plastic cup for the water reservoir. Cut the landscape fabric to fit snugly over the reservoir cup, securing it with a rubber band. This creates a wicking barrier that delivers moisture slowly to the soil above.
Place the cup in one corner of the container, leaving enough space for your seed trays. The reservoir should hold 1-2 cups of water—enough to keep the soil damp for 1-2 weeks without drowning roots. I like to use a shallow tray so I can nestle seed-starting cells right on top of the fabric.
🌱 Step 2: Layer the Wicking System
Fill the container with 2-3 inches of moistened seed-starting mix, leaving space for your seed trays. Press the mix lightly so it’s firm but not compacted. The goal is to create a 1-inch gap between the soil surface and the bottom of your seed trays—this ensures the fabric can wick moisture upward without soggy contact.
Lay the fabric-covered reservoir cup in place, then gently press the edges of the fabric into the soil. The fabric should sit just below the seed trays, allowing capillary action to pull water up as needed. If the fabric sags, add a small rock to weigh it down—this keeps tension even for consistent wicking.
💧 Step 3: Assemble and Test the System
Place your seed trays on top of the fabric, ensuring they sit flat and don’t press down too hard. Fill the reservoir cup with 1 cup of water and wait 30 minutes—you should see the soil in the trays darken slightly as moisture wicks upward. If it doesn’t, adjust the fabric’s position or add a pinch more water to kickstart the process.
Cover the container with its lid (or a clear plastic wrap) to retain humidity. Check the reservoir every 2-3 days—top off with water only when the cup is empty. This method prevents overwatering while keeping roots hydrated, even if you forget to check for a few days.
☀️ Step 4: Sow Seeds and Monitor Growth
Plant seeds directly into the trays as you normally would, following packet depth guidelines. Most seeds germinate best when kept in 70-75°F soil, so place the container on a seedling heat mat if your space runs cooler. Once sprouts appear, remove the lid to prevent fungal growth while still maintaining humidity.
Watch for first true leaves—this is your cue to move the trays under grow lights or bright indirect light. Self-watering systems work best when paired with consistent light; leggy seedlings signal either insufficient light or uneven moisture. Adjust the reservoir water level as needed—you’ll know it’s right when the soil stays evenly moist but not soggy.
⏰ Step 5: Transition to Independent Watering
After 4-6 weeks, when seedlings have 3-4 true leaves, start reducing reservoir water. Gradually shift to hand-watering at the base to toughen roots before transplanting. The self-watering system should last through germination, but once seedlings mature, they’ll need direct soil contact for stronger root development.
Clean and reuse the container for future batches—just rinse the fabric and reservoir cup between uses. This setup cuts watering time by 80%+ while giving you the confidence of perfect moisture control. No more dried-out seeds or drowned seedlings!
Tips & tricks for perfect self-watering seed starters
Here's what nobody tells you about getting this system right the first time—trust me, these little details make all the difference.
Fabric Placement Matters: In Step 2, when you're pressing the fabric edges into the soil, make sure they sit just below the seed trays—not touching the bottom. The 1-inch gap is critical for proper wicking. I've seen beginners press the fabric too high, which blocks moisture flow entirely. Think of it like a tiny dam—water should rise through capillary action, not get trapped.
Test Before You Commit: That 30-minute wait in Step 3 is your chance to catch problems early. If the soil doesn't darken after 30 minutes, don't just add more water—check fabric tension first. Sometimes the rubber band is too tight, preventing proper wicking. Loosen it slightly if needed, but not so much that the fabric sags again.
Light Requirements Aren't Optional: The instructions mention grow lights, but here's the thing: natural bright indirect light works too, but only if it's truly bright. South-facing windows can work, but north-facing ones won't. If your seedlings look leggy (those stretched-out stems), it's almost always a light issue before it's a water issue. Move them closer to the light source if possible.
Reuse Strategy: When cleaning between batches, don't just rinse the fabric—give it a quick soak in a 1:10 bleach-water solution for 5 minutes, then rinse thoroughly. This prevents mold buildup that can transfer to your next batch of seeds. I reuse my containers for years this way, and they stay mold-free.
Pro Tips for Self Watering Seed Starter
- Here's what nobody tells you about getting this system right the first time—trust me, these little details make all t...
- Fabric Placement Matters: In Step 2, when you're pressing the fabric edges into the soil, make sure they sit just bel...
- Test Before You Commit: That 30-minute wait in Step 3 is your chance to catch problems early. If the soil doesn't dar...
Frequently asked questions
Got questions about self-watering seed starters? You’re not alone—here are the answers to common concerns to help you grow with confidence!
How often should I water a self-watering seed starter?
A self-watering seed starter is designed to reduce manual watering, but consistency is key. Fill the reservoir every 3–5 days (or when soil feels dry). Overfilling can drown seeds, while underfilling may dry them out. Check moisture daily for the first week—seedlings are delicate!
How long does it take for seeds to germinate in one of these?
Germination time varies by seed type, but self-watering starters create ideal moisture and warmth, often speeding up the process. Fast germinators (like radishes or lettuce) may sprout in 3–7 days, while slower ones (tomatoes, peppers) take 7–21 days. Keep them in a warm, bright spot (not direct sun) until sprouts appear!
What if my seeds aren’t germinating—is the starter broken?
Not necessarily! First, check seed viability (test with a damp paper towel). Ensure the reservoir is filled correctly and the wick isn’t clogged. Seeds need warmth (70–85°F) and light—move to a sunny windowsill or use a heat mat. If all else fails, try fresh seeds or a different starter.
Can I reuse a self-watering seed starter?
Clean it thoroughly after use: disinfect with a 1:10 bleach-water mix, rinse well, and let dry. Reuse for fast-growing crops (like herbs or greens) or annual transplants. For long-term reuse, swap out the wick or soil to prevent mold. Pro tip: Label your starter to track what’s been planted!
What’s a good alternative if I don’t have a self-watering starter?
No starter? No problem! Try these low-fuss alternatives:
- Misting bottle + clear lid: Keep soil moist with a spray bottle and cover with plastic wrap until sprouts emerge.
- Paper towels: Place seeds between damp towels in a sealed bag for quick germination (great for peppers/tomatoes).
- Peat pots: Fill with soil and water from the bottom to mimic self-watering.
Wrapping up and next steps
Ready to watch your seeds sprout with zero stress? A self-watering seed starter is your secret weapon for effortless germination—whether you're a green thumb or just starting out. 🌱 With the right setup, you’ll enjoy consistent moisture, faster growth, and healthier seedlings without the daily watering hassle.
Now that you’re armed with tips and answers, grab your supplies and start planting! Try one tray this season and see the difference—your future garden will thank you. Happy growing! 🌿