
Propagation
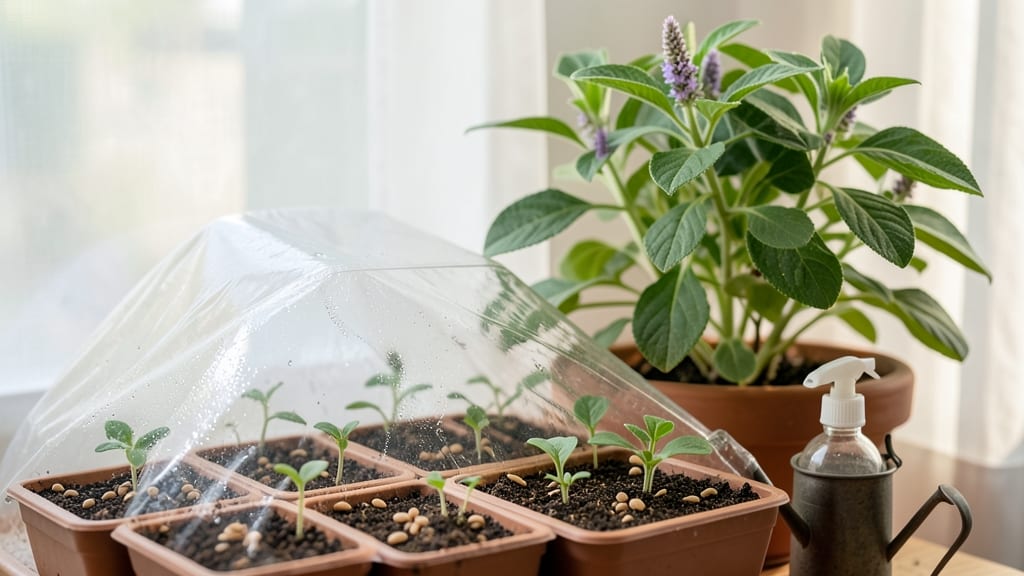
Stevia seeds need a cold trick before they’ll even think about sprouting. 🌱 I’ve battled with stubborn stevia seeds for years—until I discovered that a simple 6-8 week cold stratification period turns their finicky nature into reliable germination. Without it? Forget it. With it?
Tiny green sprouts appear in just 2-4 weeks after warming. The secret isn’t complicated: dampen your seeds, chill them in the fridge, then give them warmth and light. Most gardeners overlook this step, which is why so many struggle.
You’ll need a plastic bag, a damp paper towel, and patience—but the payoff is worth it. Those first sprouts feel like magic after weeks of waiting. Once they break through, you’ll have delicate seedlings that need gentle care.
Keep them under grow lights or in a sunny window, and avoid overwatering—they’re sensitive. By month 3, you’ll be pinching back new growth to encourage bushier plants, and by summer, you’ll have your own stevia harvest. This method works for both beginners and experienced growers.
The key is consistency—don’t rush the cold period, and don’t let the soil dry out once they’re warm. Trust the process, and you’ll have thriving stevia plants that sweetly reward your patience.
📚 In This Guide
- What you need
- Instructions
- Tips and common mistakes
- Wrapping up and next steps
What you need
- ● Stevia seeds: High-quality, fresh seeds (preferably organic or heirloom varieties like Stevia rebaudiana). Aim for 10–20 seeds per batch for experimentation.
- ● Seed-starting mix: A lightweight, sterile blend (e.g., 50% peat moss + 50% perlite or vermiculite). Avoid garden soil—it’s too dense!
- ● Small pots or trays: 2–3 inch (5–7.5 cm) pots or a seed tray with drainage holes. Plastic or biodegradable options work best.
- ● Clear plastic domes or wrap: To create a humidity tent (e.g., a humidity lid or plastic wrap).
- ● Spray bottle: With water (preferably room-temperature, distilled, or rainwater) for gentle misting.
- ● Cold stratification setup: Refrigerator: A standard fridge set to 35–40°F (2–4°C).
- ● Sealed container: A ziplock bag or airtight container with a damp paper towel (to maintain moisture).
- ● Grow lights or sunny windowsill: A full-spectrum LED grow light (12–16 hours/day) or a south-facing window for warmth.
- ● Thermometer/hygrometer: To monitor temperature (60–75°F / 15–24°C) and humidity (70–80%) post-stratification.
- ○ Fertilizer (optional): A diluted seaweed extract or fish emulsion (1/4 strength) for seedlings after sprouting.
- ○ Heat mat (optional): For faster germination if your space is chilly (e.g., 70–75°F / 21–24°C).
- ● Labeling tags: To track seed varieties and planting dates!
Step-by-step instructions for germinating stevia seeds
Here's how I break down cold stratification—it's the secret to getting those stubborn stevia seeds to sprout reliably.
🌱 Step 1: Prepare Seeds for Cold Treatment
Stevia seeds need cold stratification to break dormancy, but don't rush it. First, mix the seeds with damp sand or peat moss in a ratio of 1 part seeds to 3 parts medium. I like to use a small plastic bag or container—just enough to hold everything without crushing the seeds.
Seal the container loosely (a twist tie or rubber band works) to keep moisture in but allow airflow. Place it in your refrigerator's crisp drawer (around 35-40°F) for 4-6 weeks. This mimics winter's natural chilling period. Check the mix weekly—it should stay evenly moist but not soggy. If it dries out, spritz with water and reseal.
⏰ Step 2: Stratify and Monitor for Readiness
After 4 weeks, open the container and check for any signs of sprouting. You won't see much yet, but the seeds will have softened enough for germination. If no progress appears, give it 2 more weeks—some batches need the extra time. Here's the thing: patience is key. Skipping stratification means seeds may never break through.
Once the 6-week mark hits, remove the seeds from cold storage and let them sit at room temperature (65-75°F) for 24 hours to acclimate. This prevents shock when you move them to the soil. I like to label the bag with the date—it's easy to forget when you're waiting for tiny seeds to do big things.
🌿 Step 3: Sow Stratified Seeds in Warmth
Fill small seed trays or pots with well-draining seed-starting mix (avoid garden soil—it's too dense). Plant the seeds ¼ inch deep, spacing them ½ inch apart to prevent overcrowding. Gently press the soil around them but don't pack it down. Stevia seeds are tiny, so I use a toothpick to handle them carefully.
Cover the tray with a clear plastic dome or plastic wrap to retain humidity. Place it in a warm spot (70-75°F)—a seedling heat mat helps if your home runs cooler. Keep the soil consistently moist (not wet) by misting lightly every 2-3 days. You'll see the first sprouts in 10-21 days, but some may take longer. Watch for tiny green shoots breaking the surface—that's your signal to remove the dome.
☀️ Step 4: Provide Light and Care for New Sprouts
The moment those first leaves appear, move the tray to bright, indirect light (a south-facing window or grow light). Stevia seedlings are sensitive to direct sun at this stage—it can scorch their delicate leaves. You'll know they're getting enough light when they grow upright and dark green, not leggy or pale.
Water from the bottom by placing the tray in ½ inch of water for 10 minutes, then drain excess. This prevents damping-off, a fungal disease that kills young seedlings overnight. Thin seedlings to 2 inches apart once they have 2-3 true leaves—this gives them room to grow without competing for nutrients.
✂️ Step 5: Harden Off and Transplant
After 4-6 weeks of growth (when seedlings are 3-4 inches tall), start hardening them off. Place them outside in partial shade for 1 hour the first day, gradually increasing time over 10-14 days. Stevia is tender—don't rush this step. You'll know they're ready when they handle full sun and breezes without wilting.
Transplant outdoors after the last frost, spacing plants 12-18 inches apart in well-draining soil. Mulch lightly to retain moisture and suppress weeds. Stevia thrives in full sun but tolerates partial shade in hot climates. With consistent care, you'll have sweet, homegrown stevia ready for harvest in 3-4 months.
Tips & tricks for perfect stevia seed germination
Cold stratification might feel like waiting for forever, but these little tricks will turn your patience into reliable sprouts.
Medium Selection: While sand or peat moss work well, I've found coconut coir (a sustainable alternative) holds moisture better without compacting. If using peat moss, make sure it's moist but not dripping—think of a wrung-out sponge. The goal is to keep seeds evenly hydrated throughout the 4-6 weeks in the refrigerator.
Container Choice: A small plastic bag with a twist tie works, but I've had better luck with a shallow container like a plastic takeout box. This allows easier monitoring of moisture levels and prevents seeds from getting buried too deep. Label your container with the date—trust me, you'll forget!
Temperature Consistency: The crisp drawer in your fridge should stay around 35-40°F, but if your fridge runs warmer, move the container to the main compartment where it's cooler. For extra insurance, place a thermometer in the container during the first week. Stevia seeds are picky about temperature consistency during this critical period.
Acclimation Hack: That 24-hour room temperature adjustment before planting is crucial. I like to place the container on a warm spot in my kitchen (like near the oven) to help speed up the process. This gradual temperature change prevents shock and gives seeds a smoother transition from cold to warm conditions.
Pro Tips for Stevia Seed Germination
- Cold stratification might feel like waiting for forever, but these little tricks will turn your patience into reliabl...
- Medium Selection: While sand or peat moss work well, I've found coconut coir (a sustainable alternative) holds moistu...
- Container Choice: A small plastic bag with a twist tie works, but I've had better luck with a shallow container like ...
Frequently asked questions
Got questions about germinating stevia seeds?
You’re not alone! Here are answers to the most common queries to help you succeed with your cold-stratified sprouts.
How long does stevia seed germination take?
Stevia seeds can take anywhere from 14 to 60 days to sprout, depending on factors like seed age, stratification method, and temperature. Patience is key—keep soil consistently moist (not soggy) and maintain warmth (around 70–75°F) after stratification. If no sprouts appear after 2 months, the seeds may need fresh stratification or could be non-viable.
Do I really need cold stratification for stevia seeds?
Yes! Stevia seeds have a hard seed coat that requires cold stratification (4–6 weeks in the fridge) to break dormancy. Skipping this step often results in 0% germination. For best results, mix seeds with damp peat moss or a paper towel, place them in a sealed bag, and refrigerate before planting. Pro tip: Some gardeners soak seeds in warm water for 24 hours first to soften the coat slightly.
What’s the best soil mix for germinating stevia seeds?
Use a light, well-draining mix like:
- 50% peat moss or coco coir (for moisture retention)
- 30% perlite or vermiculite (for aeration)
- 20% sand or compost (for nutrients)
My stevia seeds sprouted, but the seedlings look weak. What’s wrong?
Weak seedlings often suffer from overcrowding, poor light, or inconsistent moisture. Here’s how to fix it:
- Thin seedlings to 2–3 inches apart once they have 2–3 true leaves.
- Move them to a sunny windowsill or grow light (stevia needs 6+ hours of light/day).
- Water at the soil level (not overhead) to avoid fungal issues.
- Keep temps between 65–80°F—avoid drafts or heaters.
Can I use stevia leaf cuttings instead of seeds for faster growth?
Stevia propagates much faster from cuttings than seeds. Take 3–4 inch stem cuttings from healthy plants, remove lower leaves, and dip in rooting hormone. Plant in moist perlite or sand, cover with a plastic bag to retain humidity, and place in bright, indirect light. Roots typically form in 2–4 weeks—this method yields stronger plants with 90%+ success!
Wrapping up and next steps
Mastering stevia seed germination through cold stratification unlocks a world of sweet success—literally! 🌱 With the right patience and techniques, you can transform tiny seeds into thriving plants that yield natural sweeteners.
Your next step? Experiment with these methods, keep a germination journal, and share your progress with fellow plant enthusiasts.
Pro tip: Once your stevia sprouts are strong, consider transplanting them into larger pots or your garden. Happy growing—your taste buds (and plants) will thank you! 🌿