
Trees
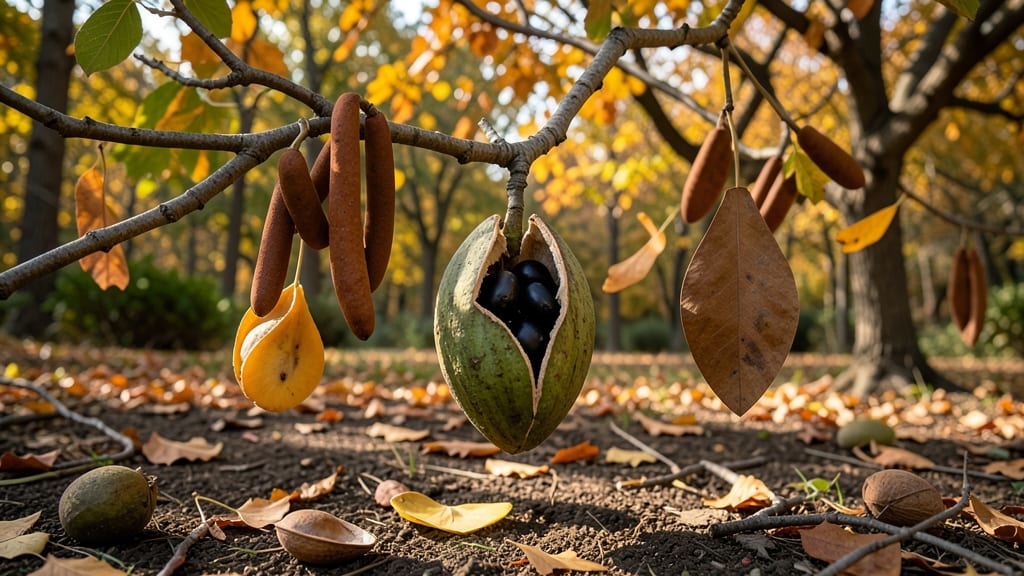
Collecting tree seed pods in autumn lets you grow native trees for free—just follow the right steps. 🌳 I’ve turned fallen acorns, maple samaras, and walnut husks into thriving saplings by mimicking nature’s germination tricks.
The key is knowing when to harvest, how to break dormancy, and where to store them until spring.
You’ll need basic supplies like paper bags for drying, a moist paper towel for stratification, and a warm spot to simulate winter. Some seeds, like oaks, need 60-90 days of cold moisture, while others, like maples, sprout faster.
The process feels like magic when those first green shoots appear—proof you’re growing a future tree.
By spring, you’ll have sturdy seedlings ready for transplanting, saving money and supporting local ecosystems. Even fruit trees like apples or cherries respond well to this method, though their seeds often need extra care.
The payoff? A backyard full of shade, wildlife habitat, and maybe even fruit in a few years.
Works for any climate—just adjust timing and storage conditions. Here’s how to turn those pods into trees without the guesswork. Let’s get growing!
📚 In This Guide
- What you need
- Instructions
- Tips and common mistakes
- Wrapping up and next steps
What you need
- ● Tree seed pods – Collect fresh, mature pods (e.g., maple "helicopters," sweet gum "spiky balls," or acorns). Aim for at least 50 pods for reliable germination.
- ● Paper towels or coffee filters – 2-3 sheets per batch of pods for moisture control during stratification.
- ● Ziploc bags or airtight containers – Quart-sized or larger (1-2 per seed type) to hold pods and moisture.
- ● Labeling materials – Masking tape + marker or small tags to label bags with pod type and date.
- ● Refrigerator or cold stratification setup – A consistent 34–40°F (1–4°C) space (like a fridge crisper drawer) for 6–12 weeks.
- ● Small shovel or trowel – For planting stratified seeds outdoors in spring.
- ● Sand or vermiculite – 1–2 cups mixed with pods for better airflow during stratification.
- ● Humidity tray – A shallow tray with water + pebbles to maintain moisture if using open containers.
- ● Planting journal – To track pod types, stratification dates, and germination progress.
- ● Gloves – If handling spiky pods (like sweet gum) to protect your hands!
Step-by-step instructions for collecting, stratifying, and storing tree seed pods
Here's how I prepare tree seeds for successful germination next season—no guesswork involved.
🌱 Step 1: Harvest Mature Seed Pods at the Right Time
Collect seed pods when they've fully matured but haven't yet split open. Most hardwood trees release seeds in late summer or early fall, so watch for pods that turn brown or papery. Gather them on a dry day when the pods are still firmly attached but ready to release seeds—this usually happens just before they crack open naturally.
I like to shake branches gently over a large cardboard box to catch falling pods. Avoid harvesting from diseased trees or areas with pest infestations. Store fresh pods in a paper bag in a cool, dry place until you're ready to process them. If the pods are still moist, spread them out to dry for a day or two before storing.
💧 Step 2: Extract Seeds and Clean Them Thoroughly
Open the dried pods carefully to remove seeds. Some pods, like those from maples or oaks, release seeds easily when crushed, while others, like hickory, may require gentle prying with your fingers. Place seeds in a bowl of water—viable seeds will sink, while empty or nonviable ones will float. Remove any debris or chaff that rises to the surface.
Spread the clean, sunken seeds on a paper towel to dry completely. This step prevents mold during stratification. I label each batch with the tree species and harvest date using a fine-tip marker directly on the towel. Store the dried seeds in an envelope or small paper bag until you're ready to stratify them.
⏰ Step 3: Stratify Seeds According to Species Needs
Most tree seeds require a cold period to break dormancy, a process called stratification. For most hardwoods, mix the seeds with a dampened peat moss or coconut coir (about 1 part seeds to 3 parts moist medium) in a sealed plastic bag. Place the bag in your refrigerator for 6-12 weeks, checking monthly to ensure the mix stays moist but not soggy.
Some seeds, like those from redbud or catalpa, need only 4-6 weeks of cold treatment, while others, like oaks, may require up to 6 months. I keep a small notebook to track each batch’s stratification timeline. After the cold period, remove the seeds from the fridge and let them sit at room temperature for 1-2 weeks before planting.
🪴 Step 4: Plant Stratified Seeds in Well-Draining Soil
Fill small pots or seed trays with a light, well-draining potting mix (avoid heavy garden soil). Plant seeds at a depth of ¼ to ½ inch, depending on their size. Press the soil gently around each seed to ensure good contact but don’t compact it too tightly. Water lightly to settle the soil without displacing the seeds.
Place the pots in a warm, bright location with indirect light—direct sunlight can dry out the soil too quickly. Keep the soil consistently moist but never waterlogged. Germination can take 2-12 weeks, depending on the species. I cover the pots with clear plastic wrap to retain humidity until the first sprouts appear, then remove the wrap to prevent fungal growth.
☀️ Step 5: Transplant Seedlings When Ready for Outdoors
Once seedlings develop 2-3 sets of true leaves and are at least 3-4 inches tall, they’re ready to move outdoors. Harden them off by placing them in a sheltered spot for 1-2 hours the first day, gradually increasing their time outside over 7-10 days. This helps them adjust to sunlight and temperature changes without shock.
Transplant seedlings into the garden or larger containers in spring, after the last frost date. Choose a location with the right light and soil conditions for the tree species. Water deeply after transplanting to help roots establish. I mark each seedling’s location with a small stake to avoid disturbing it during the growing season.
Tips & tricks for perfect tree seed pod preparation
These practical insights will help you maximize your seed germination success without the common pitfalls.
Timing Secret: Harvest pods when they're fully mature but still closed—this is your narrow window for success. I've learned the hard way that waiting too long means seeds scatter naturally, while harvesting too early results in poor germination. Look for pods that have turned brown or papery but haven't split open yet. This usually happens in late summer or early fall, depending on your climate.
Species-Specific Stratification: The 6-12 week cold treatment in Step 3 is crucial, but don't assume all seeds need the same duration. Redbud and catalpa seeds only require 4-6 weeks, while oak seeds may need up to 6 months. I keep a small notebook to track each species' stratification timeline—this prevents over-stratification which can reduce viability. After the cold period, the 1-2 week room temperature rest is equally important for breaking dormancy.
Storage Wisdom: For long-term storage, place dried seeds in envelopes and keep them in a cool, dry place with good air circulation. I've found that adding a silica gel packet to the storage container helps maintain proper moisture levels. Label each envelope with the species and harvest date—this prevents confusion when you're ready to plant next season. The key is maintaining consistent conditions until you're ready to stratify.
Transplanting Technique: When hardening off seedlings in Step 5, start with just 1-2 hours on the first day. Gradually increase their outdoor time over 7-10 days—this mimics natural conditions and prevents transplant shock. I've seen seedlings that were perfectly healthy indoors wilt dramatically when moved too quickly. The gradual exposure helps them develop the resilience needed for outdoor conditions.
Pro Tips for Tree Seed Pods
- These practical insights will help you maximize your seed germination success without the common pitfalls.
- Timing Secret: Harvest pods when they're fully mature but still closed—this is your narrow window for success. I've l...
- Species-Specific Stratification: The 6-12 week cold treatment in Step 3 is crucial, but don't assume all seeds need t...
Frequently asked questions
Got questions about tree seed pods?
You’re not alone! Whether you’re just starting or troubleshooting, here are answers to the most common queries to help you succeed with harvesting, stratifying, and storing those precious seeds for next year’s garden.
What’s the best time to harvest tree seed pods?
Harvest seed pods when they’re fully mature but before they split open—usually in late fall or winter, depending on the tree. For example, maple samaras turn brown and dry, while acorns should feel firm and heavy. Pro tip: Check your specific tree’s pod characteristics, as timing varies!
How do I know if the seeds inside are viable?
Test viability by floating test: Drop seeds in water—viable ones sink (they’re dense and full of life!), while hollow or empty seeds float. For extra accuracy, cut open a few pods to inspect the seeds’ color and firmness. A healthy seed should look plump, not shriveled or moldy.
Can I skip stratification for some tree seeds?
Most tree seeds need stratification (a cold, moist period) to break dormancy, but a few exceptions exist! Seeds from tropical trees (like mango) or pre-stratified varieties (e.g., some fruit trees) may germinate without it. Always check your tree’s specific needs—skipping this step could mean no sprouts!
How long can I store tree seeds before they lose viability?
Storage life varies by species, but most tree seeds stay viable for 1–5 years if kept cool (32–40°F), dry, and in airtight containers. Label pods with the harvest date and tree type! For longer storage, refrigerate or freeze seeds in sealed bags with a desiccant packet to prevent moisture.
Why aren’t my stratified seeds germinating?
If seeds refuse to sprout after stratification, check these common culprits:
- Improper stratification: Ensure moisture levels stayed consistent (not soggy or bone-dry).
- Old seeds: Some lose viability over time—test freshness first!
- Wrong conditions: Verify warmth, light, and soil mix (e.g., sandy soil for fast drainage).
- Pests or mold: Inspect for damage or funky smells before planting.
Adjust one variable at a time to troubleshoot!
Wrapping up and next steps
From harvesting to stratifying and storing tree seed pods, you now have the tools to nurture next year’s garden with confidence! 🌱 Whether you’re a seasoned gardener or just starting out, these simple steps ensure your seeds will sprout strong and healthy. Why not take the next step? Try collecting pods from your favorite trees this season, experiment with different storage methods, and watch your garden flourish with homegrown wonders!
💡 Pro Tip:
Keep a seed journal to track which pods thrive best in your climate—your future self (and garden!) will thank you!