
Lawn
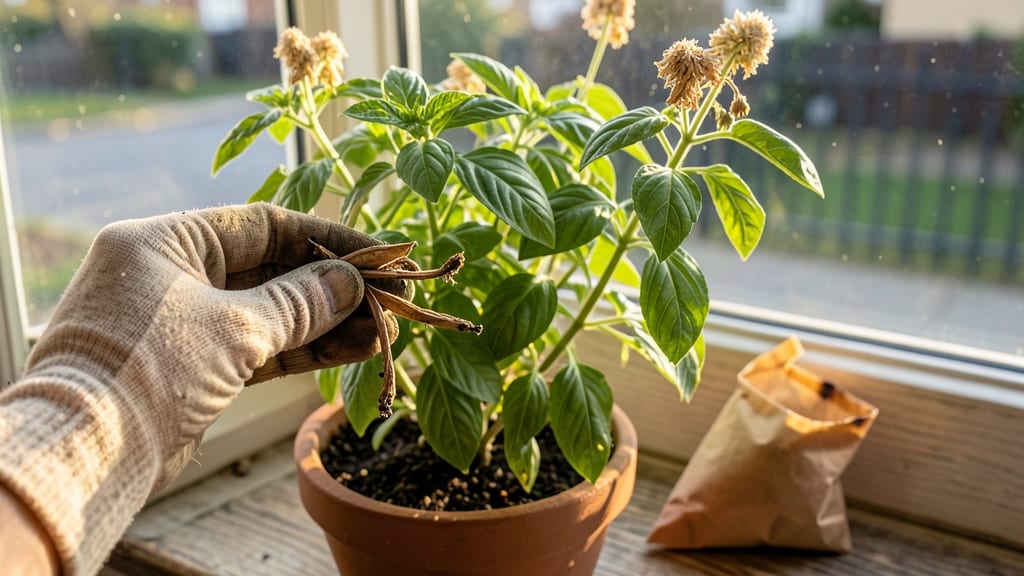
Cold-stressed basil blooms are nature’s way of giving you free seeds for next season’s garden. 🌱 The trick is letting your basil flower just enough to form seed pods—but not so much that it stops producing those fragrant leaves.
I’ve harvested seeds from my own plants for years, and once you see how easy it is, you’ll never buy basil seeds again.
Start by letting your basil bolt naturally (or give it a light frost in fall if you’re in Zone 7 or colder). When you spot those tiny white flowers, let them mature into green seed pods—about 3-4 weeks after blooming.
The pods turn brown and papery when ready; that’s your cue to harvest. Skip the ones that split open, as those seeds have already scattered.
Drying is simple: lay pods on a tray in a warm, dry spot for 5-7 days until completely crisp. Then, rub them between your fingers to release the tiny black seeds.
Store them in a paper envelope in the fridge—they’ll stay viable for 2-3 years. Plant them next spring, and you’ll have fresh basil growing in just 4-6 weeks.
Pro tip: If your basil flowers too early, pinch off blooms to keep it leafy longer. And if you’re worried about seed viability, do a quick float test—drop a few seeds in water. Sinkers are good; floaters are past their prime. Happy seed saving!
📚 In This Guide
- What you need
- Instructions
- Tips and common mistakes
- Wrapping up and next steps
What you need
- ● Basil seed pods: 1–2 mature basil plants (or 10–15 pods if harvesting from dried stems). Look for light brown, papery pods—they’re ready when they split open slightly!
- ● Glass jar or airtight container: A small mason jar (8 oz) or any clean, dry container with a lid.
- ● Paper towels or parchment paper: 1–2 sheets to line your jar or drying surface.
- ○ Small bowl or plate: For sorting seeds (optional but helpful!).
- ● Scissors or pruning shears: Sharp tools to snip dried pods cleanly.
- ● Fine-mesh strainer or sieve: To separate seeds from chaff if drying outdoors.
- ● Food dehydrator or oven: For speed-drying pods (set to 100°F–120°F if using an oven).
- ● Magnifying glass: For spotting tiny seeds in pods.
- ● Labeling tags: To mark your seed jar with the harvest date and variety.
How to extract basil seeds from cold-stressed blooms
Skip buying seeds this year—grow your own from homegrown basil with this simple, zero-waste method.
🌿 Step 1: Identify and Select Healthy Basil Plants
Choose basil plants that have already produced flowers but haven't yet gone to seed. Look for stems with fully opened white or purple blooms—these are ready for cold stress. Avoid plants with brown or wilted leaves, as they won't produce viable seeds.
Harvest the entire flowering stem by snipping it just above a set of leaves with clean, sharp scissors. This encourages the plant to produce more side shoots, giving you a second chance at seeds later in the season. Place the cuttings in a paper bag to contain any loose seeds during transport.
☀️ Step 2: Cold-Stress the Basil Blooms
Place the harvested basil stems in a sealed plastic bag with a few ice cubes or refrigerate them at 35-40°F for 3-5 days. This cold treatment mimics winter conditions, tricking the plant into setting seeds instead of just producing flowers. You'll know the stress is working when the flower buds begin to turn brown and dry out slightly.
Check the stems daily. If they start to mold or smell sour, remove them immediately—this means the cold treatment has gone too far. Once the buds are dry to the touch but still intact, they're ready for the next step. This process ensures higher seed viability compared to letting them dry naturally on the plant.
🪴 Step 3: Dry and Harvest the Seed Pods
Remove the cold-stressed stems from the fridge and lay them out on a paper towel-lined tray in a warm, dry spot with indirect sunlight. Keep them out of direct sun to prevent overheating, which can scorch the delicate seed pods. Within 7-10 days, the flower clusters will turn completely brown and crispy—this is your signal that the seeds are fully mature.
Gently rub the dried flower clusters between your fingers or use a small sieve to separate the seeds from the chaff. Store the seeds in a paper envelope in a cool, dark place. They'll remain viable for 2-3 years if kept dry. Label the envelope with the variety and harvest date—basil seeds from homegrown plants often produce more robust seedlings than store-bought varieties.
💧 Step 4: Test Seed Viability (Optional but Recommended)
Before storing your seeds long-term, test a few to ensure they'll germinate. Place 5-10 seeds on a damp paper towel in a sealed plastic bag. Keep them in a warm spot (70-75°F) and check daily. You should see sprouts within 7-14 days—if fewer than half sprout, try cold-stressing another batch of blooms for better results.
This simple test gives you confidence that your seeds are worth saving. If germination rates are low, you can always use the remaining seeds for cooking or composting. The process of testing also helps you refine your cold-stressing technique for next time—like adjusting the duration or temperature slightly.
⏰ Step 5: Store and Plant Your Seeds
Once you've confirmed your seeds are viable, store them in a paper envelope in the fridge or freezer to extend their shelf life. When ready to plant, sow the seeds ¼ inch deep in well-draining potting mix. Keep the soil consistently moist but not soggy, and place the container in a warm spot with bright, indirect light until germination.
You'll see seedlings emerge within 10-14 days. Thin them to 3-4 inches apart once they have their first true leaves. The satisfaction of growing basil from seeds you extracted yourself is unmatched—plus, you'll have a steady supply of fresh herbs for years to come with minimal effort.
Tips & tricks for perfect basil seed pod extraction
Here's what I've learned from years of experimenting with zero-waste basil seed harvesting—these tricks make all the difference.
Plant Selection: Look for basil blooms that are fully opened but haven't yet started forming seed pods. These are the sweet spot for cold stressing—too early and you won't get seeds, too late and the flowers may have already released pollen. I always check for vibrant green stems with no brown spots, as stressed plants won't produce viable seeds. The white or purple blooms should be just starting to show color changes, not fully dried out.
Cold Stress Technique: The 3-5 day cold treatment at 35-40°F is crucial for seed viability. I've found that using a standard home fridge set to its coldest setting (usually around 38°F) works perfectly. Place the sealed bag on the top shelf where it's coldest. For extra insurance, I sometimes add a small ice pack to the bag—just make sure it doesn't touch the stems directly. The key is to mimic natural winter conditions that trigger seed formation in the plant's life cycle.
Drying Strategy: When removing stems from cold storage, I always let them sit at room temperature for about 10 minutes before laying them out to dry. This prevents condensation from forming on the delicate flower clusters, which could lead to mold. For the drying process, I use a mesh cooling rack over a paper towel rather than a solid tray—this allows air to circulate on all sides of the stems, speeding up the drying process while preventing overheating. The indirect sunlight is especially important during summer months when direct sun can cook the seeds before they're ready.
Seed Viability Test: Don't skip the germination test! I've seen batches that looked perfect but had less than 20% viability. For the test, I use a clear plastic bag with a damp paper towel to create a mini greenhouse effect. This helps maintain consistent moisture while allowing me to monitor progress easily. If your seeds don't sprout within 14 days, it's worth trying another round of cold stressing—sometimes the timing needs adjustment based on your specific basil variety.
Pro Tips for Basil Seed Pods
- Here's what I've learned from years of experimenting with zero-waste basil seed harvesting—these tricks make all the ...
- Plant Selection: Look for basil blooms that are fully opened but haven't yet started forming seed pods. These are the...
- Cold Stress Technique: The 3-5 day cold treatment at 35-40°F is crucial for seed viability. I've found that using a s...
Frequently asked questions
How do I know when basil seed pods are ready for harvesting?
Basil seed pods turn from green to tan or light brown when ready—usually 10–14 days after flowers bloom. Gently twist or pinch them off; they should release seeds easily. Avoid harvesting when pods are still green or they’ll be too moist and mold-prone. Pro tip: Harvest on a dry morning for best results!
Can I grow basil seed pods indoors without cold stress?
Yes! Skip the cold treatment by letting basil naturally mature indoors under bright light (6+ hours/day). Seed pods may form slower but will still develop. Just ensure good airflow to prevent fungal issues. For extra speed, try a cool (55–60°F) nighttime temp for 2–3 days to mimic cold stress.
How long do basil seed pods stay viable for storage?
Dry seed pods keep for 1–2 years in a cool, dark place (like a sealed jar). Test viability by planting a few—if they sprout within 10 days, the rest are good. For freshness, store in the fridge (up to 6 months) or freeze them. Warning: High humidity = mold risk, so avoid damp storage!
What can I do with basil seed pods if I don’t want to extract seeds?
Don’t toss them! Use pods in tea (1 tsp pods = 1 cup hot water for a mild, earthy flavor), sprinkle them on salads for crunch, or infuse oils/vinegars. They also make beautiful dried decor—hang them in bundles for a rustic touch. Bonus: Compost spent pods for nutrient-rich soil!
Why are my basil seed pods turning black or mushy?
Black/mushy pods signal overwatering, fungal infection (like powdery mildew), or poor airflow. Reduce watering, space plants 12+ inches apart, and prune for airflow. If caught early, remove affected pods; severe cases may need neem oil spray. Prevent it: Harvest pods before they overripe!
Wrapping up and next steps
From cold-stressed basil blooms to zero-waste seed extraction, you’ve unlocked a simple, sustainable way to grow fresh basil year after year! 🌱 These tiny seed pods aren’t just a bonus—they’re a game-changer for gardeners who love efficiency and eco-friendly practices.
Now that you’re armed with the know-how, why not share this trick with fellow plant lovers or experiment with other herbs?
Ready to take it further? Try preserving your seeds in labeled envelopes or even gifting them to friends. Happy growing! 🌿