
Lawn
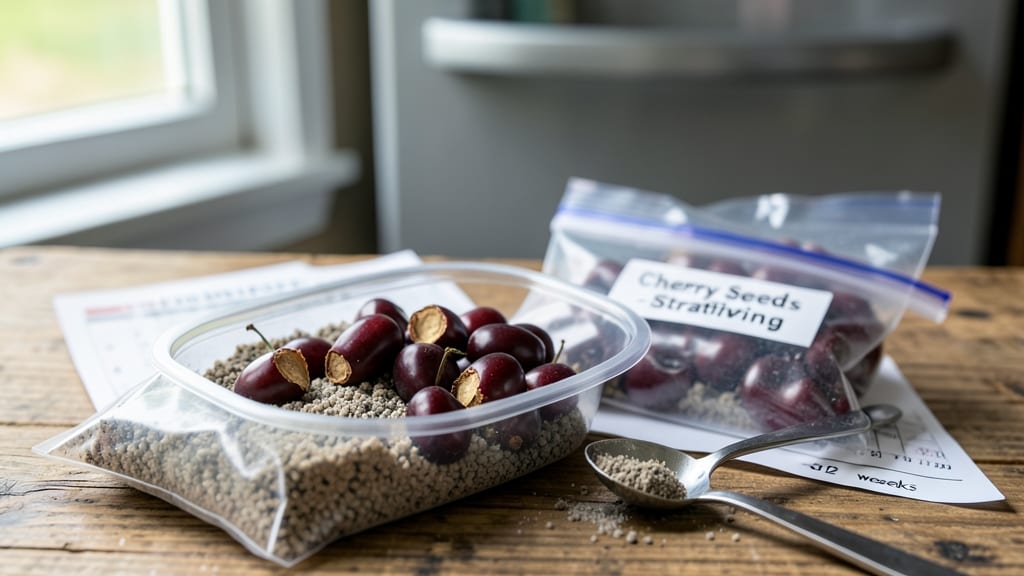
Cherry seed stratification is the cold-moist trick that turns stubborn seeds into reliable saplings next spring. 🌱 I learned the hard way that skipping this step means weeks of waiting for seeds that may never sprout—my first batch sat in warm soil for months before giving up. The secret? Mimicking nature's winter chill by storing seeds in damp sand for 8-12 weeks before planting.
You'll need 3 parts clean sand to 1 part seeds, all kept in a sealed container at 34-41°F—that's your refrigerator's crisper drawer. Most people overcomplicate this, but the key is moisture: the mix should feel like a damp sponge, not dripping.
Advanced growers swear by adding a 1% hydrogen peroxide solution to prevent mold, though I've had success with just distilled water and a plastic bag.
By spring, you'll see tiny roots breaking through the sand—proof the seeds are ready. Plant them ½-inch deep in well-draining soil, and keep them warm (around 70°F) for consistent germination. The payoff? Saplings that grow 2-3 times faster than unstratified seeds, with stronger roots that handle transplanting like pros.
This method works for sweet, sour, and tart cherries alike, though stone pits from fruit you eat won't always produce true-to-type trees. For best results, source seeds from local nursery stock or wild cherries. The wait is worth it when you see those first true leaves unfurl next spring.
📚 In This Guide
- What you need
- Instructions
- Tips and common mistakes
- Wrapping up and next steps
What you need
- ● Fresh, dried cherry seeds (10–50 seeds, depending on your project scale). Tip: Harvest seeds from fully ripe, organic cherries (avoid store-bought—pesticides can interfere! 🚫🍒).
- ● Paper towels or coffee filters (2–4 sheets, depending on seed quantity).
- ● Plastic ziplock bags (quart-sized, 1–2 bags).
- ● Water spray bottle (for gentle moistening—no soaking!).
- ● Refrigerator or cold stratification setup (34–40°F / 1–4°C for 6–12 weeks).
- ● Small pots or seed trays (with drainage holes, 4–6 inches deep).
- ● Potting mix (sterile, well-draining mix—think 50% peat moss + 50% perlite/sand).
- ● Plastic wrap or humidity dome (to retain moisture during germination).
- ○ Heat mat (optional) (for faster germination, set to 70–75°F / 21–24°C).
- ● Plant labels & marker (to track seed varieties and dates!).
- ● Seed cleaning: Remove pulp and dry seeds completely before stratification (prevents mold! 🍄❌).
- ● Cold storage: Place sealed bags in a fridge or bury them in a moist, insulated outdoor container (e.g., a Styrofoam cooler).
- ● Germination patience: Some seeds may take 3–6 months to sprout—consistency is key!
Step-by-Step instructions for cherry seed stratification
Here's how to break dormancy and ensure strong germination for your cherry seeds next spring.
🌱 Step 1: Harvest and Clean the Seeds
Extract seeds from ripe cherries by slicing them open and scooping out the pits. Rinse the pits thoroughly under cool water to remove any remaining fruit flesh—this prevents mold during stratification. Let them air-dry completely for 24 hours on a paper towel before proceeding. You'll notice the pits feel light and dry to the touch when ready.
I like to place them in a single layer on the towel so they don't stick together. This prevents moisture pockets that could rot seeds before stratification begins. Store them in a labeled paper envelope until you're ready to start the cold treatment—just don't let them get damp again.
💧 Step 2: Prepare the Moist Stratification Medium
Mix equal parts of peat moss and sand in a shallow container—this creates ideal airflow while maintaining moisture. Dampen the mix until it feels like a well-wrung sponge: squeeze gently and water should bead up slightly but not drip. This balance is critical because too much moisture causes rot, while too little prevents germination.
Spread the seeds 1 inch apart in the medium, placing them with the pointed end down. Cover lightly with an additional ¼ inch of the mix—just enough to obscure them from light but not bury them too deeply. Label your container with the date and variety if known, since stratification takes 3-4 months for reliable results.
☀️ Step 3: Cold Stratify in Controlled Conditions
Place the container in a refrigerator (not the freezer) where temperatures stay between 35-45°F. This mimics winter's natural cold period that breaks seed dormancy. I use the crisper drawer because it maintains consistent humidity without freezing. Check the moisture every 2-3 weeks—top up with a spray bottle if the surface feels dry.
Keep the container in darkness—light exposure at this stage can trigger premature germination, which weakens seedlings. You'll know stratification is working when you see tiny roots emerging from the seeds after 6-8 weeks. This is your cue that dormancy has been broken and germination is imminent.
⏰ Step 4: Transition to Warm Germination
Once roots appear, transfer the container to a warm, bright location (around 65-75°F). I use a seedling heat mat under a grow light to simulate spring conditions. Keep the medium consistently moist—never soggy—by misting lightly every 2-3 days. Germination typically occurs within 2-4 weeks after this transition.
When seedlings emerge, remove the container from the heat mat and place it under full-spectrum grow lights for 14-16 hours daily. Thin to the strongest 2-3 seedlings per pot once they develop true leaves. You'll see them reach for the light, signaling they're ready for their next growth phase.
Tips & tricks for perfect cherry seed stratification
The secret to reliable cherry seed germination lies in these precise steps—here's how to avoid common pitfalls and maximize success.
Drying is Non-Negotiable: That 24-hour drying period in Step 1 isn't just about removing moisture—it's about preventing mold that could ruin your entire batch. I've seen seeds rot within days when people skip this step or don't dry them thoroughly. Place your seeds in a single layer with space between them so air can circulate evenly. If you're impatient, you can speed up drying by using a fan on low setting for the first few hours, but complete drying is still essential before stratification.
Medium Texture Matters: The "well-wrung sponge" test in Step 2 is crucial—your peat moss and sand mix should hold moisture without being soggy. Too much water creates anaerobic conditions that lead to rot, while too little prevents the seeds from absorbing what they need. I recommend using a spray bottle to adjust moisture levels rather than pouring water directly, as this gives you better control. If your mix feels too dry after a few weeks, add a light misting rather than soaking.
Light Control is Critical: During the 3-4 month stratification period in Step 3, absolute darkness is essential. Even a small amount of light can trigger premature germination, which weakens seedlings. If you don't have a completely dark space, wrap your container in aluminum foil or place it in a cardboard box with the lid taped shut. This mimics the natural winter darkness that triggers dormancy breaking in the wild. The first sign of success—tiny white roots—usually appears after about 6-8 weeks.
Temperature Consistency: Maintaining that 35-45°F range is more important than you might think. Refrigerators can vary greatly—some have warmer spots near the top or cooler areas near the back. I've had best success using the crisper drawer because it maintains stable humidity levels without freezing. If your refrigerator runs hotter, you might need to move the container to a different location or even use a small fan to circulate cooler air around it. The goal is to simulate natural winter conditions as closely as possible.
Pro Tips for Cherry Seed Stratification
- The secret to reliable cherry seed germination lies in these precise steps—here's how to avoid common pitfalls and ma...
- Drying is Non-Negotiable: That 24-hour drying period in Step 1 isn't just about removing moisture—it's about preventi...
- Medium Texture Matters: The "well-wrung sponge" test in Step 2 is crucial—your peat moss and sand mix should hold moi...
Frequently asked questions
Got questions about cherry seed stratification?
You’re not alone! This process can feel tricky, but we’ve got answers to help you grow those sweet seeds with confidence. Here’s what you need to know:
How long does cherry seed stratification take?
Cherry seeds typically need 60–90 days of cold, moist stratification to break dormancy. Some varieties (like tart cherries) may take longer—up to 120 days. Start in late fall or early winter for best results, mimicking nature’s timing. Patience pays off for higher germination rates!
Can I skip stratification and plant seeds directly?
Not recommended! Cherry seeds have a hard outer shell that blocks moisture and air, making direct planting unlikely to work. Stratification softens the seed coat, improving germination from 10% to 80%+. If you’re impatient, try scarification (lightly sanding the seed) as a backup—but stratification is still the gold standard.
When should I start the stratification process?
Begin stratification in late October to November for outdoor methods (like burying seeds in a cold frame) or 6–8 weeks before your last frost for indoor refrigeration. This ensures seeds are ready to plant in early spring, when soil temps warm up. Pro tip: Label your seeds! Varieties like sweet vs. tart cherries have different needs.
What if my seeds rot during stratification?
Rotting usually means too much moisture or poor airflow. Use a well-draining medium (like damp sand or peat moss) and avoid sealing seeds in airtight containers. If mold appears, discard the batch and try again with sterilized materials. Keep temps between 35–45°F—never warmer—to prevent spoilage.
Can I reuse stratification materials?
Yes, but only if they’re clean and dry! Reuse sand, peat, or vermiculite for multiple batches, but sterilize first by baking at 200°F for 30 minutes to kill fungi or bacteria. Avoid reusing damp or moldy substrates—better safe than sorry when nurturing tiny seeds!
Wrapping up and next steps
Mastering cherry seed stratification is your ticket to a thriving garden next season! 🌱 By mimicking nature’s cold-moist cycle, you’ve unlocked the secret to breaking dormancy and ensuring reliable germination. Whether you’re a seasoned gardener or just starting out, this method is your best bet for growing cherries from seed.
Now that you’re armed with the know-how, take the next step: gather your seeds, set up your stratification station, and watch the magic unfold. Happy growing—your future cherry trees are waiting! 🌿