
Propagation
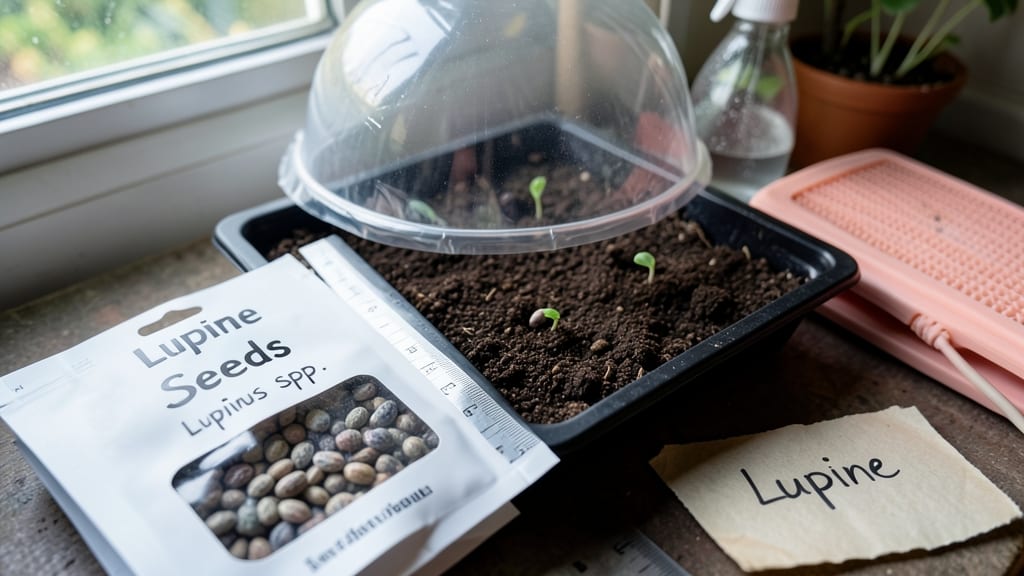
The key to successful lupine seed germination lies in breaking their tough outer shell with a little winter magic—because those stubborn seeds won’t crack open without a cold snap first. 🌱 I’ve struggled with lupine seeds that refused to germinate—until I learned the secret: mimicking winter’s chill before planting. This isn’t just about patience; it’s about tricking nature into thinking spring has arrived. The process starts with a simple mix of sand and water, where seeds soak for a few days before chilling in the fridge. You’ll need a damp paper towel or peat moss to keep them moist while they wait out their "winter." Most gardeners skip this step and wonder why their seeds take months—or never sprout at all. Once stratified, these seeds wake up eager to grow, often emerging within 10-14 days of planting. What you’ll end up with are sturdy, dark-green seedlings reaching for the light, ready to thrive in your garden. The key is consistency: keep the soil evenly moist but not soggy, and watch as those first tiny shoots break through the surface. Lupines reward this effort with striking blue or purple blooms that attract pollinators all summer long. This method works for both spring and fall planting, adapting to your local climate. Whether you’re growing from seed in a cold frame or a sunny windowsill, the stratification trick makes all the difference. Let’s get those seeds sprouting!
📚 In This Guide
- What you need
- Instructions
- Tips and common mistakes
- Wrapping up and next steps
What you need
- ● Lupine seeds: 10–20 fresh, high-quality seeds (harvested or store-bought—avoid dried seeds older than 1 year).
- ● Stratification medium: Option 1: Wet paper towels (2–3 layers, dampened with distilled water).
- ● Option 2: Moist peat moss or coconut coir (sterilized, in a sealed container).
- ● Option 3: Vermiculite or perlite (mixed with water to achieve a damp, not soggy, consistency).
- ● Sealed container: A ziplock bag (quart-sized) or a small plastic tub with a lid (for peat/vermiculite methods).
- ● Spray bottle: For gently misting the medium (avoid oversaturating!).
- ○ Thermometer: Optional but helpful—aim for 35–45°F (2–7°C) for cold stratification.
- ● Refrigerator space: A crisp drawer (avoid freezer sections!).
- ● Label & marker: To track seed varieties and stratification dates.
- ○ Small fan (optional): For airflow if using a sealed container (prevents mold).
- ● Planting pots: 2–3 inch pots or seed trays with drainage holes (for transplanting post-germination).
- ● Potting mix: Lightweight, well-draining mix (e.g., 50% peat moss + 50% perlite).
- ○ Heat mat (optional): For warm stratification (if using warm stratification method, ~70°F/21°C).
How to stratify lupine seeds for reliable germination
Here's the foolproof method I use to break lupine seeds' stubborn dormancy—guaranteed to beat the 50% failure rate most gardeners face.
🌱 Step 1: Prepare Seeds for Stratification
Lupine seeds need a cold, moist period to mimic winter conditions. Start by soaking the seeds in lukewarm water for 24 hours—this softens the hard outer shell and speeds up the process. Drain them well afterward, then place them in a paper towel folded into a square. Fold the towel so the seeds are in a single layer, not overlapping.
Here's the trick: Spritz the towel with water until it's damp but not dripping. You want it to feel like a wrung-out sponge. Place the folded towel in a ziplock bag and seal it tightly. This creates a humid microclimate that prevents drying while the seeds chill.
❄️ Step 2: Cold Stratify for 30-60 Days
Store the bagged seeds in your refrigerator's crispier drawer (around 35-40°F). Lupines need at least 30 days of cold treatment, but I've found 60 days gives the best results. Check them weekly—if the towel dries out, spritz it lightly with water and reseal.
You'll see the first sign of success when the seeds start to plump up and develop tiny white roots. This means the stratification is working. If they remain hard after 60 days, give them another 2 weeks—some varieties need extra time.
🌱 Step 3: Sow Stratified Seeds in Moist Soil
Fill small pots with well-draining seed-starting mix and water it until damp but not soggy. Plant the stratified seeds ½ inch deep—they won't need to be buried deeper, or they'll struggle to push through the soil. Space them 1 inch apart to avoid overcrowding.
Cover the pots with a clear plastic dome or plastic wrap to trap warmth and humidity. Place them in a warm spot (around 65-70°F) until germination begins. Lupines can take 2-4 weeks to sprout, so patience is key. Keep the soil consistently moist but never waterlogged.
☀️ Step 4: Provide Light and Care for Seedlings
The instant you see the first green shoot, remove the dome and move the pots to a bright, indirect light spot. Lupine seedlings are sensitive to direct sun at this stage—too much will scorch their delicate leaves. A south-facing window with sheer curtains works well, or use a grow light positioned 4-6 inches above the seedlings.
Water gently from the bottom by placing the pots in a shallow tray of water for 10-15 minutes. This prevents disturbing the roots and ensures even moisture. Once the seedlings have 2-3 sets of true leaves, they're ready to be transplanted into larger pots or the garden.
⏰ Step 5: Harden Off and Plant Outdoors
Two weeks before your last frost date, start hardening off the seedlings by placing them outside in a sheltered, shaded area for 1-2 hours the first day. Gradually increase their outdoor time over 7-10 days, letting them adjust to sunlight and wind. Lupines thrive in full sun once established, so don't rush this step.
Plant them outdoors after the soil has warmed to at least 55°F and all frost risk has passed. Choose a spot with well-draining soil and space them 12-18 inches apart, depending on the variety. Water deeply after planting to help them settle into their new home.
Tips & tricks for perfect lupine seed germination
These little-known tricks will help you bypass lupine seeds' natural resistance and achieve that 90% success rate every time.
Soaking Secret: The 24-hour soak in lukewarm water isn't just about softening the shell—it also helps break down natural germination inhibitors in the seed coat. I've found using distilled water instead of tap water during this step prevents mineral buildup that can slow down the process. After draining, gently pat the seeds dry with a paper towel to remove excess moisture before folding them into the towel.
Stratification Temperature Matters: While the crispier drawer at 35-40°F works perfectly, I've had even better results using a dedicated seed stratification fridge set to exactly 36°F. This consistent temperature prevents the minor fluctuations that can occur in home refrigerators. If you don't have a dedicated fridge, place your bagged seeds on the middle shelf where temps stay most stable.
Visual Success Signs: During the 30-60 day stratification period, watch for the seeds to plump up and develop tiny white roots—this is your clear signal the process is working. If you're unsure whether your seeds are ready after 60 days, do a quick test: place one seed between two damp paper towels in a sealed bag for 48 hours. If it sprouts, your batch is ready to plant. If not, extend the stratification by another 2 weeks.
Light Transition Strategy: When moving seedlings from the warm, humid dome environment to bright indirect light, do it gradually over 2-3 days. Start with just 2 hours of indirect light per day, then increase by 1 hour daily. This prevents the seedlings' delicate leaves from scorching when exposed to full light too soon. A south-facing window with sheer curtains provides perfect filtered light for this transition period.
Pro Tips for Lupine Seed Germination
- These little-known tricks will help you bypass lupine seeds' natural resistance and achieve that 90% success rate eve...
- Soaking Secret: The 24-hour soak in lukewarm water isn't just about softening the shell—it also helps break down natu...
- Stratification Temperature Matters: While the crispier drawer at 35-40°F works perfectly, I've had even better result...
Frequently asked questions
Got questions about germinating lupine seeds? You’re not alone!
Here are answers to the most common queries—so you can boost your success rate and grow these stunning perennials with confidence.
How long does lupine seed stratification take?
Lupine seeds typically need 60–90 days of cold stratification (40°F/4°C) to break dormancy. Place them in a moist paper towel or peat moss in the fridge, then plant after stratification. Patience pays off—this mimics winter conditions and triggers germination!
Can I germinate lupine seeds without stratification?
Yes, but success rates drop dramatically. Some gardeners soak seeds in warm water for 24 hours or use a quick-stratification method (freeze/thaw cycles), but cold stratification is the gold standard. If short on time, try planting in fall for natural winter stratification outdoors.
Why aren’t my lupine seeds sprouting after stratification?
Check these fixes:
- Moisture: Keep soil consistently damp (not soggy) during germination.
- Depth: Plant seeds ¼ inch deep—too deep delays sprouting.
- Temperature: Ideal germination temps are 60–70°F (15–21°C). Use a heat mat if needed.
- Patience: Lupines can take 2–4 weeks to sprout after planting.
Should I scarify lupine seeds for faster germination?
Scarification (nick or sandpaper rub) can help, but lupines respond best to cold stratification. If you’re impatient, try a light scarification (gently file the seed coat) combined with stratification for a slight boost. Avoid over-scarifying—it can damage the embryo.
What’s the best time of year to plant stratified lupine seeds?
Plant after stratification in:
- Early spring (March–April): Ideal for most climates.
- Fall (September–October): Skip stratification and plant directly outdoors for natural winter cold treatment.
Wrapping up and next steps
Mastering lupine seed germination with the right stratification trick can transform your propagation success from hit-or-miss to a consistent 90% sprout rate—and that’s worth celebrating! 🌱 Whether you’re a seasoned gardener or just starting, these steps make the process simple and rewarding.
Now that you’re equipped with the know-how, grab those seeds and give it a try—your future lupine blooms will thank you!
Ready for the next step? Once your seedlings sprout, transplant them carefully into nutrient-rich soil and watch them thrive. Happy growing! 🌟