
Propagation
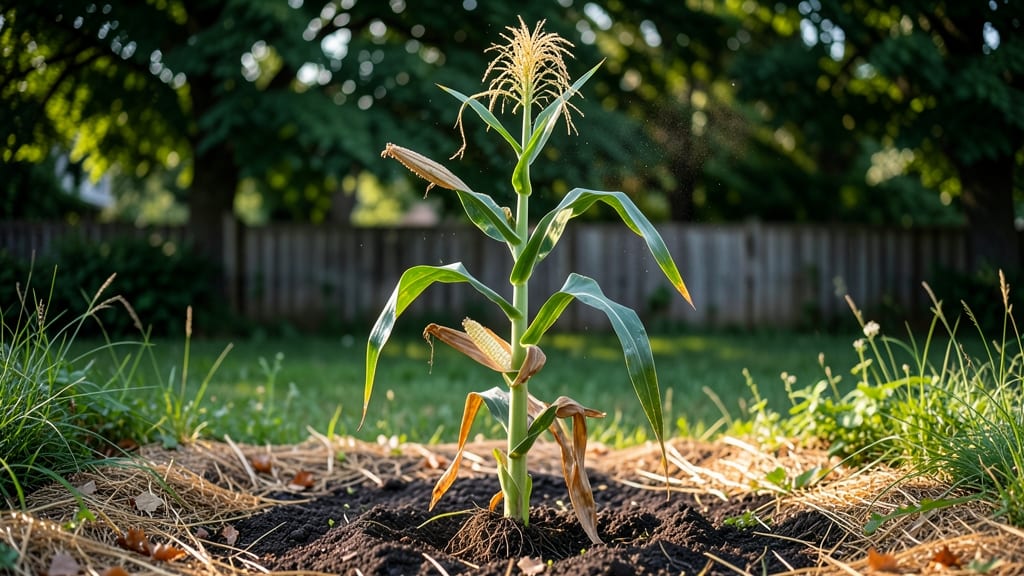
Growing corn from seed to harvest means turning those tiny kernels into towering stalks with ears so heavy they bow the plants over. 🌽 The secret to success isn't complicated—it's timing, spacing, and a little patience (plus the right soil prep).
I've grown corn for years, and the zero-waste pods that open naturally? That's where the magic happens, especially when you avoid common mistakes like overcrowding or inconsistent watering.
You'll need a sunny spot with rich, well-draining soil (think compost mixed in), seeds planted 1-1.5 inches deep and 4-6 inches apart in rows 3 feet apart. The key is consistency—water 1-2 inches per week, especially during pollination (when those silky tassels appear).
Most varieties take 90-120 days to mature, but sweet corn like 'Silver Queen' or 'Peaches and Cream' rewards you faster with tender ears.
By harvest time, you'll be snapping off ears with plump kernels and a creamy texture—the kind that makes neighbors ask where you learned to grow corn this well. The zero-waste pods (like dried corn cobs) can even be composted or used for crafts, so nothing goes to waste.
Just watch for pests like corn borers and earworms, and you'll have a bumper crop every time.
This method works for backyard gardens, raised beds, or even large-scale plots. Whether you're growing for fresh eating, canning, or just the joy of watching those stalks shoot up, the process is simpler than it looks. Let's get those seeds in the ground!
📚 In This Guide
- What you need
- Instructions
- Tips and common mistakes
- Wrapping up and next steps
What you need
- ● Corn seeds: Choose heirloom or organic varieties (e.g., Golden Bantam or Country Gentleman). Buy 1–2 lbs (enough for ~1,000–2,000 seeds, depending on spacing).
- ● Zero-waste seed pods: Biodegradable or compostable pods (e.g., Jiffy 7s or homemade from coconut coir). Get 50–100 pods for a small garden.
- ● Potting mix: Seed-starting mix (sterile, well-draining). A 10–20 lb bag covers ~50 pods.
- ● Garden soil: Loamy, nutrient-rich soil with a pH of 6.0–7.0. Test or amend with compost. 2–3 cubic yards for a 10’x10’ plot.
- ● Fertilizer: Starter fertilizer: 5-10-10 or fish emulsion (follow label rates).
- ● Organic fertilizer: Composted manure (chicken or cow) or balanced organic fertilizer (e.g., 10-10-10). 10–20 lbs per 100 sq ft.
- ● Hand trowel: For transplanting seedlings.
- ● Garden hoe or cultivator: To loosen soil and remove weeds.
- ● Watering can or hose with nozzle: Gentle spray for seedlings; soaker hose for mature plants.
- ○ Row marker or stakes: To mark planting rows (optional but helpful for larger plots).
- ● Pruners or scissors: For harvesting ears (if not using natural pod openings).
- ● Gloves & sun hat: Because gardening is hard work! 😎
- ● Sunlight: A full-sun location (6+ hours of direct sunlight daily).
- ● Space: Corn needs 12–18 inches between plants and 2–3 feet between rows for proper airflow.
- ● Water source: Consistent moisture (1–2 inches per week).
- ● Patience: Corn takes 90–120 days to harvest—plan ahead! 📅
- ● Trellis or stakes: For tall varieties (e.g., Mammoth Melting) to prevent lodging.
- ● Mulch: Straw or grass clippings to retain moisture and suppress weeds.
- ● Corn silk collection bag: For saving seeds or crafting (if you’re feeling creative!).
- ● Plant journal: To track growth stages and harvest dates.
Step-by-step instructions for growing corn from seed to harvest
Here's how I grow sweet, healthy corn using simple techniques that work every season.
🌱 Step 1: Choose and Prepare Your Planting Site
Corn thrives in full sun with at least 6-8 hours of direct sunlight daily. Pick a spot with rich, well-draining soil—corn roots need space to spread. I like to test soil pH first; aim for 6.0-6.8. If your soil is heavy clay, mix in 2-3 inches of compost and till it in a few days before planting.
Corn also benefits from windbreaks. If your garden is exposed, plant near a fence or tall plants like sunflowers to prevent stalks from snapping. The ideal planting time is after the last frost when soil reaches 60°F—stick your finger in; if it feels warm, it's ready.
🌱 Step 2: Plant Seeds at the Right Depth and Spacing
For 4 plants, you’ll need about 16-20 seeds (corn has a low germination rate). Plant seeds 1 inch deep in rows spaced 30-36 inches apart. I use my fingers to make small holes—don’t press seeds too firmly, or they’ll struggle to sprout. Drop 2-3 seeds per hole and cover lightly with soil.
Here’s the thing—corn needs room to grow. Space individual plants 8-12 inches apart in the row. If you plant too close, stalks will compete for nutrients, leading to smaller ears. Thin seedlings to the strongest plant per hole once they’re 4-6 inches tall—save the thinned plants for compost.
☀️ Step 3: Water and Fertilize for Strong Growth
Keep soil evenly moist but not soggy during germination. Water 1 inch per week, aiming for the base of plants—not the leaves—to prevent fungal diseases. Once stalks reach 12 inches tall, switch to deep watering 2-3 times per week. You’ll know you’re doing it right when the soil feels damp 6 inches down.
Side-dress with high-nitrogen fertilizer when plants are 6-8 inches tall and again at tasseling (when pollen appears). I use a balanced 10-10-10 fertilizer, sprinkling it lightly around the base and watering it in. Avoid over-fertilizing—too much nitrogen leads to lush leaves but no ears.
⏰ Step 4: Monitor for Pollination and Pest Signs
Corn is wind-pollinated, so plant at least 4 rows in a block (not a single row) to ensure good pollination. You’ll know it’s working when the silks (tassels) turn brown—this means pollen has fertilized the ears. If silks stay green past 2 weeks, hand-pollinate by brushing tassels over them with a paintbrush.
Watch for pests like corn earworms and raccoons. Cover ears with paper bags or corn husks when they’re 3/4 grown to deter pests. I also check leaves daily for holes or chewed edges—early intervention saves the harvest.
🌽 Step 5: Harvest at Peak Ripeness
Corn is ready when the silks turn brown and kernels are plump and milky when pierced with a fingernail. For sweet corn, harvest in the morning after a cool night—sugars peak then. Twist stalks gently to avoid breaking them. If you miss the window, kernels turn starchy and lose sweetness.
Use harvested ears immediately or blanch and freeze for later. To store pods naturally, let them dry on stalks until kernels turn hard and husks crisp. Hang dried pods in a well-ventilated, dry place—they’ll open naturally when fully dry, releasing seeds for next season.
Tips & tricks for perfect corn growth from seed to harvest
Real talk: Growing corn from seed to those sweet, zero-waste pods isn't just about planting and waiting. Here's what nobody tells you about getting it right.
The Sunlight Factor: Those 6-8 hours of sunlight aren't just a suggestion—they're non-negotiable. I've learned this the hard way after watching plants lean toward the sun like sunflowers. If your garden gets partial shade, consider using reflective mulch or planting near a white fence to bounce extra light onto the plants. Morning sun is especially important for photosynthesis to kickstart growth.
Thinning Strategy: When you're thinning seedlings to the strongest plant per hole at 4-6 inches tall, don't just yank them out—cut them at the base with clean scissors. This prevents disturbing the roots of your remaining plants. I also like to thin on a cloudy day to reduce stress on the plants. The extra seedlings make great compost, but they'll be healthier if you give them a clean removal rather than a rough tug.
Pollination Check: That 2-week window for silks to turn brown is your best indicator of successful pollination. If you're in a windy area or notice silks staying green, grab a small paintbrush and gently transfer pollen from the tassels (those feathery tops) to the silks. I've had to do this a few times, and it makes all the difference for ear development. Think of it as giving your corn plants a helping hand with nature's process.
Harvest Timing Secret: The morning-after-cool-night rule for harvesting is actually about the starch-to-sugar ratio in the kernels. Corn converts starch to sugar during the night, especially after a cool evening. If you harvest in the afternoon, the sugars will have already converted back to starch. Trust me on this—your taste buds will notice the difference between corn harvested at 7am versus 2pm on the same day.
Pro Tips for Corn From Seed To Harvest
- Real talk: Growing corn from seed to those sweet, zero-waste pods isn't just about planting and waiting. Here's what ...
- The Sunlight Factor: Those 6-8 hours of sunlight aren't just a suggestion—they're non-negotiable. I've learned this t...
- Thinning Strategy: When you're thinning seedlings to the strongest plant per hole at 4-6 inches tall, don't just yank...
Frequently asked questions
Got questions about growing corn from seed to harvest? You’re not alone! Here are some of the most common queries—plus straightforward answers to help you grow like a pro.
How long does it take for corn to go from seed to harvest?
Most corn varieties take 90 to 120 days from planting to harvest, depending on the type. Sweet corn, for example, typically matures in 70–100 days. Check the seed packet for exact days-to-maturity—this is your best guide!
What’s the best temperature for planting corn seeds?
Corn thrives in warm soil (60–65°F or 15–18°C). Wait until nighttime temps stay above 50°F (10°C)—planting too early can stunt growth. Use a soil thermometer to test! Pro tip: Cover seeds with a light row cover if frost threatens.
Why aren’t my corn plants growing tall or producing ears?
Common culprits include poor soil nutrition (low nitrogen/phosphorus), underwatering, or pests like corn earworms. Test your soil, ensure 1–2 inches of water weekly, and use row covers early to deter pests. Fix: Side-dress with compost or a balanced fertilizer at tasseling.
Can I grow corn in containers or small spaces?
Yes! Dwarf varieties like ‘Bodacious’ or ‘Golden Bantam’ thrive in 5-gallon pots or raised beds. Just ensure 6+ hours of sun and deep pots (12+ inches) for root growth. Containers dry faster—water consistently!
How do I know when corn is ripe and ready to harvest?
Check for these signs: Silks turn brown, kernels are plump and milky when pierced (not crunchy), and husks feel dry. Pick in the morning for peak sweetness! Bonus: Shuck and boil immediately for the best flavor.
What can I do with leftover corn cobs or husks?
Zero-waste wins! Compost husks/cobs, brew husk tea (steep in hot water for cold/flu relief), or make cornmeal by drying and grinding kernels. Even cobs can fuel a fire pit!
Wrapping up and next steps
Growing corn from seed to harvest with zero-waste pods isn’t just sustainable—it’s rewarding! 🌱 From selecting the right soil to harvesting golden ears, every step connects you to nature while minimizing waste. Whether you’re a beginner or a seasoned gardener, this method makes the process simpler and more eco-friendly.
Ready to take the next step? Start small—plant a few pods in your backyard or balcony and watch your garden transform. Share your harvest with friends or experiment with new recipes—because great corn deserves great company! 🌽✨