
Lawn
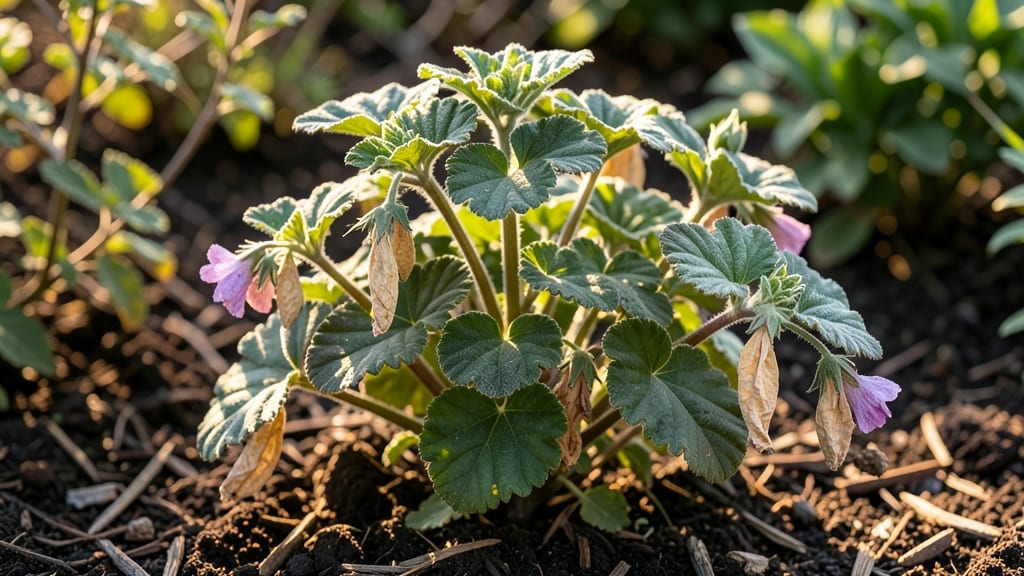
Harvesting geranium seed pods without the frustrating twist-and-pull struggle is totally doable—and it turns your spent plants into next year’s garden gold. 🌱 The trick lies in knowing exactly when those pods are ready (hint: they’re not as green as you think) and using a method that preserves every seed without the mess.
Most gardeners grab pods too early, only to watch them shatter or twist into impossible knots. I’ve perfected a three-step process that keeps seeds intact and your hands clean: wait for the pods to turn light brown and papery, then gently squeeze—not twist—to release the seeds.
No more lost seeds or sore fingers.
By the end of this, you’ll have a jar of viable seeds that’ll sprout into lush geraniums in just 2-3 weeks—no fancy equipment needed. The best part? You’ll save money, reduce waste, and have plants that match your garden’s exact color palette.
Whether you’re a first-timer or a seasoned grower, this method works for zonal geraniums, ivy geraniums, or pelargoniums alike. Let’s make seed saving simple—and frustration-free.
📚 In This Guide
- What you need
- Instructions
- Tips and common mistakes
- Wrapping up and next steps
What you need
- ● Geranium plants: Mature, healthy plants with fully developed seed pods (typically late summer/fall). Aim for at least 3-5 plants for a decent yield.
- ● Pruning shears or sharp scissors: Clean, sterilized tools to snip pods without crushing them.
- ● Paper bags or breathable mesh sacks: 2-3 medium-sized bags (12x15 inches) to collect pods while allowing airflow.
- ● Tray or baking sheet: Sturdy, flat surface (preferably with raised edges) for drying pods.
- ○ Parchment paper or silicone mat: Optional but helpful for easy cleanup.
- ● Small hammer or rolling pin: For gently tapping pods to release seeds (if not using a seed-saving kit).
- ● Fine-mesh sieve or colander: To sift out seeds from chaff (4-6 inch diameter works well).
- ● Labeling tags & permanent marker: To mark seed varieties and harvest dates.
- ● Air-tight containers: Small glass jars or resealable bags with silica gel packets (for long-term storage).
- ● Seed-saving kit: Includes a seed separator and storage containers (great for bulk harvesting).
- ● Fan or dehumidifier: Speeds up drying in humid climates.
- ● Compost bin: For repurposing pod husks as mulch or compost.
- ● Notebook: To log plant details (e.g., bloom color, disease resistance).
Step-by-step guide to harvesting geranium seed pods
Here's how to collect seeds without damaging plants or wasting a single pod.
🌿 Step 1: Identify and Monitor Mature Seed Pods
Geranium seed pods mature when they turn from green to a deep brown and begin splitting open naturally. I always start checking in late summer, about 8-10 weeks after flowering begins. The pods will feel dry and papery to the touch—this is your cue they're ready.
Gently examine each stem for fully mature pods. If you find any that are still green or slightly moist, leave them on the plant. Only harvest the ones that are completely dry and starting to crack open. This ensures maximum seed viability and prevents premature collection.
🪴 Step 2: Harvest Pods Without Damaging the Plant
Use clean, sharp scissors to snip the entire seed pod stem, leaving about ½ inch of stem attached. This prevents the plant from wasting energy trying to heal a torn stem. I like to work on a dry day when the pods are fully mature—morning is ideal because the dew has evaporated but the air is still cool.
Place the harvested pods in a paper bag immediately. The paper allows airflow while keeping seeds contained. Never use plastic bags—they trap moisture and can cause mold. You'll want to collect pods from all plants to ensure genetic diversity in your seed collection.
💧 Step 3: Dry and Process the Seed Pods
Spread the harvested pods on a clean, dry surface in a single layer. I use a baking sheet lined with parchment paper for this step. Let them dry for 3-5 days in a warm, dry place with good airflow. You'll know they're properly dried when they rattle when shaken—this indicates the seeds inside are completely mature.
Once fully dry, gently crush each pod between your fingers or use a small hammer to release the seeds. I like to do this over a clean white surface so I can easily see the tiny black seeds against the background. Be patient—this step requires gentle handling to avoid damaging the delicate seeds.
✂️ Step 4: Clean and Store the Seeds
Use a fine-mesh sieve to separate the seeds from any remaining pod debris. Shake gently over the sieve until only clean seeds remain. For extra cleanliness, I sometimes use a small fan to blow away lighter chaff while keeping the heavier seeds in place.
Store the clean seeds in an airtight container with a desiccant packet to absorb any moisture. I label each container with the geranium variety and the harvest date. Keep the container in a cool, dark place—seeds will remain viable for 2-3 years when stored properly.
🌱 Step 5: Prepare for Next Season's Planting
In early spring, take your stored seeds and stratify them for 4-6 weeks in the refrigerator to break dormancy. Place them in a sealed container with a damp paper towel to maintain moisture. This cold treatment mimics winter conditions and encourages better germination.
After stratification, plant the seeds in a well-draining seed-starting mix at a depth of about ¼ inch. Keep the soil consistently moist but never soggy. You'll see germination in 2-4 weeks under ideal conditions. This method gives you a head start on the growing season and ensures strong, healthy seedlings.
Tips & tricks for perfect geranium seed pod harvesting
These insider techniques will help you collect every last viable seed without stressing your plants.
Timing Secret: The 8-10 week window after flowering is critical—this is when geranium pods reach peak maturity. I've learned the hard way that harvesting too early (when pods are still green) means immature seeds that won't germinate. Wait until pods feel completely dry and papery, and you'll maximize your seed yield. This patience pays off with seeds that store beautifully for years.
Equipment Upgrade: While clean scissors work, invest in pruning shears for larger geranium collections. The sharp blades make quick work of multiple stems without crushing pods. Always leave that ½-inch stem attachment—it helps the plant heal faster and prevents energy loss. I keep a small basket nearby to collect pods efficiently as I work through the garden.
Drying Strategy: That 3-5 day drying period is non-negotiable for seed viability. I place my baking sheet near a sunny window but avoid direct sunlight which can overheat the pods. A gentle fan on low speed helps circulate air without disturbing the seeds. When pods rattle like tiny maracas, you know they're ready for processing—this is your green light to proceed.
Storage Wisdom: Labeling containers isn't just about organization—it's about future success. I include the geranium variety, harvest date, and any special notes like "needs cold stratification." The desiccant packets are worth every penny—they prevent moisture buildup that could trigger mold. I store my containers in the back of my pantry where temperatures stay consistently cool.
Pro Tips for Geranium Seed Pods
- These insider techniques will help you collect every last viable seed without stressing your plants.
- Timing Secret: The 8-10 week window after flowering is critical—this is when geranium pods reach peak maturity. I've ...
- Equipment Upgrade: While clean scissors work, invest in pruning shears for larger geranium collections. The sharp bla...
Frequently asked questions
Got questions about harvesting geranium seed pods? You’re not alone! Here are some of the most common concerns—and their simple solutions—to help you master zero-waste techniques with ease.
When are geranium seed pods ready for harvesting?
Seed pods mature when they turn from green to tan or light brown and start splitting open on their own. This usually happens 8–12 weeks after flowering. Wait until they’re fully dry—harvesting too early can ruin seed viability. A gentle tap should release seeds inside!
What do I do if my seed pods twist off before I harvest them?
If pods twist off prematurely, don’t panic! Scatter them on a paper towel in a dry, shaded spot to finish drying. Twisting is natural—it’s how geraniums disperse seeds. Just collect the fallen pods and store them in a paper bag until fully dry (1–2 weeks).
Can I harvest geranium seeds without cutting the whole plant?
Use clean scissors or pruners to snip individual pods at the stem. Leave 1–2 inches of stem attached to prevent damage to the plant. For large batches, wear gloves—geranium stems can be prickly! Focus on healthy, mature pods first to avoid over-stressing the plant.
What’s the best way to store harvested geranium seeds?
Store seeds in a paper envelope or breathable bag (never plastic!) in a cool, dark place (like a pantry). Label with the harvest date—geranium seeds stay viable for 2–3 years if kept dry. Pro tip: Add a damp paper towel to the envelope to maintain humidity if your climate is very dry.
Why aren’t my geraniums producing seed pods?
Pods may skip you if your plant is too young (<1 year), over-fertilized (focus on bloom, not foliage), or lacks sunlight (geraniums need 6+ hours/day). Deadhead spent blooms early to encourage new flowers—and pods! If pests like aphids are present, spray with soapy water to protect developing pods.
Wrapping up and next steps
Geranium seed pods offer a zero-waste, sustainable way to propagate your favorite plants while minimizing mess and effort! By mastering twist-free harvesting techniques, you’ll enjoy healthier plants, reduced waste, and a rewarding gardening experience—all while keeping your space tidy. 🌱
Ready to put your new skills to the test? Start with just one geranium plant and experiment with the methods shared here. Before you know it, you’ll be sharing seed pods (and cuttings!) with fellow gardeners—or even expanding your own green oasis. Happy harvesting! 🌿