
Propagation
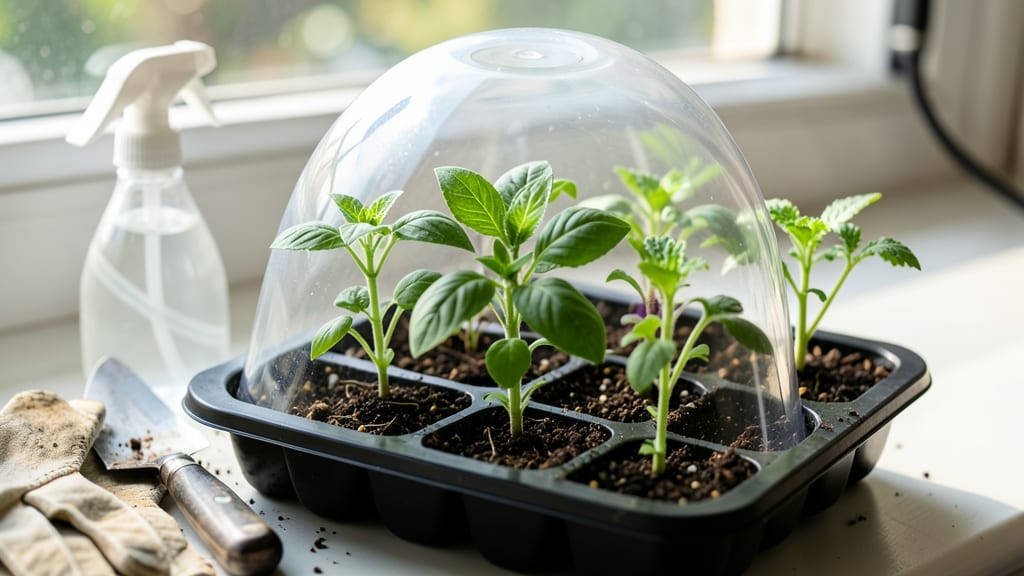
Here are some growing from seed tips—your seeds won’t wait forever, so soil temperature decides how fast they sprout. 🌱 I've watched seedlings emerge in 3 days instead of 2 weeks just by adjusting heat, and I'm sharing the exact tricks that make the difference between patience and frustration.
Most beginners overlook this: cool soil slows germination, while warmth triggers rapid growth. For veggies like tomatoes and peppers, aim for 70-85°F; cool-season crops like lettuce prefer 55-65°F. A simple heat mat or sunny windowsill can shave days off your wait time—and that's before you even see green.
You'll end up with sturdy, uniform seedlings that outpace store-bought plants by weeks. The secret isn't just heat—it's consistent moisture and proper depth too. No more wondering why your seeds "just didn't work" when the conditions were off.
Works for any seed type, from delicate herbs to hearty vegetables. Here's how to dial in the perfect starting environment for your first batch—no guesswork, just reliable results.
📚 In This Guide
- What you need
- Instructions
- Tips and common mistakes
- Wrapping up and next steps
What you need
- ● Seeds: Choose high-quality, fresh seeds (check the packet for germination rates). Pro tip: Start with easy-to-grow varieties like marigolds, basil, or radishes for confidence boosts!
- ● Growing Containers: Seed trays (with drainage holes) – 2–4 trays depending on seed volume.
- ● OR Small pots (3–4 inches deep) – 1–2 per seed type.
- ● OR Biodegradable seed pods (eco-friendly option).
- ● Growing Medium: Seed-starting mix (sterile, lightweight potting soil) – 1–2 bags (1–2 cubic feet).
- ○ Optional boost: Perlite or vermiculite (10–20% mix) for aeration.
- ● Heat Mat (Critical for Soil Temp!): Adjustable heat mat (70–85°F range) – 1 mat for trays/pots.
- ● Thermometer: Soil thermometer (digital preferred) to monitor temps 24/7.
- ● Spray Bottle: For gentle watering (avoid over-saturating seeds!).
- ● Grow Lights OR Sunny Windowsill: LED grow lights (12–16 hours/day) – 1–2 lights per setup.
- ● OR A south-facing window with indirect light.
- ● Humidity Dome OR Plastic Wrap: Keeps moisture in until sprouts emerge.
- ● Fertilizer: Balanced liquid fertilizer (5-5-5 or 10-10-10) – dilute to half-strength for seedlings.
- ● pH Test Kit: Ensures soil pH is ideal (most seeds prefer 6.0–7.0).
- ● Label Sticks: Mark trays/pots with seed types and dates planted!
- ● Fan: A small oscillating fan (2–3 hours/day) strengthens seedlings.
- ● Seedling Heat Pad Cover: Insulates heat mats for extra warmth.
Instructions: mastering soil temperature for faster seed germination
Here’s how to use temperature science to accelerate sprouts without sacrificing seedling strength.
🌱 Step 1: Understand Your Seeds’ Ideal Temperature Range
Every seed type has a sweet spot temperature for germination. Cool-season crops like lettuce and peas thrive at 50-60°F, while warm-season favorites such as tomatoes and peppers need 75-85°F. Check your seed packet—this is non-negotiable. I always cross-reference with a germination chart to avoid common mismatches (like planting tomatoes too early).
If your home’s ambient temperature won’t cut it, a seedling heat mat is your best friend. These plug-and-play mats keep soil 10°F warmer than room temperature and cut germination time in half. Place it under your seed trays before sowing—just be sure to remove it once sprouts emerge to prevent overheating.
🌡️ Step 2: Pre-Warm the Soil for 24 Hours Before Planting
Cold soil slows germination by 30-50%. The night before planting, place your seed trays on the heat mat (or in a warm spot like near a sunny window) to raise the soil temperature to your seed’s ideal range. You’ll know it’s ready when the soil feels warm to the touch—like a freshly brewed cup of tea, not scalding. This pre-conditioning jumpstarts metabolic activity inside the seed.
For extra speed, cover the trays with a clear plastic dome or wrap them in plastic wrap. This traps radiant heat and keeps moisture levels consistent. I’ve seen germination times drop from 10 days to 5 just by adding this pre-warming step. Just don’t seal it too tightly—you want a slight condensation effect, not a sauna.
💧 Step 3: Maintain Consistent Moisture and Temperature Post-Planting
Once seeds are sown, consistency is key. Place your trays back on the heat mat (if using) and monitor soil moisture daily. The surface should feel damp but not soggy—like a wrung-out sponge. Overwatering now can cause seeds to rot before they sprout. I use a spray bottle for precision, misting lightly until water just begins to bead on the soil surface.
Keep trays in a location where the temperature stays within 5°F of your seed’s ideal range. A sunny windowsill might fluctuate too wildly, while a basement can get too cool. If your home runs cold, a small greenhouse dome or a DIY setup with a clear plastic bottle (cut in half and placed over the tray) helps lock in warmth. Check soil temperature with a seedling thermometer—it’s the only way to know for sure.
⏰ Step 4: Watch for Germination Cues and Adjust Accordingly
Germination speed varies, but you’ll notice three key signals that everything’s on track. First, the seed coat may split or soften—this happens 12-48 hours before sprouting. Next, you’ll see a tiny white radicle (the embryonic root) pushing through the soil. Finally, the first true leaves (not the initial seed leaves) will unfurl, signaling the seedling is photosynthesizing on its own.
If sprouts appear unevenly (some seeds germinate while others remain dormant), your soil temperature might be too low or inconsistent. Increase heat slightly and check moisture—dry pockets can stall germination. Conversely, if seedlings emerge too quickly (within 3 days) but look weak and leggy, your soil was likely too warm (>85°F), which exhausts the seed’s energy reserves prematurely.
☀️ Step 5: Transition to Optimal Growing Conditions After Sprouting
The moment your first true leaves appear, it’s time to remove the heat mat and adjust light exposure. Seedlings now need bright, indirect light (or a grow light) to prevent stretching. Place them 2-3 inches under a full-spectrum LED or on a south-facing windowsill. You’ll see strong, stocky growth within 3-5 days—this is your reward for nailing the temperature phase.
Keep soil moisture even but not wet—tap the tray to let excess water drain, then return it to its growing spot. Avoid cold drafts or sudden temperature swings, which can shock delicate seedlings. If your home’s nighttime temps drop below 60°F, move trays to a warmer spot or use a small space heater (safely positioned) to maintain stability.
Tips & tricks for perfect seedling growth
Real talk: Temperature control is the game-changer that separates impatient gardeners from successful ones. Master these details, and you'll cut germination time dramatically while building stronger seedlings.
Precision Matters: The 24-hour pre-warming step in Step 2 isn't just about warmth—it's about creating the exact conditions each seed type needs. For cool-season crops, aim for 55°F (right in that 50-60°F sweet spot). For warm-season seeds, push to 80°F—just below the 85°F danger zone. I use a seedling thermometer to verify, because eyeballing "warm to the touch" can be misleading. The 10°F boost from heat mats is your secret weapon for speeding up dormancy-breaking without overstressing seeds.
Germination Signals: Those 12-48 hours before sprouting are when seeds are most vulnerable. Watch for the seed coat to soften—this means metabolic activity is ramping up. If you see uneven germination, check for dry pockets in the soil or temperature fluctuations. I've found that keeping trays on a heat mat during this critical window (while maintaining the 5°F consistency range) can push even stubborn seeds to sprout within 24 hours of the first sign of activity.
Light Transition Strategy: The moment you see first true leaves in Step 5, remove the heat mat immediately—this prevents seedlings from becoming heat-stressed. Here's the thing: I've seen many gardeners keep heat mats on too long, which causes seedlings to stretch toward light instead of growing stocky. Place your trays under bright, indirect light (or a grow light) within 3-5 days of sprouting to trigger that strong, sturdy growth phase. This is when you'll notice the difference between weak, leggy seedlings and robust plants ready for transplanting.
Pro Tips for Growing From Seed Tips
- Real talk: Temperature control is the game-changer that separates impatient gardeners from successful ones. Master th...
- Precision Matters: The 24-hour pre-warming step in Step 2 isn't just about warmth—it's about creating the exact condi...
- Germination Signals: Those 12-48 hours before sprouting are when seeds are most vulnerable. Watch for the seed coat t...
Frequently asked questions
What’s the best soil temperature for fast seed germination?
The ideal soil temperature depends on the plant, but most vegetables thrive between 65°F–75°F (18°C–24°C). Cool-season crops (like lettuce) prefer 55°F–65°F (13°C–18°C), while warm-season plants (tomatoes, peppers) need 75°F–85°F (24°C–29°C). Use a seedling heat mat if your soil runs cold!
How long should I wait before seeds sprout if they’re not showing signs of life?
Germination times vary—check the seed packet! Fast growers (radishes, beans) may sprout in 3–7 days, while slow ones (roses, some herbs) can take 2–4 weeks. If nothing happens after 3x the expected time, test moisture, warmth, and seed viability.
Can I use regular potting soil for seeds, or do I need something special?
Yes, but opt for a lightweight, sterile seed-starting mix (not garden soil) to avoid compaction and disease. Mix in perlite or vermiculite for drainage. Avoid compost-heavy blends—fresh seeds need air and moisture, not dense nutrients yet!
What should I do if my seeds rot instead of sprouting?
Overwatering or poor drainage causes rot. Fix it:
- Ensure pots have drainage holes.
- Water only when the top inch of soil feels dry.
- Use a sterilized mix (no old compost).
- Consider a bottom-watering tray to avoid soggy soil.
How can I speed up germination for stubborn seeds?
Try these tricks:
- Warmth: Place trays on a heat mat or near a sunny window.
- Light: Some seeds (like lettuce) need light to sprout—cover trays with plastic wrap until germination.
- Soaking: Pre-soak seeds overnight in water for 24 hours (great for peas, beans).
- Stratification: Cold-treat seeds (like tomatoes) in the fridge for 1–2 weeks before planting.
Wrapping up and next steps
Growing from seed is a rewarding journey, and mastering soil temperature secrets is your shortcut to faster, healthier sprouts! 🌱 Whether you’re a beginner or a seasoned gardener, the right warmth and patience will transform tiny seeds into thriving plants.
Start small—pick one seed type and experiment with your setup—then build confidence as you see those first green shoots break through.
Ready to take the next step? Try tracking your soil temps for a week, adjust as needed, and share your progress with fellow gardeners! The best part? Every seed you plant is a chance to grow something extraordinary. Happy gardening! 🌿