
Planting
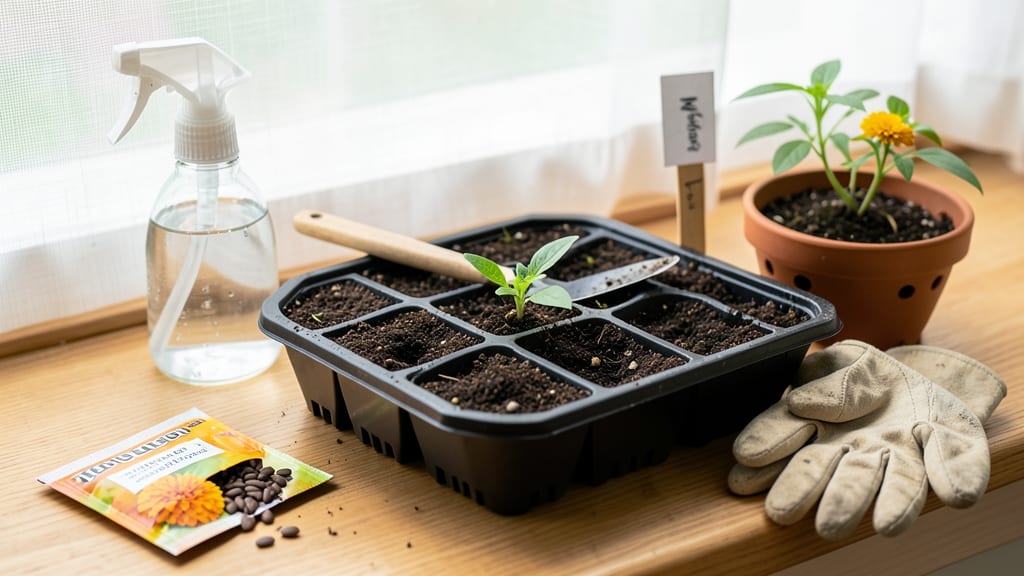
Planting a seed step by step starts with the right conditions—and I’ve learned that patience and prep are everything. 🌱 The difference between a thriving sprout and a sad, shriveled seedling often comes down to these first few minutes spent setting it up right.
Whether you're growing tomatoes, marigolds, or basil, the core steps are the same, and once you master them, you’ll see germination rates that make you the neighborhood gardening hero.
You’ll need just a few simple supplies: seeds (check the packet for planting depth), a container or garden bed, well-draining soil, water, and a sunny spot. The soil should be moist but not soggy—think of it like a damp sponge, not a swamp.
For most seeds, planting depth is about twice the width of the seed, though tiny seeds like lettuce need only a light dusting. Label your containers if you’re growing multiple types, because trust me, you’ll forget which is which before they sprout.
Once planted, water gently to settle the soil without disturbing the seeds, and keep the soil consistently moist (not drenched) until germination. Most seeds need warmth and light to break dormancy, so place them in a warm spot—some gardeners even use a heat mat for stubborn seeds.
Within a week to three weeks, you’ll see those first green shoots push through the soil, and that’s when the real fun begins.
Here’s the secret to perfect germination: don’t overwater after planting, and keep the soil temperature steady. If you’re starting indoors, a sunny windowsill or grow light works, but outdoor seeds need protection from harsh winds or direct afternoon sun until they’re strong enough.
The moment you see those first leaves, you’re on your way to a garden that’ll make your neighbors jealous.
📚 In This Guide
- What you need
- Instructions
- Tips and common mistakes
- Wrapping up and next steps
What you need
- ● Seeds: Choose high-quality, fresh seeds (check the packet for planting depth and spacing instructions). Pro tip: Save a few extras in case of germination failures!
- ● Seed-starting containers: Small pots (3-4 inches deep) or
- ● Seed trays with individual cells (biodegradable or plastic)
- ● Quantity: 1 container per seed (or as per packet instructions)
- ● Potting mix: Lightweight, sterile seed-starting mix (avoid garden soil—it’s too dense!). Quantity: Enough to fill containers 2/3 full.
- ● Water: Room-temperature, clean water (chlorine-free if possible). Use a spray bottle or small watering can with a fine rose.
- ● Grow lights or sunny windowsill: Option 1: A full-spectrum LED grow light (12-16 hours/day)
- ● Option 2: A south-facing window (6+ hours of direct sunlight daily)
- ● Plant labels: Toothpicks + masking tape or pre-made seedling labels (write seed type + date planted).
- ● Fine mist spray bottle: For gentle watering (prevents disturbing seeds).
- ● Tweezers: For delicate seeds (e.g., tiny flower or herb seeds).
- ○ Heating mat (optional): Speeds up germination for slow starters (e.g., tomatoes, peppers).
- ● Humidity dome: Clear plastic wrap or a mini greenhouse lid to retain moisture (remove once sprouts appear!).
- ● Temperature: Ideal range: 65–75°F (18–24°C) (check seed packet for specific needs).
- ● Humidity: Keep soil consistently moist (not soggy!).
- ● Space: Clear a dedicated area for your seedlings (e.g., a tray or shelf).
Step-by-step instructions for planting seeds like a pro
Here's how I turn tiny seeds into thriving plants—every time. No fancy tools, just the right technique.
🌱 Step 1: Choose the Right Seed and Container
Pick seeds that match your climate and growing conditions—some need warmth, others prefer cooler soil. I always check the seed packet for depth and spacing needs. For beginners, start with fast-growing seeds like radishes or lettuce—they forgive mistakes better than fussy tomatoes.
Use clean containers with drainage holes. A simple yogurt cup with holes poked in the bottom works just as well as fancy seed trays. Fill it halfway with a light, fluffy seed-starting mix (never garden soil—it's too heavy and can block germination). Press the mix down gently so it's firm but not packed.
💧 Step 2: Plant Seeds at the Correct Depth
Sow seeds at a depth of about twice their diameter. Tiny seeds like marigolds go just 1/8 inch deep, while larger ones like beans need 1 inch. I use a toothpick to make a small hole—it's precise and doesn't crush delicate seeds.
Drop in 1-2 seeds per hole (unless the packet says otherwise). Cover them lightly with more mix, then mist the surface with water until it looks damp but not soggy. Too much water buries seeds too deep, while too little leaves them dry and lifeless.
☀️ Step 3: Provide Warmth and Moisture for Germination
Seeds need warmth to sprout—most germinate best between 65-75°F. Place your container on a seedling heat mat or in a warm spot like on top of the fridge. Cover the container with plastic wrap or a humidity dome to trap moisture (but not so tight that condensation drips onto seeds).
Check daily but don't water again until the soil feels dry to the touch about 1/2 inch down. You'll see the first sprouts in 3-14 days, depending on the seed. Remove the cover immediately once you spot green—too much humidity invites mold that can kill seedlings overnight.
🌿 Step 4: Give New Seedlings Proper Light and Air
The moment those first leaves appear, move seedlings to a bright spot with 12-16 hours of light daily. A south-facing window works, but if your seedlings stretch toward the glass (called "leggy"), they need stronger light. I use a grow light on a timer to keep them growing straight and sturdy.
Thin seedlings if you planted more than one per hole—keep the strongest one and snip the others at soil level with scissors. Avoid pulling, or you'll disturb the roots of the plant you're keeping. Water from the bottom (place the tray in an inch of water for 10 minutes) to encourage deep root growth.
⏰ Step 5: Transplant When Ready for the Garden
Seedlings are ready to move outdoors when they have 2-4 true leaves (the first leaves are just baby "cotyledons"). Harden them off first by placing them outside in a shaded spot for 1 hour the first day, then gradually increasing time over 5-7 days. This toughens them up for real garden conditions.
Dig holes slightly deeper than the seedling's container and space them according to the plant's mature size. Water deeply after transplanting to help roots settle. I always add a handful of compost to the planting hole—it gives young plants a nutrient boost to keep them thriving.
Tips & tricks for perfect seed planting
Here's what nobody tells you about turning those tiny seeds into strong, healthy plants—details that make all the difference.
Seed Selection Wisdom: Always check the seed packet for specific planting instructions—some seeds need light to germinate and shouldn't be buried at all. I learned this the hard way with delicate flowers that refused to sprout because I covered them too deeply. For beginners, stick with easy-to-grow varieties like radishes or lettuce—they're forgiving when you make mistakes.
The Right Mix Matters: Never use garden soil for starting seeds—it's too dense and can block germination. A light, fluffy seed-starting mix with perlite or vermiculite is key. If you're short on time, you can even make your own mix by combining 50% peat moss and 50% perlite. Just make sure it's moist but not soggy before planting.
Germination Temperature: Most seeds sprout best between 65-75°F, but some need cooler conditions. If your home stays cool, place containers on a seedling heat mat or use a warm spot like on top of the fridge. I've seen seeds fail to germinate when kept in a cold basement—always check your seed packet for specific temperature needs.
Lighting Secrets: Those 12-16 hours of light daily are non-negotiable for healthy seedlings. If your south-facing window isn't enough, invest in a basic grow light on a timer. I notice seedlings stretch toward light (called "leggy") when they don't get enough—this makes them weak and prone to falling over.
Pro Tips for Plant A Seed Step By Step
- Here's what nobody tells you about turning those tiny seeds into strong, healthy plants—details that make all the dif...
- Seed Selection Wisdom: Always check the seed packet for specific planting instructions—some seeds need light to germi...
- The Right Mix Matters: Never use garden soil for starting seeds—it's too dense and can block germination. A light, fl...
Frequently asked questions
Got questions?
Planting seeds can feel intimidating at first, but don’t worry—we’ve got answers to the most common ones! Whether you’re curious about timing, troubleshooting, or alternative methods, this section covers all the bases to help you grow with confidence.
What’s the best time of year to plant seeds?
The ideal time depends on your climate and the plant type. For cool-season crops (like lettuce or peas), plant in early spring or fall when soil temps are below 70°F. Warm-season plants (tomatoes, peppers) thrive when soil is at least 60°F—usually late spring or summer. Always check seed packets for specific guidelines!
How long does it take for seeds to germinate?
Germination time varies wildly! Fast growers (like radishes) sprout in 3–7 days, while slowpokes (such as okra or some herbs) may take 2–4 weeks. Factors like moisture, temperature, and seed age play a role. If nothing happens after twice the expected time, the seed might be dead—try replanting!
What if my seeds won’t sprout? Troubleshooting tips?
Don’t panic! First, check moisture—soil should stay consistently damp (not soggy). If seeds are old (1+ years), viability drops. Try a water test: Soak seeds overnight; if they sink, they’re likely viable. For stubborn seeds, gently scratch the shell with sandpaper or soak in warm water for 12–24 hours to speed up germination.
Can I plant seeds directly in the ground, or should I start indoors?
It depends! Delicate seedlings (like tomatoes or peppers) need a head start indoors 6–8 weeks before the last frost. Hardy plants (beans, carrots, spinach) can go straight into the ground. For beginners, starting indoors reduces transplant shock and gives you more control over conditions like light and warmth.
Are there any seeds I shouldn’t plant at home?
Some seeds are tricky or even illegal to grow without permits (e.g., certain cannabis strains). Others, like nightshade family plants (tomatoes, potatoes, peppers), can be toxic if misidentified. Always research your local laws and double-check seed labels. When in doubt, stick to beginner-friendly options like herbs, lettuce, or marigolds!
Wrapping up and next steps
Planting a seed is a rewarding journey that connects you to nature—one tiny sprout at a time! 🌱 By following these step-by-step instructions, you’ve learned how to prepare your seeds, soil, and space for success.
Remember, patience and consistency are key; soon, you’ll witness the magic of life unfolding right before your eyes.
Ready to take the next step? Experiment with different plants, track your progress, and share your green thumb adventures with fellow gardeners! Whether you’re growing herbs, flowers, or veggies, every seed you plant is a chance to grow something beautiful—both literally and figuratively. Happy planting! 🌿