
Size
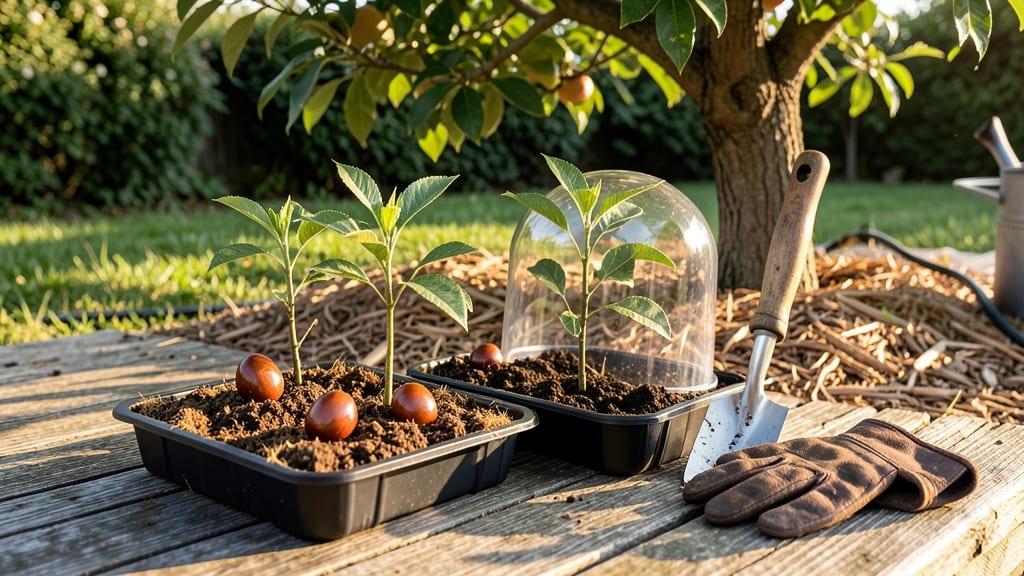
Growing a peach tree from seed is the ultimate long-term gardening project—imagine that tiny pit transforming into a tree with real fruit in 10+ years. 🌱 I tried it after eating a perfect peach, and though it’s slow, there’s something magical about nurturing a tree from scratch that you can’t get from a nursery grafted sapling.
The secret to success starts with the seed: extract it from fresh, ripe fruit, clean off the flesh, and let it dry completely before storing. Then comes the tricky part—stratification—mimicking winter’s cold to break dormancy.
Place the seed in a damp paper towel, seal it in a plastic bag, and refrigerate for 8-12 weeks. Patience here pays off later.
Once sprouted, transplant into well-draining soil and place in full sun—6+ hours daily. Early growth is slow, but with consistent watering and protection from pests, your seedling will develop strong roots. By year 3, you’ll see real tree shape, though fruit won’t appear for another 5-7 years.
Here’s the trade-off: seed-grown trees are unpredictable (maybe sweet, maybe sour), but grafting ensures faster, true-to-parent fruit. Either way, the journey makes every bite of that first homegrown peach unforgettable. Ready to start?
📚 In This Guide
- What you need
- Instructions
- Tips and common mistakes
- Wrapping up and next steps
What you need
- ● Peach seeds: 3–5 fresh, plump seeds (harvested from organic, ripe peaches—avoid store-bought if treated with chemicals).
- ● Small pots or seed trays: 2–3 (4-inch diameter minimum) with drainage holes. Pro tip: 💡 Use biodegradable pots for easy transplanting!
- ● Well-draining potting mix: 2–3 cups (sterilized, seed-starting blend with perlite or vermiculite).
- ● Plastic wrap or humidity dome: 1 (to retain moisture during germination).
- ● Spray bottle: 1 (for gentle watering).
- ● Grow lights or sunny windowsill: Access to 6–8 hours of indirect light daily (or a grow light for 12–16 hours).
- ● Patience: 😉 (Peach trees take 3–5 years to bear fruit—plan ahead!)
- ● Pruning shears: 1 (for trimming seedlings later).
- ● Fertilizer: Balanced, diluted liquid fertilizer (e.g., 10-10-10) or organic compost tea.
- ● Garden gloves: 1 pair (to protect hands from seed coatings or soil).
- ○ Thermometer: Optional (to monitor soil temp—ideal germination range: 60–70°F).
- ● Label markers: 2–3 (to track seedling progress).
- ● Peach tree support: Stake or trellis (for when seedlings reach 1–2 feet tall).
Step-by-Step guide to growing peach trees from seed using zero-twist pods
Here's how to transform a single peach pit into a thriving tree with minimal fuss.
🌱 Step 1: Extract and Prepare the Seeds
Start with fresh, ripe peaches—older seeds germinate poorly. Cut the fruit open and remove the pit, then crack it open carefully to extract the single seed inside. Rinse the seed under cool water to remove any remaining fruit residue, which can attract mold. Here's the thing—peach seeds have a hard outer shell that slows germination, so we'll need to soften it.
Place the seed between two sheets of damp paper towel, rolling it gently to keep moisture even. Store it in a sealed plastic bag in the refrigerator for 4-6 weeks. This cold stratification mimics winter conditions and breaks seed dormancy. Check weekly—if the towel dries out, mist it lightly. You'll know it's ready when the seed feels slightly softer to the touch and the towel stays damp without excess moisture.
💧 Step 2: Plant the Stratified Seed
Fill a small container—3-4 inches deep—with well-draining potting mix. Press the seed about 1 inch deep into the soil, with the pointed end facing downward. This orientation ensures the seedling grows straight rather than leaning. Water gently until the soil feels evenly moist but not soggy—you want it damp enough to support root growth but not waterlogged.
Cover the container loosely with plastic wrap to retain humidity, but leave a small gap for airflow. Place it in a warm spot, ideally 65-75°F, where it receives indirect light. Avoid direct sunlight at this stage—you're nurturing the seed, not the mature plant. You'll see the first signs of germination in 2-4 weeks, when a tiny sprout pushes through the soil.
☀️ Step 3: Transplant and Provide Optimal Growing Conditions
Once the seedling reaches 4-6 inches tall and develops its first true leaves (not the initial seed leaves), it's time to transplant. Choose a larger pot—6-8 inches deep—with fresh potting mix. Gently remove the seedling, keeping the root ball intact to avoid damaging delicate roots. Place it in the new pot and firm the soil around it lightly, ensuring the stem stands upright.
Move the pot to a location with full sun exposure—peach trees thrive in 6-8 hours of direct sunlight daily. If growing indoors, supplement with a grow light positioned 6-12 inches above the plant. Water deeply once a week, allowing the top 2 inches of soil to dry out between waterings. Overwatering at this stage can lead to root rot, so always check the soil moisture before adding more water.
✂️ Step 4: Prune and Train for Strong Growth
As the seedling grows, focus on shaping it into a strong, sturdy tree. When it reaches 12-18 inches tall, prune the top set of leaves to encourage branching. Use clean, sharp scissors to make a 45-degree cut just above a leaf node. This technique stimulates lateral growth, giving your tree a bushier form. Real talk: Peach trees grown from seed can take 3-5 years to bear fruit, but proper pruning now ensures a healthier, more productive tree later.
In late winter or early spring, prune again to remove any dead, diseased, or crossing branches. Aim for an open center that allows sunlight and air to reach all parts of the tree. This step is crucial—it prevents future issues like fungal infections and ensures even fruit production. Watch for new growth after pruning; healthy branches will show fresh green leaves within 2-3 weeks.
🪴 Step 5: Transition to the Garden (Optional)
After the seedling has grown for 1-2 years and developed a sturdy trunk—about 1 inch in diameter—it's ready for outdoor planting. Choose a sunny spot in your garden with well-draining soil. Dig a hole twice as wide as the root ball but no deeper. Gently remove the seedling from its pot, loosen the roots if they're circling, and place it in the hole so the top of the root ball sits 1 inch below the soil surface. This ensures stability and prevents stem rot.
Backfill the hole with soil, pressing lightly to remove air pockets. Water deeply to settle the soil and encourage root growth. Mulch around the base with 2-3 inches of organic mulch, keeping it 3 inches away from the trunk to prevent rot. Peach trees are drought-tolerant once established, but young trees need 1 inch of water weekly during the first growing season. You'll know it's thriving when new leaves emerge and the tree shows steady growth.
Tips & tricks for growing peach trees from seed
Transforming a peach pit into a thriving tree is all about patience and precision—here's how to optimize each stage.
Seed Selection: Choose peaches from trees that produce fruit consistently, as these seeds are more likely to grow into productive trees. Avoid seeds from store-bought peaches, which are often treated with fungicides that inhibit germination. The fresher the seed, the better—older seeds lose viability quickly. I've found that seeds from heirloom varieties often produce trees with more predictable fruit characteristics.
Stratification Success: During the 4-6 week cold stratification in Step 1, place the sealed bag in the refrigerator's crisper drawer where humidity is highest. This maintains consistent moisture without requiring weekly checks. You'll notice the seed feels softer when it's ready—it should yield slightly when pressed between fingers. This is your cue to plant immediately, as the seed is now primed for germination.
Germination Environment: The 65-75°F warm spot in Step 2 should be well-ventilated to prevent mold growth while maintaining humidity. A clear plastic container with drainage holes works perfectly—place it on a seedling heat mat set to 70°F for faster, more reliable germination. Watch for condensation on the plastic wrap; if it's excessive, remove the wrap for 10 minutes daily to allow airflow.
Transplant Timing: When your seedling reaches 4-6 inches in Step 3, its first true leaves (the second set after germination) will be more robust than the initial seed leaves. This is your signal to transplant. Use a small trowel to loosen the soil around the roots before transferring—this prevents root damage. The larger 6-8 inch pot should have drainage holes to prevent waterlogging, which can stunt growth or cause rot.
Pro Tips for Peach Seed Grow A Garden
- Transforming a peach pit into a thriving tree is all about patience and precision—here's how to optimize each stage.
- Seed Selection: Choose peaches from trees that produce fruit consistently, as these seeds are more likely to grow into productive trees.
- Stratification Success: During the 4-6 week cold stratification in Step 1, place the sealed bag in the refrigerator's crisper drawer where humidity is highest.
Frequently asked questions
Got questions about growing peaches from seed or saving seeds for your garden? Here are some of the most common queries—and their answers—to help you get started with confidence!
Can you really grow a peach tree from a seed?
Yes! While it’s possible, the resulting tree may not produce fruit identical to the parent plant. Peach seeds are heterozygous, meaning the tree will likely have different traits—like size, flavor, or ripening time. For consistent fruit, grafting is the way to go, but seed-grown trees are great for experimentation or ornamental use!
How long does it take for a peach seed to sprout?
Peach seeds need stratification (a cold period) to break dormancy. After 6–12 weeks in the fridge, germination can take 2–4 weeks in warm, moist soil (70–80°F). Patience is key—some seeds may take longer, especially if stored improperly. Keep soil consistently damp but not soggy!
What’s the best way to save peach seeds for planting?
Clean seeds thoroughly, remove the pit’s flesh, and let them dry for 1–2 days. Store them in a paper envelope (not plastic!) in the fridge for up to 6 months. Avoid freezing—it can damage viability. Label seeds with the variety name and harvest date to track success!
Why isn’t my peach seed sprouting?
Common culprits include unstratified seeds (skip the cold treatment), rotting from overwatering, or poor soil (use well-draining mix). Try planting deeper (1–2 inches) or testing a new batch. If seeds are old (>1 year), viability drops—start fresh!
Can I grow peach seeds indoors first?
Start seeds in small pots with a heating mat (70°F) for faster germination. Once sprouts have 2–3 leaves, transplant outdoors after the last frost. Harden off seedlings gradually to avoid shock. Just remember: Seedlings are delicate—provide bright, indirect light until they’re strong enough for direct sun.
Wrapping up and next steps
Growing peaches from seed is a rewarding journey that connects you to nature’s zero-waste magic—no fancy tools or complex steps required! 🌱 With just a little patience and the right techniques, you can transform a simple seed into a thriving tree (or even a zero-twist pod for easy saving).
Whether you’re a beginner or a seasoned gardener, this method proves that effortless seed saving is within reach.
Now that you’re armed with knowledge, why not take the next step? Start with one peach pit today—plant it, nurture it, and watch your garden grow. Share your progress with fellow gardeners or experiment with different varieties. Happy growing! 🌿