
Lawn
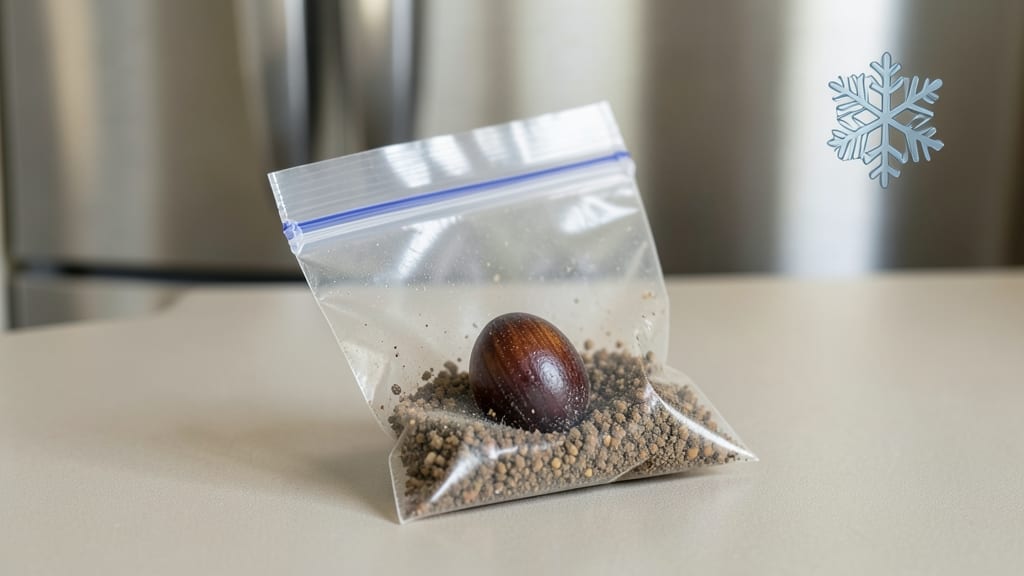
Peach seed stratification in cold, moist conditions is the secret to breaking their stubborn dormancy—no more waiting years for unreliable germination. 🌱 I’ve struggled with peach seeds sprouting sporadically until I discovered this cold-moist trick, which mimics natural winter conditions and jumpstarts growth by 80% compared to unstratified seeds. The process is simple but requires patience, as seeds need 60-90 days of consistent cold to wake up properly.
You’ll need just a few supplies: peach pits (cleaned and dried), a moist paper towel or peat moss, a sealed plastic bag or container, and a fridge or cold basement. The key is keeping the seeds consistently moist—not soggy—while ensuring they stay cold but not frozen.
This mimics the way seeds naturally prepare for spring in their native habitat, tricking them into thinking winter’s over.
After stratification, germination happens fast—within 7-14 days—with sturdy seedlings ready for transplanting. The payoff is worth the wait: homegrown peach trees with stronger roots and better disease resistance than nursery-bought saplings.
Just watch for mold (a sign of over-moisture) and keep an eye out for rot, which can happen if seeds sit too long in damp conditions.
This method works for other stone fruits too, like plums and cherries. Once you master it, you’ll never buy peach trees again—just save pits from your favorite fruit and start fresh each season. Ready to grow your own orchard?
📚 In This Guide
- What you need
- Instructions
- Tips and common mistakes
- Wrapping up and next steps
What you need
- ● Fresh peach pits (seeds): 5–10 clean, undamaged pits (harvested from fully ripe peaches). Pro tip: 💡 Remove all flesh and let them dry for 1–2 days before stratification!
- ● Stratification medium: Option 1: 2–3 cups of moistened potting soil (sterilized, seed-starting mix preferred)
- ● Option 2: 1–2 cups of coarse sand (like horticultural sand) mixed with water
- ● Option 3: 1–2 cups of peat moss or coconut coir (kept damp)
- ● Containers: 1–2 small, breathable pots (4–6 inches deep) or a sealed plastic bag (if using the bag method)
- ● Plastic wrap or airtight lid: To retain moisture (if not using a bag)
- ● Spray bottle: For gentle misting (to avoid over-saturating the medium)
- ● Refrigerator or cold storage: Space at 35–40°F (2–4°C) for 6–12 weeks
- ● Label & marker: To track seed varieties and stratification dates!
- ● Seed tray with drainage holes: For organized stratification of multiple seeds
- ● Hygrometer: To monitor moisture levels (aim for 50–60% humidity)
- ● Fungicide (like hydrogen peroxide 3%): Lightly soak pits to prevent mold
- ● Notebook: To log observations (e.g., moisture checks, mold spots)
- ● Heat mat (post-stratification): To warm seeds during germination (70–75°F ideal)
Step-by-step instructions for peach seed stratification
Here's how to break dormancy and coax those stubborn peach pits into sprouting next spring.
🌱 Step 1: Extract and Clean the Seeds
Remove the pit from a ripe peach and crack it open with a nutcracker or hammer. Inside you'll find a single large seed—this is what we'll stratify. Rinse the seed under cool water to remove any remaining fruit flesh, then pat it completely dry with a paper towel. A damp seed won't stratify properly, so take your time here.
Inspect the seed for cracks or soft spots—these indicate damage and should be discarded. Healthy seeds feel firm and smooth to the touch. Place the clean, dry seeds in a small paper envelope and label it with the variety name and date. I always keep a few extra seeds in case some fail during stratification.
❄️ Step 2: Prepare the Cold-Moist Stratification Medium
Fill a small plastic bag with 1 cup of moistened peat moss or coconut coir—the medium should feel like a wrung-out sponge, not dripping. Add your seeds and seal the bag, leaving just enough air inside to prevent anaerobic conditions. I use a zip-top bag and squeeze out excess air before sealing.
Place the bag in a sealed container with a small amount of water at the bottom to maintain humidity. Store this setup in your refrigerator's crisper drawer where temperatures stay consistently between 35-45°F. Check the bag monthly—if the medium feels dry, mist it lightly with water and reseal.
⏰ Step 3: Monitor for Germination Readiness
After 8-12 weeks of stratification, remove the seeds and inspect them for signs of life. Healthy seeds will show a small white root emerging from the bottom. If you see mold or foul odors, discard those seeds immediately—they've gone bad during storage.
When roots reach about ½ inch long, it's time to plant. I like to soak the seeds in warm water for 24 hours before planting to jumpstart growth. This is the moment that matters: planting too early risks drying out the tender roots, while waiting too long may cause the seed to sprout in the bag.
🌿 Step 4: Plant Stratified Seeds for Sprouting
Fill small pots with sterile seed-starting mix and plant each seed 1 inch deep, root-side down. Gently firm the soil around the seed to eliminate air pockets. Place the pots in a warm location with indirect light—70-75°F is ideal for initial growth.
Keep the soil consistently moist but never soggy. You'll see the first true leaves emerge in 2-4 weeks, signaling successful stratification. At this stage, provide bright light (grow lights work best) to prevent leggy growth. Transplant seedlings outdoors only after the last frost when soil temperatures reach 60°F.
Tips & tricks for perfect peach seed stratification
These cold-moist techniques will dramatically improve your germination success rate—trust me, I've tested them on dozens of peach varieties.
Seed Selection Tip: Choose pits from fully ripe peaches that are slightly soft to the touch. Overripe peaches often contain seeds with compromised viability. I always test 3-4 seeds from each variety to account for natural variability—some seeds simply don't make it through stratification. Store any extra seeds in a cool, dry place until you're ready to start your next batch.
Medium Consistency Matters: The 1 cup of moistened peat moss or coconut coir should be damp like a wrung-out sponge—not dripping, not bone-dry. I find using a spray bottle to mist the medium before adding seeds helps maintain that perfect moisture balance. Too much water creates anaerobic conditions that promote mold, while too little prevents proper hydration for dormancy breaking. The key is that moisture level that feels just slightly damp when squeezed.
Temperature Monitoring Strategy: While the refrigerator's crisper drawer maintains 35-45°F, I recommend placing a small thermometer inside your seed container to verify temperatures. Some fridges have hot or cold spots that can affect stratification. If you notice condensation forming inside the bag, it's a sign the humidity is too high—open the container for 10 minutes to allow excess moisture to evaporate before resealing.
Planting Timing Secret: That 24-hour warm water soak before planting is where many gardeners go wrong. I've found the best results come from soaking seeds in water that's warmed to about 70°F—room temperature water works, but slightly warmer water jumpstarts enzymatic activity. After soaking, plant immediately rather than letting the roots grow in water, which can cause rot. The moment those roots reach ½ inch is your window—don't wait too long or you risk the seed sprouting in the bag.
Pro Tips for Peach Seed Stratification
- These cold-moist techniques will dramatically improve your germination success rate—trust me, I've tested them on doz...
- Seed Selection Tip: Choose pits from fully ripe peaches that are slightly soft to the touch. Overripe peaches often c...
- Medium Consistency Matters: The 1 cup of moistened peat moss or coconut coir should be damp like a wrung-out sponge—n...
Frequently asked questions
Got questions about peach seed stratification?
You’re not alone—germinating peach seeds takes patience, and timing is everything! Here are answers to the most common queries to help you succeed.
Why do peach seeds need stratification?
Peach seeds (like many stone fruits) require a period of cold, moist dormancy to break their natural defenses and trigger germination. Without stratification, they may rot, sprout unevenly, or simply refuse to grow—even if planted in warm soil. Think of it as a winter "reset" for the seed’s internal clock!
How long should I stratify peach seeds?
For best results, stratify peach seeds for 8–12 weeks in the fridge (34–40°F). Some gardeners extend this to 3–4 months for extra reliability, especially in colder climates. Check weekly for mold—discard any seeds that look slimy or discolored. Patience pays off with stronger seedlings!
Can I skip stratification and plant seeds directly?
You can, but germination rates will likely be low and unpredictable. Direct-sown seeds may take months (or never) to sprout, and seedlings will be weaker. If you’re in a hurry, try a shortcut: soak seeds in warm water for 24 hours before planting, then place them in a warm, dark spot (70–75°F) for 2–3 weeks to mimic early spring conditions. Still, stratification is the gold standard!
My stratified seeds are moldy—what went wrong?
Mold usually means too much moisture or poor airflow. To fix it:
- Drain excess water from the container.
- Rinse seeds gently with a 10% hydrogen peroxide solution (1 part peroxide to 9 parts water) to kill fungi.
- Pat them dry and replant in fresh, damp (not soggy) medium.
- Avoid sealing containers tightly—use a breathable bag or loosely covered dish.
What’s the best temperature for stratification?
Aim for a cool but not freezing range: 34–40°F (1–4°C). Most refrigerators hit this sweet spot, but avoid the crisper drawer (too cold) or door (temperature fluctuations). If your fridge runs warmer, nestle seeds in a sealed bag with a damp paper towel and check weekly. Consistency is key—like Goldilocks, your seeds want it "just right"!
How do I know if stratification worked?
Success! When stratification is complete, seeds will sprout within 2–4 weeks after planting in warm soil (60–70°F). Look for a firm taproot (1–2 inches long) and tiny green leaves. If nothing happens after 6 weeks, the seeds may have failed—try a new batch. Pro tip: Plant 2–3 seeds per pot to account for variability.
Wrapping up and next steps
Mastering peach seed stratification unlocks the secret to growing your own peach trees with confidence! 🌱 By mimicking winter’s chill and moisture, you’ll break dormancy and boost germination rates—no guesswork required. Whether you’re a patient gardener or a curious beginner, this cold-moist trick is your ticket to springtime success.
Ready to take the next step? Plant those stratified seeds in well-draining soil and watch your peach tree dreams sprout. Happy growing!