
Planting
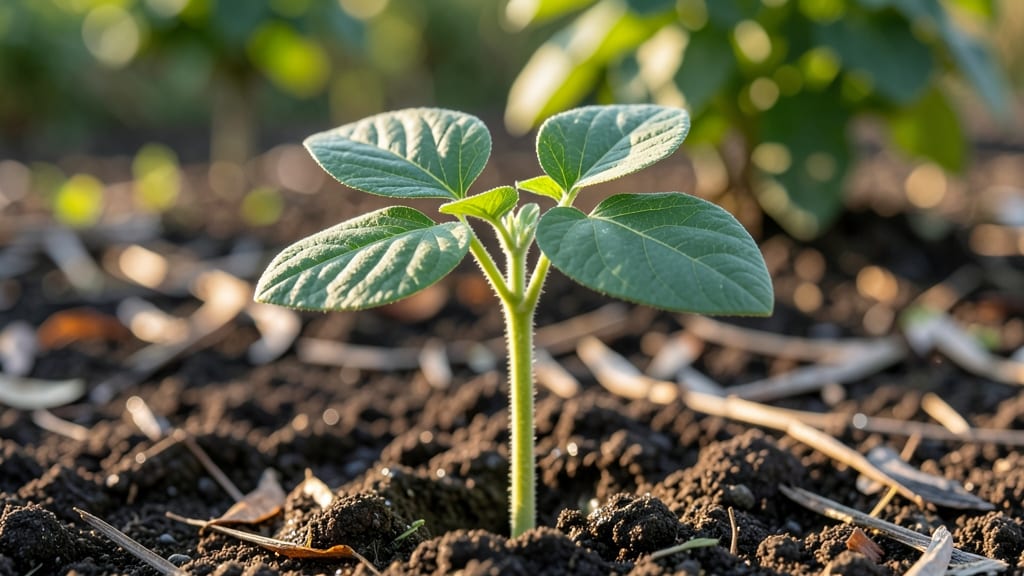
That first crack in the seed coat is where the magic begins. 🌱 Watching a seed grow into a plant feels like witnessing a tiny miracle—one that happens every time you create the right conditions.
The journey starts underground, where moisture, warmth, and darkness trigger the seed to wake up and push through the soil.
Most seeds need three things to germinate reliably: consistent moisture, temperatures between 60-75°F, and a dark, well-draining growing medium. Too much light or cold slows things down, while overwatering can suffocate the seed before it even starts.
I’ve learned that patience is key—some seeds like tomatoes sprout in 5-10 days, while others like peppers take 2-3 weeks.
Once the seedling breaks through the soil, you’ll see its first true leaves (not the tiny seed leaves) appear, signaling it’s ready for light. At this stage, it’s all about giving it space to grow—thinning crowded seedlings prevents competition and strengthens each plant.
With proper care, that fragile sprout will soon become a thriving plant ready for the garden.
This process works for everything from fast-growing radishes to slow-starting trees. The same principles apply whether you’re growing in a windowsill tray or a backyard bed. Let’s break it down step by step so you can turn seeds into plants with confidence.
📚 In This Guide
- What you need
- Instructions
- Tips and common mistakes
- Wrapping up and next steps
What you need
- ● Seeds: Choose fresh, high-quality seeds (e.g., beans, sunflower, or basil). Quantity: 2–5 seeds per container (for experiments).
- ● Seed-starting mix: Lightweight, sterile potting soil (avoid garden soil—it’s too dense!). Quantity: 1–2 cups per container.
- ● Containers: Small pots (3–4 inches deep), plastic cups, or seed trays with drainage holes. Quantity: 1 per seed type.
- ● Water: Room-temperature, filtered water (chlorine-free if possible).
- ● Spray bottle: For gentle watering (avoids disturbing seeds).
- ○ Clear plastic wrap or dome: To retain humidity (optional but helpful for slow-germinating seeds).
- ● Plant labels: Toed sticks or markers to track seed types.
- ○ Heat mat (optional): For warm-weather seeds (e.g., peppers, tomatoes). Spec: 70–85°F range.
- ○ Grow lights (optional): LED or fluorescent bulbs (12–16 hrs/day). Spec: Full-spectrum, 6000K–6500K.
- ● Tweezers: For delicate seed placement.
- ● Notebook/journal: To log germination progress (dates, conditions, observations).
- ● Warmth: Ideal germination temps vary by seed (check seed packet!). Most thrive at 65–75°F.
- ● Humidity: Keep soil moist (not soggy)—aim for 60–70% humidity during germination.
- ● Light (post-sprout): Bright, indirect light (direct sun can scorch seedlings).
How to watch a seed transform into a thriving plant
Every gardener's journey starts here—where tiny seeds become lush, living plants.
🌱 Step 1: Choose the Right Seeds and Prepare the Soil
Pick seeds suited to your climate and growing conditions—cool-season crops like lettuce or peas thrive in spring, while tomatoes and peppers need warmth. I always check the packet for days to germination; fast germinators like radishes pop up in 3-5 days, while slow ones like parsley may take 2-3 weeks. Fill your container with light, airy seed-starting mix (never garden soil—it's too dense). Moisten it until it feels like a damp sponge, not soggy.
Press the soil down gently to remove air pockets, then create small holes with your finger or a pencil. The depth depends on seed size—small seeds like basil go in just ¼ inch deep, while larger ones like beans need 1 inch. Here's the thing—planting too deep slows germination because the seedling has to work harder to reach light.
💧 Step 2: Plant and Maintain Ideal Moisture
Drop 1-2 seeds per hole (you'll thin later) and cover lightly with soil, matching the original depth. Mist gently with a spray bottle until the surface looks damp but not wet. The key is keeping moisture consistent—too dry and seeds won't sprout; too wet and they'll rot before germinating. I like to place trays on a shallow dish of water to maintain humidity without overwatering.
Place your container in a warm spot (65-75°F works for most seeds). A seedling heat mat speeds things up if your home runs cooler. Watch for condensation on the dome or plastic wrap—this means moisture levels are perfect. Once you see the first green shoots (usually within 7-14 days), remove any cover immediately to prevent fungal growth.
☀️ Step 3: Provide Light and Air for Healthy Growth
The moment seedlings emerge, they need 12-16 hours of light daily. A south-facing window rarely cuts it—you'll see leggy, weak stems reaching for light. I use a grow light on a timer, keeping it 2-3 inches above seedlings and raising it as they grow. You'll know they're getting enough light when leaves are dark green and compact, not pale and stretched.
Thin seedlings to one per cell when they have 2 true leaves (the first pair are cotyledons). Snip the weaker one at soil level with scissors—don't pull, or you'll disturb the roots of the plant you're keeping. This might seem cruel, but crowded seedlings compete for nutrients and grow poorly. After thinning, give them a light watering to settle the soil.
🌿 Step 4: Transition to Independent Growth
When seedlings have 3-4 true leaves and strong stems, they're ready for their first real test. Start by moving them to a slightly cooler spot (55-65°F nights) for 6-8 hours to toughen them up. Gradually increase outdoor time over 7-10 days, ending with full sun exposure. This process, called hardening off, prevents shock when they go into the garden.
Watch for signs of stress—wilting or yellowing leaves mean they're not ready yet. Once they're thriving outdoors, transplant carefully, keeping the soil ball intact. Water deeply after planting to help roots establish. Real talk: The first few weeks after transplanting are critical. Keep an eye on moisture and watch for pests, which love tender new plants.
⏰ Step 5: Maintain and Celebrate Growth
Now the real magic happens. Your seedlings will grow rapidly with proper care—water when the top inch of soil feels dry, and feed with a balanced fertilizer every 2-3 weeks. You'll notice new leaves forming at the top, and stems thickening as roots spread. This is your reward for patience.
Here's where it gets fun—watch for the first flowers or fruits forming, depending on your plant. For herbs like basil, pinch off the top set of leaves to encourage bushier growth. For vegetables, harvest regularly to keep production going. The transformation from seed to plant is one of nature's most satisfying processes, and you're now part of it.
Tips & tricks for perfect seed germination
Small details make all the difference when you're waiting for that first green shoot to appear.
Germination Timing: The 3-5 days for fast germinators like radishes or 2-3 weeks for slow ones like parsley are just averages—environment matters. If your kitchen stays cooler than 65°F, germination will take longer. Place your seed trays on a heating pad set to 75°F to speed things up, especially for slower seeds. I've seen parsley pop up in just 10 days with consistent warmth!
Soil Depth Matters: That ¼ inch depth for small seeds like basil isn't just a suggestion—it's crucial. Planting them deeper forces seedlings to push through more soil, which can exhaust their energy reserves before they even emerge. Use a pencil to mark the exact depth if you're unsure. For larger seeds like beans, that 1 inch depth gives them room to grow without surface drying.
Lighting Strategy: The 12-16 hours of light daily is non-negotiable, but quality matters too. If using a grow light, position it 2-3 inches above seedlings and raise it as they grow. I notice seedlings stretch toward light when they're not getting enough—this is called etiolation. Rotate trays daily so all sides get even exposure, preventing lopsided growth.
Hardening Off: Those 6-8 hours of cooler nighttime exposure in Step 4 are your seedlings' first taste of real-world conditions. Start with just 2 hours on day one, then add 1 hour each subsequent day. Watch for wilting—it's normal! The plants are adjusting. By day 7-10, they should handle full sun without stress. This gradual process prevents transplant shock that can kill tender seedlings.
Pro Tips for Seed Grows Into A Plant
- Small details make all the difference when you're waiting for that first green shoot to appear.
- Germination Timing: The 3-5 days for fast germinators like radishes or 2-3 weeks for slow ones like parsley are just ...
- Soil Depth Matters: That ¼ inch depth for small seeds like basil isn't just a suggestion—it's crucial. Planting them ...
Frequently asked questions
Got questions about how a seed grows into a plant? You're not alone! Here are some of the most common queries—along with straightforward answers to help you succeed.
How long does it take for a seed to grow into a plant?
The time varies by plant type, but most seeds sprout within 5–14 days under ideal conditions (warmth, moisture, and light). Fast growers like radishes sprout in 3–5 days, while slow starters like tomatoes or peppers may take 1–3 weeks. Always check the seed packet for specifics!
What if my seed won’t sprout? What’s the problem?
If your seed isn’t sprouting, check these common issues:
- Too cold – Many seeds need warmth (70–85°F) to germinate. Use a heat mat or move pots to a sunny windowsill.
- Not enough moisture – Keep soil consistently damp (not soggy). A spray bottle helps avoid disturbing seeds.
- Old or low-quality seeds – Test viability by soaking seeds in water; if they sink, they’re likely good. Store seeds in a cool, dry place.
- Buried too deep – Most seeds need light to germinate. Plant them at a depth 2–3x their size (e.g., a ½-inch seed goes 1 inch deep).
Still stuck? Try scarifying (nick the seed coat) or soaking overnight for stubborn varieties.
Can I grow a plant from any seed I find outside?
Not all seeds are safe or reliable! Some may be invasive, hybridized, or treated with chemicals (like those from grocery store produce). Stick to seeds from:
- Reputable nurseries or seed companies (e.g., Baker Creek, Burpee).
- Heirloom or open-pollinated varieties for guaranteed growth.
- Organic sources if you’re avoiding pesticides.
If you’re foraging, research the plant first—some "seeds" (like those from nightshade family) can be toxic!
Do seeds need light to grow into plants?
Most seeds don’t need light to germinate—they sprout in darkness! However, once they’ve sprouted (when the seedling emerges), they’ll need 4–6 hours of sunlight daily (or a grow light). Exceptions: Light-loving seeds (like lettuce or petunias) may benefit from surface planting or a clear lid to trap warmth.
What’s the best soil for seed germination?
Use a lightweight, sterile seed-starting mix (not garden soil). Look for blends labeled "seed starting" or "potting mix" with:
- Good drainage (avoids rot).
- Peat moss, coco coir, or perlite for aeration.
- pH balanced for seeds (most prefer 6.0–7.0).
Pro tip: Sterilize soil by baking it at 200°F for 30 minutes to kill fungi/bacteria. Repurpose old mix? Mix in 10% perlite to refresh it.
Can I speed up germination?
Yes! Try these tricks:
- Soak seeds overnight (except large seeds like beans—just dampen the soil).
- Use a heat mat (70–85°F) or place pots on top of the fridge.
- Cover containers with plastic wrap to trap humidity (remove once sprouts appear).
- Try stratification for slow germinators (like apples or peaches)—mix seeds with damp sand and refrigerate for weeks.
Patience is key, but these hacks can cut wait times by 30–50%!
Wrapping up and next steps
Watching a seed grow into a plant is one of nature’s most rewarding processes—and now, you’re ready to nurture that magic! 🌱 From selecting the right soil to patiently waiting for those first sprouts, every step matters. Remember, even the smallest efforts can lead to lush, thriving greenery.
Ready to take the next step? Start with just one seed—whether it’s a bold sunflower or a delicate herb—and let your green thumb shine! Plant today, and soon, you’ll be celebrating a flourishing garden of your own. Happy growing! 🌿