
Lawn
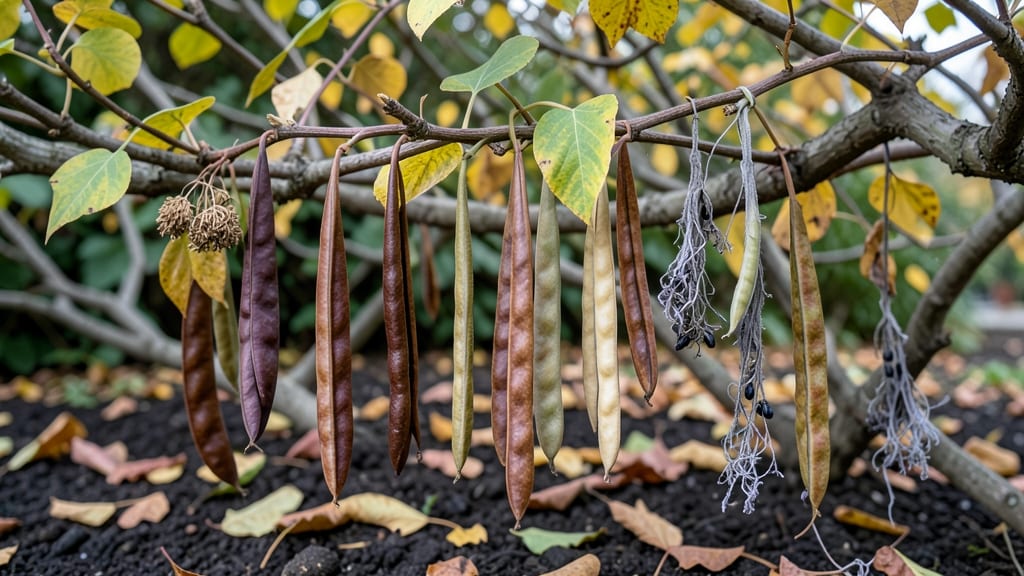
Harvesting wisteria seed pods without wrestling with stubborn twists is easier than you think. 🌿 These woody capsules hold the key to growing your own wisteria vines, but timing and technique make all the difference. I’ve spent years collecting them—and learning which methods actually work.
The best time to harvest is when pods turn brown and papery in late summer or early fall, just before they split open. You’ll need gloves (the pods are tough but can be sharp) and pruning shears to cut them cleanly from the vine.
Skip the twisting—it damages the pods and wastes seeds. Once you’ve gathered them, let the pods dry completely in a well-ventilated area for a few weeks.
Crack them open to reveal the flat, brown seeds inside, then soak them in warm water for 24 hours to soften the hard outer shell. This step dramatically improves germination rates. For best results, sow seeds in pots with sandy, well-draining soil and keep them moist but not soggy.
Germination can take 4-8 weeks, so patience is key. These vines grow slowly at first, but with the right care, you’ll have a strong, healthy plant ready for transplanting in a year or two.
📚 In This Guide
- What you need
- Instructions
- Tips and common mistakes
- Wrapping up and next steps
What you need
- ● Gloves (heavy-duty) – 1 pair (to protect against thorns and sap). Opt for gardening gloves with reinforced palms.
- ● Pruning shears or loppers – 1 pair (for clean cuts; bypass pruners work best for delicate stems).
- ● Sharp knife or scissors – 1 (for trimming pod stems without crushing them).
- ● Bucket or large bowl – 1 (with a wide opening to catch pods easily).
- ● Newspaper or cardboard – 1 sheet (to line your workspace and protect surfaces from sap stains).
- ● Rubbing alcohol (70%+) – 1 small bottle (to sterilize tools between cuts).
- ● Twist ties or rubber bands – 5–10 (to bundle harvested pods for drying).
- ● Paper towels or cloth rags – 1 roll (for wiping sap off hands/tools).
- ● Ladder or step stool – If your wisteria is tall (ensure it’s stable and rated for your weight).
- ● Spray bottle with water – To mist pods if they’re too dry during harvest.
- ● Labeling tags & marker – For tracking pod varieties or harvest dates.
- ● Seed-starting trays – If you plan to germinate seeds immediately.
- ● Safety goggles – If you’re extra cautious about sap or debris.
How to harvest wisteria seed pods without the twist
Skip the tangled vines and stubborn pods—here's the easy way to collect wisteria seeds.
🌿 Step 1: Identify Mature Seed Pods
Wait until pods turn from green to brown and papery—this signals full maturity and readiness for harvest. I check mine in late summer or early fall when the pods start splitting open naturally. The pods should feel dry to the touch and make a slight rustling sound when shaken gently.
Don't harvest too early—immature pods won't contain viable seeds. If you see green streaks or dampness inside, wait another week. The pods should also be firm but hollow-sounding when tapped lightly with your fingernail.
✂️ Step 2: Gather Tools and Approach the Vine
Grab a pair of pruning shears and a small bucket or paper bag for collecting. I like to work on a dry, overcast day when the pods are less likely to split prematurely. Stand on a stable ladder or stool if the vine is high—never reach awkwardly, which can damage both you and the plant.
Wear gloves to protect your hands from the pods' rough texture and potential sap. The sap can irritate skin, so I always have a damp cloth handy to wipe my hands between pods. Approach the vine calmly—sudden movements can cause pods to drop unexpectedly.
🪴 Step 3: Harvest Pods Without Damaging the Vine
Cut the pods directly from the vine using your pruning shears, leaving about ½ inch of stem attached. This prevents the vine from bleeding sap excessively and makes the pods easier to handle. Place each pod in your collection container as you cut—don't let them pile up on the ground, where they could crack open.
Work systematically from the bottom of the vine upward. This ensures you don't miss any pods and makes the process feel more manageable. If a pod resists, gently twist it instead of pulling—this reduces the chance of breaking the vine. You'll know you're doing it right when the pod separates cleanly with minimal resistance.
⏰ Step 4: Process and Store the Harvested Pods
Once you've collected all the pods, spread them out on a clean, dry surface to air-dry for 3-5 days. This step is crucial—wet pods won't store well and may develop mold. Place them in a well-ventilated area away from direct sunlight, which can cause them to overheat and crack.
After drying, open each pod carefully with your fingers or a small knife. You'll find flat, brown seeds inside—each pod typically contains 2-4 seeds. Remove the seeds and store them in a sealed container with a desiccant packet to keep them dry. Label the container with the date and variety for future reference.
💧 Step 5: Plant or Store Seeds for Future Use
If you're ready to plant, sow the seeds immediately in a well-draining mix at a depth of ¼ inch. Wisteria seeds need a cold stratification period to germinate, so I place the pots outside in a protected spot during winter. You'll see germination in 6-12 months, so patience is key.
For seeds you're not planting right away, store them in a cool, dark place like a refrigerator. Check them periodically to ensure they remain dry and free from pests. With proper storage, wisteria seeds can remain viable for up to 3 years, though germination rates may decline over time.
Tips & tricks for stress-free wisteria seed pod harvesting
Took me a while to figure these out, so here goes—simple ways to make your wisteria seed collection effortless and successful.
Pod Maturity Check: The brown-and-papery test is your best friend. Run your fingernail along the pod—if it makes a hollow sound and feels completely dry, it's ready. I've learned to check pods in the morning when they're less likely to split from overnight humidity. If you're unsure, wait another 2-3 days rather than risking immature seeds.
Harvesting Strategy: Work from the bottom up to avoid missing pods hidden in the vine's shadows. I use a small notepad to mark sections I've already checked—this prevents double work and ensures you don't leave any behind. For stubborn pods, gently twist while pulling downward rather than tugging sideways, which preserves the vine's structure.
Processing Wisdom: The 3-5 day drying period is non-negotiable—wet pods develop mold faster than you'd think. I place mine on a mesh screen over a tray to catch any seeds that might fall out prematurely. Once dry, I crack pods over a clean sheet of newspaper to make cleanup easier and avoid losing seeds in the grass.
Storage Solution: Don't skip the desiccant packet! I've seen seeds lose viability within months when stored without one. Label your containers with the harvest date—this helps track seed freshness, especially important since germination rates drop after the first year. For extra protection, I place containers in a sealed plastic bag before putting them in the fridge.
Pro Tips for Seed Pods Wisteria
- Took me a while to figure these out, so here goes—simple ways to make your wisteria seed collection effortless and su...
- Pod Maturity Check: The brown-and-papery test is your best friend. Run your fingernail along the pod—if it makes a ho...
- Harvesting Strategy: Work from the bottom up to avoid missing pods hidden in the vine's shadows. I use a small notepa...
Frequently asked questions
Got questions about wisteria seed pods?
You’re not alone! Here are answers to the most common queries—from timing to troubleshooting—so you can harvest with confidence.
When do wisteria seed pods ripen and fall?
Wisteria seed pods typically ripen in late summer to early fall (August–October, depending on your climate). They’ll turn brown, dry out, and split open on their own—no need to rush! If they’re still green, give them a few more weeks. Pro tip: Shake the vine gently to encourage natural release.
Are wisteria seed pods toxic to pets or kids?
Yes! All parts of wisteria—including seed pods—contain wisterin, a compound that can cause nausea, vomiting, or even respiratory distress if ingested. Keep them out of reach of curious paws and little hands. Always wear gloves when handling them, and dispose of pods safely in sealed trash.
How do I remove seed pods without twisting the vine?
Use sharp pruning shears or a small saw to snip pods at the base. Avoid pulling or yanking, which can damage the vine. For stubborn pods, wrap a cloth around your hand to protect against sharp edges. Work in dry conditions to prevent slips—safety first!
Can I propagate wisteria from seed pods?
While possible, growing wisteria from seed pods is slow and unreliable—it can take 5+ years for seedlings to flower! Most gardeners prefer grafting or root cuttings for faster, more predictable results. If you’re determined, soak pods in water for 24 hours before planting in well-draining soil.
What’s the best time of day to harvest seed pods?
Harvest on a cool, overcast morning when pods are dry but not brittle. Avoid midday heat, which can make them stickier and harder to remove. Early morning also reduces the risk of attracting bees or other pests drawn to the pods’ sweet scent.
What can I do with leftover seed pods?
Get creative! Dry pods make rustic decorations, seed paper, or even natural confetti for weddings. Crush them for mulch (in small amounts) or compost them—just avoid composting if pets have access. Never burn them outdoors, as wisterin can release harmful fumes.
Wrapping up and next steps
Harvesting wisteria seed pods doesn’t have to be a tangled mess—with the right tools and techniques, you can collect them stress-free! Whether you’re pruning for beauty, propagation, or simply tidying up, these pods are a treasure waiting to be unlocked.
Now that you’re armed with tips and answers to common questions, it’s time to roll up your sleeves and enjoy the process.
🌱 Next step: Grab your gloves, snips, and a bucket, then head outside to transform those dangling pods into something useful—your garden (or someone else’s!) will thank you. Happy harvesting! 🌿