
Lawn
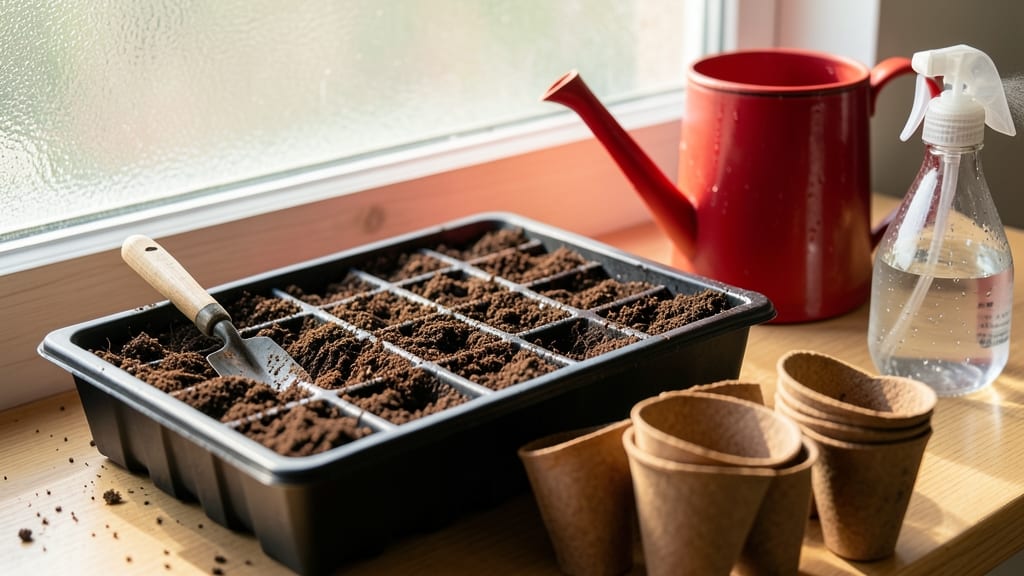
The right seed starter potting soil can turn a flat seed into a sturdy seedling in just 10-14 days. 🌱 I’ve wasted weeks using garden soil or peat-heavy mixes that either drowned roots or dried out too fast—until I found the perfect balance of moisture retention and airflow.
Look for sterile, lightweight mixes labeled for seed starting, not general potting soil. The ideal blend holds moisture without staying soggy, drains excess water, and stays free of weeds or pathogens. Pre-moisten the mix before planting to create a consistent environment for tiny roots.
Once your seeds sprout, you’ll notice bold green leaves and strong stems within days. The key is keeping the soil evenly damp (not wet) and using clear containers to monitor moisture levels. No more guessing—just reliable, fast growth.
Avoid common pitfalls like overwatering (which causes mold) or using old soil (which may harbor diseases). Sterilize reused containers with a 10% bleach solution, and always use fresh mix for each planting round.
📚 In This Guide
- What you need
- Instructions
- Tips and common mistakes
- Wrapping up and next steps
What you need
- ● Seed starter potting soil (50% of mix): Lightweight, sterile blend (e.g., Pro-Mix BX or FoxFarm Seedling Mix). Aim for 4–6 cups for a standard 1020 sq ft tray.
- ● Perlite or vermiculite (25% of mix): Adds aeration and moisture retention. Use 2–3 cups (perlite for grit, vermiculite for moisture).
- ● Coco coir or peat moss (25% of mix): Enhances water-holding capacity. 2–3 cups works well (opt for coco coir for sustainability).
- ● Seedling trays or pots: 2–4 inch cells or biodegradable pots (e.g., Bio-Degradable Jiffy Pellets).
- ● Seeds: Choose fast-sprouting varieties like basil, lettuce, or marigolds for quick results!
- ● Spray bottle: For gentle watering (avoid over-saturating).
- ● Trowel or small shovel: For mixing ingredients evenly.
- ● Worm castings (10% of mix): Boosts nutrients—add ½–1 cup for a nutrient-rich kick.
- ● Slow-release fertilizer (e.g., Osmocote): Mix in 1 tsp per 4 cups of soil for extra growth.
- ● Heat mat: Speeds up germination in cooler climates (set to 70–75°F).
- ● Clear plastic dome: Retains humidity for delicate seeds (remove once sprouts appear!).
- ● pH test kit: Ensure your mix is 5.8–6.5 pH—ideal for most seedlings.
Step-by-step guide to creating a moisture-retentive seed starter mix
Here's how to whip up a perfect blend that keeps seeds hydrated and seedlings sprouting quickly.
🌱 Step 1: Combine Base Materials for Lightweight Structure
Start with 50% peat moss or coconut coir—this holds moisture while allowing airflow. I like coconut coir because it's sustainable and drains better than peat. Add 30% perlite or vermiculite next—this creates air pockets so roots don't suffocate. Mix these dry ingredients first in a large container, breaking up any clumps with your hands until you get a fluffy, even blend.
Don't skip the perlite—it's what keeps the mix from becoming compacted. You'll know it's right when the mix feels like damp sandpaper, not a heavy brick. If you're using vermiculite instead, it'll hold more moisture but may take slightly longer to dry out between waterings.
💧 Step 2: Add Water-Retaining Components
Now stir in 20% compost or worm castings—this provides nutrients while improving moisture retention. I use a well-aged compost that's dark and crumbly, not chunky. For extra moisture control, add a handful of hydrogel crystals (about 1 tablespoon per quart of mix). These little beads expand when wet and release moisture slowly to seedlings.
Mix everything thoroughly until the hydrogel crystals are evenly distributed. The blend should smell earthy, not sour or chemical. If it smells funky, your compost needs more aging time—fresh compost can inhibit germination.
✂️ Step 3: Adjust Consistency for Ideal Moisture
Gradually add warm water while mixing until the soil reaches a consistency like a damp sponge—it should hold together when squeezed but not drip. I like to use a spray bottle for this step because it lets me control the moisture precisely. Too much water makes the mix gloppy; too little leaves seeds struggling to germinate.
Test your mix by filling a small container and pressing it gently. If water beads up on the surface, it's too wet. If it crumbles when touched, add a little more water and mix again. The perfect mix should feel like a well-wrung-out sponge—firm but not soggy.
☀️ Step 4: Store Until Ready for Use
Let the mix sit for 24 hours in a sealed container. This lets the hydrogel crystals fully absorb water and the compost settle. I keep mine in a 5-gallon bucket with a lid to maintain moisture. After 24 hours, give it one final stir—you'll notice the mix feels lighter and more uniform.
Use this mix within 2 weeks for best results. If stored properly, it'll stay fresh and ready for your next planting session. The hydrogel crystals keep working even after storage, so your seeds get consistent moisture from day one.
⏰ Step 5: Use Immediately for Fast Germination
Fill your seed trays or pots with the mix, pressing down lightly so it's firm but not compacted. Moisten again with a misting bottle until the surface looks damp but not wet. Plant your seeds according to their depth requirements—usually twice the seed diameter—and cover lightly.
Here's the thing—this mix keeps seeds moist for up to 7 days without additional watering, which is perfect for slow-germinating varieties. You'll see sprouts faster because the roots get consistent hydration from the hydrogel. Just keep an eye on moisture after germination begins—you'll need to water more frequently once seedlings emerge.
Tips & tricks for perfect seed starter mix
Common pitfalls—and how to sidestep every one when crafting your ideal seed starter blend.
Base Material Balance: Stick to the 50-30-20 ratio (peat moss/coir, perlite/vermiculite, compost) for optimal airflow and moisture retention. I learned this the hard way after ruining three batches with too much compost—it made the mix too dense and slowed germination. Break up any clumps in the peat moss or coir before mixing, or you'll end up with uneven moisture distribution in your seed trays.
Hydrogel Crystal Secret: Those 1 tablespoon per quart hydrogel crystals are a game-changer for moisture control. They expand dramatically when wet, creating a reservoir that keeps seeds hydrated for up to 7 days. Here's what nobody tells you—store your hydrogel crystals in a sealed container with a bit of water before adding to your mix. This pre-hydration ensures they're ready to work immediately when you plant your seeds.
Compost Quality Check: Fresh compost is a common mistake that can actually inhibit germination. Look for well-aged compost that's dark and crumbly, not chunky or smelly. If you're unsure, age your compost for at least 6 months before using. The 20% compost in your mix provides nutrients, but fresh compost can introduce harmful bacteria that compete with your seedlings for resources.
Storage Wisdom: That 24-hour resting period in Step 4 is crucial—it lets the hydrogel crystals fully absorb water and the compost settle. I store my mix in a 5-gallon bucket with a lid to maintain moisture, but you can also use airtight containers. After the 24 hours, give it one final stir before using. The mix will feel lighter and more uniform, ready to give your seeds the perfect start. Remember, this mix stays fresh for up to 2 weeks when stored properly.
Pro Tips for Seed Starter Potting Soil
- Common pitfalls—and how to sidestep every one when crafting your ideal seed starter blend.
- Base Material Balance: Stick to the 50-30-20 ratio (peat moss/coir, perlite/vermiculite, compost) for optimal airflow...
- Hydrogel Crystal Secret: Those 1 tablespoon per quart hydrogel crystals are a game-changer for moisture control. They...
Frequently asked questions
What’s the best ratio of seed starter potting soil to perlite or vermiculite?
For most seeds, a 50/50 mix of seed starter potting soil and perlite/vermiculite works well. This balance improves drainage while retaining moisture—critical for tiny roots! Adjust slightly for heavy soils (add more perlite) or sandy soils (add more soil).
How long can I store unused seed starter potting soil?
Store it in a cool, dry place (like a sealed bin) for up to 6 months. Over time, nutrients may degrade, and moisture retention can drop. If it smells musty or feels clumpy, toss it—fresh soil ensures better germination!
Why do my seeds rot even with a moisture-retentive mix?
Overwatering is the #1 culprit! Seed starter soil should stay damp, not soggy. Use a spray bottle or bottom-watering tray to avoid drowning seeds. If soil feels like a wrung-out sponge, it’s too wet. Let it dry slightly between waterings.
Can I reuse seed starter potting soil for new seeds?
Not ideal! Reused soil may harbor fungus, bacteria, or pests from failed seeds. Sterilize it by baking at 200°F for 30 minutes (if safe) or compost it. Fresh soil gives seedlings the clean, nutrient-rich start they need.
What’s a budget-friendly alternative to seed starter potting soil?
Mix 50% coconut coir (or peat moss) + 30% compost + 20% perlite. Avoid garden soil—it’s too dense and may contain weeds/seeds. Test small batches first to adjust moisture retention for your climate!
Wrapping up and next steps
Choosing the right seed starter potting soil is your secret weapon for nurturing fast, healthy seedlings! A moisture-retentive mix packed with nutrients and proper aeration gives your tiny sprouts the best start—no guesswork needed.
With the right blend, you’ll watch those first leaves unfurl in record time, setting the stage for a thriving garden.
Ready to dive in? Grab your supplies, follow the steps, and soon you’ll be transplanting robust seedlings into your garden with confidence! 🌱✨