
Lawn
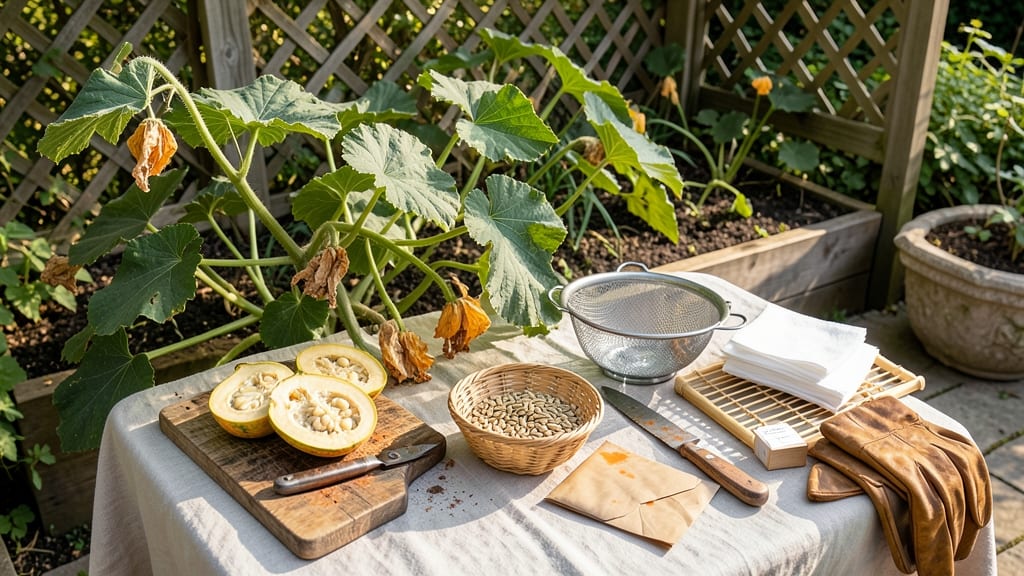
Saving squash seeds from this year’s harvest means next summer’s vines will grow stronger and more productive than ever before. 🌱 The process is simpler than it sounds—just pick the right fruit, extract the seeds, and cure them properly.
I’ve saved seeds for three years now, and my plants grow more reliably each season, with fewer pests and better yields.
You’ll need just a few supplies: mature squash, a knife, a bowl of water, and some breathable paper bags for drying. The key is selecting healthy, disease-free fruit—look for thick-skinned varieties like butternut or acorn squash, as they store seeds best.
Avoid hybrid squash (they won’t produce true-to-type seeds), and keep varieties isolated if you’re growing multiple types.
Once you’ve dried the seeds completely, store them in a cool, dark place where they’ll stay viable for 3-5 years. The first time I did this, I nearly threw out my seeds because they looked shriveled—but they sprouted perfectly fine the next spring.
Properly saved seeds mean fewer trips to the garden center and plants that thrive from day one.
This method works for both beginners and experienced gardeners, though advanced growers can experiment with isolation techniques for rare varieties. Whether you’re saving seeds for sentimental reasons or just love the idea of growing from your own harvest, this is how you do it right—every time.
📚 In This Guide
- What you need
- Instructions
- Tips and common mistakes
- Wrapping up and next steps
What you need
- ● Mature squash varieties: Choose 3–5 healthy, disease-free vines (e.g., butternut, acorn, or pumpkin). Pick varieties you love—they’re the stars of next year’s garden!
- ● Sharp pruning shears or knife: For cleanly slicing open squash to extract seeds.
- ● Colander or fine mesh strainer: A 1–2 mm mesh (or smaller) to rinse seeds thoroughly.
- ● Large bowl or bucket: For soaking seeds (aim for a 5–10 gallon capacity).
- ● Water: Enough to submerge seeds completely (about 2–3 gallons per batch).
- ● Paper towels or clean cloth: For drying seeds (use unbleached or seed-saving approved towels).
- ● Air-tight containers: Small paper envelopes (for short-term storage) or glass jars with tight lids (for long-term). Label them right away!
- ● Permanent marker or labels: To note variety, date, and location (e.g., “Butternut Squash – 2024 – Zone 7”).
- ○ Desiccant packets (optional): For extra moisture control in jars (place 1–2 packets per container).
- ● Seed catalog or notebook: To track germination rates and notes on performance.
- ● Patience: Seeds need 7–14 days to dry fully—don’t rush!
- ● Disease-free squash: Avoid seeds from squash with powdery mildew or rot.
- ● Cool, dry storage space: Ideal temp: 40–50°F (4–10°C) and 30–50% humidity.
- ● Sunny window or dehydrator: For drying seeds (if not using a well-ventilated area).
How to save squash seeds for next year’s garden
Here’s my foolproof method for collecting, drying, and storing squash seeds so they’re ready to plant when spring arrives.
🌱 Step 1: Select Healthy, Disease-Free Squash
Choose the best squash from your harvest—look for fully ripened fruit with no blemishes, soft spots, or signs of rot. I always pick the largest, most vibrant examples because they’ve had the most time to develop strong seeds. Avoid any squash that touched the ground or showed powdery mildew, as those seeds may not germinate well.
For summer squash like zucchini or yellow crookneck, wait until the skin hardens and the color deepens before harvesting. For winter squash like butternut or acorn, let them cure on a dry surface for 2-3 weeks until the stem dries and the rind feels tough. This ensures the seeds inside are fully mature.
🌿 Step 2: Extract Seeds and Rinse Thoroughly
Cut the squash open and scoop out the seeds along with the surrounding stringy pulp. Place them in a large bowl and cover with warm water. Let them soak for 24 hours—this helps separate the seeds from the fibrous material. Stir occasionally so nothing sticks to the bottom.
After soaking, drain the water and rinse the seeds gently under lukewarm running water to remove any remaining pulp. Use your fingers to pick out any debris or immature seeds (they’ll feel soft or shriveled). Spread them on a clean, dry towel to air-dry slightly for 1-2 hours before moving to the next step.
💧 Step 3: Dry Seeds Completely Before Storage
Spread the rinsed seeds in a single layer on a paper towel or parchment-lined baking sheet. Place them in a warm, dry spot (like a sunny windowsill or dehydrator set to 95°F) for 3-5 days. Stir them gently once a day to ensure even drying. Properly dried seeds will feel hard and papery—if they still feel damp or sticky, they need more time.
Test for dryness by picking up a few seeds: if they crackle slightly when crushed between your fingers, they’re ready. Store them in a small envelope or airtight container with the squash variety and harvest year written on the outside. Keep them in a cool, dark place like a pantry or seed vault.
⏰ Step 4: Test Viability Before Next Planting Season
Before planting saved seeds, do a quick germination test to ensure they’re still viable. Place 10 seeds between two damp paper towels in a sealed plastic bag. Keep them in a warm spot (70-75°F) for 5-7 days. Check daily—if 80% or more sprout, your seeds are good to go. If fewer than half sprout, store the remaining seeds in the freezer for another year.
Label your seeds with the variety name, harvest year, and any special notes (like disease resistance or flavor traits). I also jot down the planting date from the previous year to help me time things right for next season. This way, you’ll always have fresh, vigorous squash ready to grow.
Tips & tricks for perfect seed preservation
Saving squash seeds successfully comes down to these key details that make all the difference between good and great germination next season.
Selection Matters: In Step 1, when choosing your squash, pay special attention to the stem area. The stem should be completely dry and woody—this is your best indicator that the seeds inside are fully mature. I've learned the hard way that squash with even slightly green stems often yields seeds that won't germinate properly. Also, avoid any squash that developed on vines showing signs of disease, even if the fruit looks good externally.
Soaking Secret: That 24-hour soak in Step 2 isn't just about separating seeds—it's also sanitizing them. The warm water helps kill any fungal spores that might be clinging to the seeds. I like to add a teaspoon of unscented bleach to the soaking water for extra protection against mold, then rinse thoroughly afterward. This simple step has dramatically improved my germination rates over the years.
Drying Strategy: For Step 3, don't be tempted to rush the drying process. Those 3-5 days at 95°F are crucial for removing all moisture from the seeds' outer shells. I've found that using a small fan on low setting helps speed up evaporation without creating drafts that could scatter seeds. Place your drying tray on a screen or rack to allow air circulation on all sides—this prevents mold growth during the drying period.
Viability Test: When doing your germination test in Step 4, I recommend testing a second batch of 10 seeds after 3 days if you don't see good results by day 5. Some varieties germinate more slowly, and catching this early gives you time to adjust your storage plans. Keep a small notebook by your seed storage area to track which varieties perform best each year—this becomes incredibly valuable information for future planting decisions.
Pro Tips for Squash Seed Saving
- Saving squash seeds successfully comes down to these key details that make all the difference between good and great ...
- Selection Matters: In Step 1, when choosing your squash, pay special attention to the stem area. The stem should be c...
- Soaking Secret: That 24-hour soak in Step 2 isn't just about separating seeds—it's also sanitizing them. The warm wat...
Frequently asked questions
Got questions about squash seed saving? You’re not alone! Here are answers to the most common concerns to help you master the process like a pro.
How do I know when my squash seeds are fully mature and ready to harvest?
Seeds are ready when the squash is fully ripe—usually overripe (soft, wrinkled skin) or when the vines start dying back. For winter squash (like butternut or acorn), wait until the fruit is hard and dry. For summer squash (like zucchini), harvest seeds from overripe fruit to ensure maturity. Pro tip: Split open the squash and check for plump, firm seeds—if they’re still soft, they need more time!
Can I save seeds from hybrid squash varieties?
Not reliably! Hybrid squash (marked with an F1 label) won’t produce true-to-type seeds—meaning the next generation may look or taste completely different. Stick to heirloom or open-pollinated varieties (like ‘Waltham Butternut’ or ‘Black Beauty’) for consistent results. If you’re unsure, check the seed packet or ask your local nursery!
What’s the best way to dry squash seeds if I don’t have a dehydrator?
No dehydrator? No problem! Spread seeds in a single layer on a paper towel or parchment paper in a warm, dry spot (like a sunny windowsill or near a heater). Stir them daily to prevent mold. They’re dry when they’re hard and rattly when shaken. For extra speed, use a fan on low to circulate air—just avoid direct heat, which can crack seeds!
How do I prevent cross-pollination between different squash varieties?
Squash plants (especially summer and winter types) are heavily cross-pollinated by bees, so isolation is key. For best results, plant varieties at least 1 mile apart or use row covers during flowering. If space is tight, save seeds from one variety per season and label them clearly. Fun fact: Some gardeners even hand-pollinate flowers with a paintbrush for purity!
What should I do if my stored squash seeds sprout mold or smell bad?
Discard them immediately! Moldy or funky seeds mean poor germination or potential rot. To avoid this, ensure seeds are fully dry before storing and keep them in a cool, dark, airtight container (like a glass jar with a lid). If humidity is an issue, add a silica gel packet or a damp paper towel to absorb moisture. Pro tip: Test a few seeds in warm water—if they sink, they’re still viable!
Wrapping up and next steps
Saving squash seeds is a rewarding way to preserve heirloom varieties and ensure a bountiful harvest year after year! By following these simple steps—selecting healthy fruit, extracting seeds, drying them properly, and storing them correctly—you’ll be ready to plant with confidence. 🌱
Now that you’re equipped with the know-how, why not take the next step? Try saving seeds from your favorite squash variety this season and share your success with fellow gardeners. Happy growing!