
Size
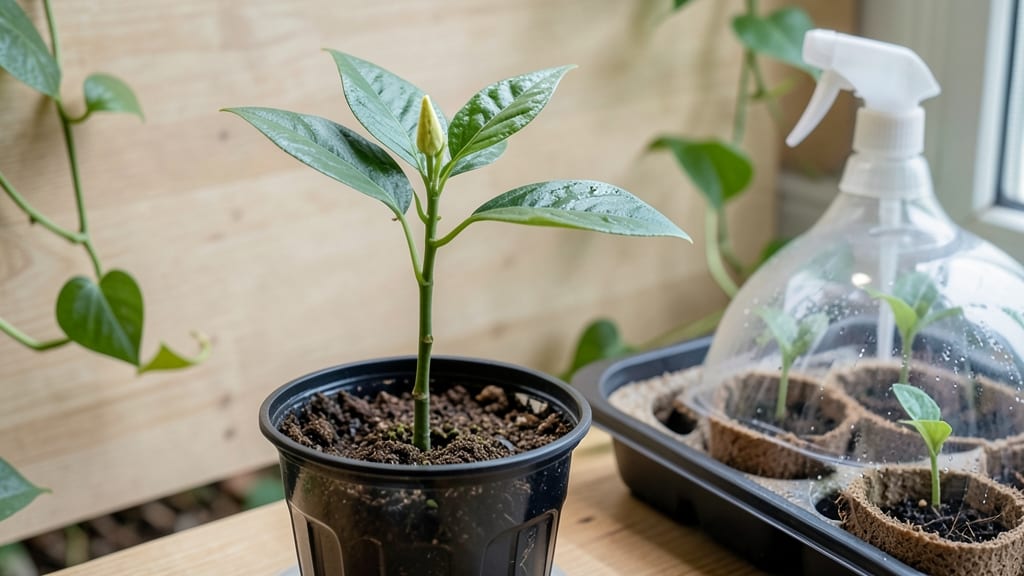
Growing a starfruit tree from a starfruit seed in your garden means tropical fruit in your own backyard—if you live where it thrives. 🌴 The journey starts with patience (those seeds can take 3-6 months to sprout) and a warm, sunny spot, but the payoff is worth it: glossy green fruit with star-shaped cross-sections perfect for snacking or garnishing.
You’ll need a well-draining soil mix (equal parts potting soil and perlite), a small pot or seed tray, and a sunny windowsill or greenhouse.
Starfruit trees love heat—75-90°F is ideal—and they can’t handle frost, so if you’re outside zone 10, plan to grow them in containers and bring them indoors in winter. The key is mimicking their natural tropical habitat.
Once sprouted, your seedling will grow 6-12 inches in its first year, but it won’t fruit for 3-5 years—so this is a long-term project. Prune regularly to encourage a strong structure, and fertilize lightly with citrus or fruit-tree fertilizer every 2-3 months.
The first fruits might be small, but with care, you’ll get there.
Container growing works well, but choose a 5-gallon pot minimum for mature trees. Grafting (a technique to speed up fruiting) is possible but advanced—stick to seeds if you’re new.
The biggest challenge? Pests like aphids and mites love young starfruit trees, so keep an eye out for sticky leaves or distorted growth.
📚 In This Guide
- What you need
- Instructions
- Tips and common mistakes
- Wrapping up and next steps
What you need
- ● Starfruit seeds: 3–5 fresh, plump seeds (harvested from ripe starfruit or purchased from a trusted source). Pro tip: 💡 Soak seeds in warm water for 24 hours to speed up germination.
- ● Seed-starting mix: 1–2 cups of well-draining, sterile potting soil (look for a mix labeled for seed germination or tropical plants).
- ● Small pots or seed trays: 2–4 biodegradable pots (3–4 inches wide) or a seed tray with individual cells.
- ● Plastic wrap or humidity dome: To create a greenhouse effect and retain moisture.
- ● Spray bottle: For gentle watering without disturbing the soil.
- ● Grow lights or sunny windowsill: A warm, bright spot (70–85°F) with indirect sunlight or a grow light for 12+ hours/day.
- ● Transplant container or garden bed: A 5-gallon pot (for indoor growth) or a well-draining garden spot (if you live in a tropical or subtropical climate, Zone 10–12).
- ● Fertilizer: A balanced, water-soluble fertilizer (e.g., 10-10-10) for young seedlings.
- ● Humidity tray: A shallow tray with pebbles and water to boost humidity around seedlings.
- ● Soil moisture meter: To monitor root health without overwatering.
- ● Trellis or support stake: For guiding the tree as it grows (starfruit vines can reach 30+ feet!).
- ● Mulch: Organic mulch (e.g., straw or wood chips) to retain soil moisture and regulate temperature.
Step-by-Step instructions for growing starfruit trees from seed
Here's how to nurture a starfruit tree from seed to a thriving tropical specimen—with patience and precise care.
🌱 Step 1: Extract and Prepare the Seeds
Starfruit seeds are encased in a fibrous pulp that must be removed carefully. Cut open a ripe starfruit (the kind sold in grocery stores works fine) and scoop out the seeds along with the surrounding gel. Rinse the seeds thoroughly under running water to remove all fruit residue. The gel contains natural germination inhibitors, so removing it is critical for successful sprouting.
Place the cleaned seeds in a bowl of water for 24 hours to soften the outer coating. This step mimics natural rainfall and helps the seed absorb moisture before planting. After soaking, gently rub the seeds between your fingers to remove any remaining gel—this ensures faster germination. I like to wrap them in a damp paper towel and store them in a sealed plastic bag overnight for extra hydration.
💧 Step 2: Sow Seeds in a Warm, Moist Environment
Fill a small seed-starting tray or individual pots with well-draining potting mix—starfruit seeds rot easily if kept too wet. Plant each seed ½ inch deep in its own container, as they dislike being crowded. I use 4-inch pots for each seed to give the initial roots room to establish without competition. Press the soil lightly around the seed to ensure good contact but don’t compact it.
Cover the pots with clear plastic wrap or a humidity dome to retain moisture and warmth. Starfruit seeds thrive in 75-85°F soil temperatures, so place the tray on a seedling heat mat if your home runs cooler. Keep the soil consistently moist (not soggy) by misting lightly every 2-3 days until germination occurs. Patience is key—germination can take 3-6 weeks, depending on temperature and humidity.
☀️ Step 3: Provide Bright, Indirect Light for Seedlings
Once the first true leaves appear (not the initial seed leaves), remove the plastic cover immediately to prevent fungal growth. Move the seedlings to a location with bright, indirect light—direct sun at this stage can scorch tender new growth. A south-facing window with sheer curtains works well, or use a grow light positioned 6-8 inches above the plants for 12-14 hours daily. You’ll know the light is sufficient when the leaves are deep green and compact, not elongated or pale.
Starfruit seedlings grow slowly at first, so resist the urge to transplant too soon. Wait until they develop 3-4 sets of true leaves (about 4-6 weeks after germination) before considering a larger pot. At this stage, I fertilize lightly with a balanced, water-soluble fertilizer diluted to half-strength to encourage steady growth without burning the delicate roots.
🪴 Step 4: Transplant to Larger Containers and Harden Off
When seedlings reach 6-8 inches tall, transplant them into 1-gallon pots filled with a mix of 60% potting soil, 30% perlite, and 10% compost. Starfruit trees have shallow but extensive root systems, so avoid deep pots that can cause waterlogging. Gently remove the seedling from its small pot, tease the roots slightly to encourage branching, and place it in the new container at the same depth it was growing before.
Begin hardening off the seedlings by placing them outdoors in a shaded, sheltered spot for 1-2 hours daily, gradually increasing exposure over 2 weeks. This acclimates them to wind, sun, and temperature fluctuations. Once they tolerate full sun for 6+ hours daily without wilting, they’re ready for their permanent outdoor home—though they’ll need year-round warmth (they’re tropical!). In colder climates, keep them in pots and bring them indoors during winter.
✂️ Step 5: Prune and Maintain for Fruit Production
Starfruit trees benefit from light pruning to encourage a bushier shape and better air circulation. Pinch back the tips of new growth when the plant is 12-18 inches tall to promote branching. Remove any leggy or weak stems at the base to redirect energy into stronger growth. I prune mine in late winter or early spring before new growth begins, using sterilized shears to avoid disease.
Fertilize every 4-6 weeks during the growing season with a citrus-specific fertilizer (starfruit is in the same family) or a balanced 10-10-10 formula. Water deeply 2-3 times weekly during hot weather, ensuring the soil drains freely—starfruit trees hate soggy roots. With patience, your seedling will mature into a tree that produces fruit in 5-7 years, though some varieties may take longer. The key is consistency: warmth, light, and gentle care yield the best results.
Tips & tricks for growing starfruit trees from seed
Between us, starfruit seeds are picky little things—they won’t forgive mistakes. Here’s how to give them the best shot at success.
Seed Prep is Everything: Don’t rush the 24-hour soak—this is non-negotiable. The gel around starfruit seeds contains natural inhibitors that prevent germination, and water alone won’t break them down completely. For extra insurance, I add a splash of hydrogen peroxide (1 part peroxide to 10 parts water) to the soak. This helps break down stubborn gel without harming the seed. After soaking, the seeds should feel plump and slightly soft when gently squeezed—this is your cue they’re ready for planting.
Temperature Control is Critical: Those 75-85°F soil temperatures in Step 2 aren’t just suggestions—they’re dealbreakers. If your home runs cooler, invest in a seedling heat mat (they’re cheap and make all the difference). I’ve seen germination rates drop by 50% when seeds sit in 65°F soil. Pro tip: Place your pots on top of your fridge (not inside) for a gentle, consistent heat source if you don’t have a heat mat. Monitor with a soil thermometer to stay in that sweet spot.
Lighting Strategy for Delicate Seedlings: The 12-14 hours of grow light in Step 3 should be timed to mimic natural daylight. Use a timer to automate this—starfruit seedlings need consistency. If you’re using natural light, rotate your pots weekly so all sides get even exposure. Watch for "leggy" growth (long, thin stems with pale leaves)—this is your signal the light isn’t strong enough. At this stage, more light is better than too little, even if it means moving closer to a bright window.
Transplanting Without Shock: When moving to 1-gallon pots in Step 4, the key is to minimize root disturbance. Water the seedling thoroughly the day before transplanting so the roots slide out easily. Gently loosen the root ball with your fingers rather than pulling—this encourages new root growth into the fresh soil. After transplanting, give the soil a light mist to settle it around the roots, then let it dry slightly before your next watering. This helps prevent transplant shock, which can stall growth for weeks.
Pro Tips for Starfruit Seed Grow A Garden
- Between us, starfruit seeds are picky little things—they won’t forgive mistakes. Here’s how to give them the best sho...
- Seed Prep is Everything: Don’t rush the 24-hour soak—this is non-negotiable. The gel around starfruit seeds contains ...
- Temperature Control is Critical: Those 75-85°F soil temperatures in Step 2 aren’t just suggestions—they’re dealbreake...
Frequently asked questions
Got questions about growing starfruit from seed?
You’re not alone—this tropical fruit tree has quirks! Here are answers to the most common questions to help you grow a thriving garden.
How long does it take for a starfruit seed to germinate?
Starfruit seeds typically germinate in 2–4 weeks when kept in warm, moist conditions (around 75–85°F). Patience is key—some may take longer, especially if the soil stays too dry. Keep the seedling tray humid with a plastic cover until sprouts appear!
When will my starfruit tree bear fruit?
Starfruit trees grown from seed can take 5–10 years to produce fruit, depending on care and climate. Grafted trees (common in commercial settings) fruit faster (3–5 years). For quicker results, consider buying a young grafted tree from a nursery!
What’s the best climate for growing starfruit?
Starfruit thrives in tropical or subtropical climates with warm temperatures (60–90°F) and high humidity. They’re sensitive to frost—if you live in a cooler zone, grow them in containers and move them indoors during winter. Coastal areas with mild winters work best!
Why isn’t my starfruit seed sprouting?
Common culprits include:
- Cold soil: Starfruit seeds need warmth (70°F+). Use a seedling heat mat if your home is chilly.
- Dry soil: Keep the soil consistently moist (not soggy) with a spray bottle or misting.
- Old seeds: Fresh seeds sprout better—try soaking them in warm water for 24 hours before planting.
Can I grow starfruit from a grocery store fruit?
Yes! But save the largest, plumpest seeds from ripe starfruit (avoid bruised or overripe ones). Rinse the seeds to remove pulp, dry them, and plant immediately. Store-bought seeds may take longer to germinate, so don’t rush—give them time and warmth!
Wrapping up and next steps
Growing a starfruit tree from seed is a rewarding journey that blends patience with tropical excitement! 🌱 With the right soil, sunlight, and care, you’ll soon enjoy the sweet, fragrant fruits of your labor—whether you’re harvesting for fresh eating, juicing, or sharing with neighbors.
Start small, stay consistent, and don’t forget to celebrate each milestone, from sprouts to blossoms!
Ready to take the next step? Plant your seeds today and watch your garden transform into a lush, fruit-bearing paradise. Happy growing! 🌿