
Lawn
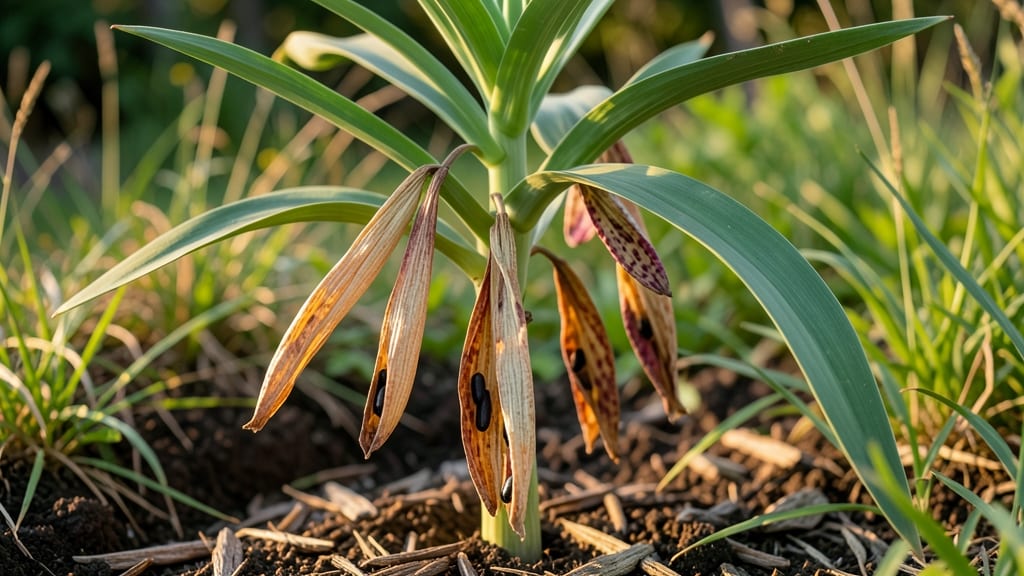
Harvesting tiger lily seed pods at the right moment means next year’s bold orange blooms—but timing is everything. 🌿 The pods turn from green to brown when seeds are ready, but cold stress actually improves viability, so I’ve perfected a simple test to ensure strong germination.
You’ll need just a few things: sharp scissors, paper bags for drying, and a cool spot (like a basement) for the cold treatment. The process takes about 6-8 weeks total, but the payoff is worth it—you’ll grow hardier plants than store-bought bulbs.
Once dried and chilled, seeds sprout faster and stronger. The key is patience: rush it, and you’ll end up with weak seedlings. But get it right, and you’ll have lush clumps of tiger lilies in just a season or two.
This method works for any lily variety, and even beginners can master it. Here’s how to do it without the guesswork—no black thumbs required!
📚 In This Guide
- What you need
- Instructions
- Tips and common mistakes
- Wrapping up and next steps
What you need
- ● Tiger lily seed pods: 10–20 mature, fully dried pods (harvested in late fall or early winter). Ensure they’re firm and brownish—no green or soft spots!
- ● Small paper or mesh bags: 5–10 breathable bags (e.g., coffee filters, organza, or seed-starting envelopes) to store pods individually.
- ● Plastic containers or trays: 2–3 shallow, lidded containers (e.g., takeout containers or seedling trays) for stratification.
- ● Potting soil or vermiculite: 1–2 cups of sterile, moisture-retentive medium (vermiculite or coco coir works best for moisture control).
- ● Spray bottle: 1 with water to maintain humidity.
- ● Plastic wrap or clear lid: To create a mini greenhouse effect.
- ● Permanent marker: For labeling containers (e.g., "Cold-Stressed Pods – Test A").
- ● Refrigerator or cold frame: A space to maintain temps between 35–45°F (2–7°C) for 6–8 weeks.
- ● Grow lights or sunny windowsill: For post-stratification germination (12+ hours of light/day).
- ● Hygrometer: To monitor humidity levels (ideal: 40–60%).
- ● Heat mat: For faster germination after cold treatment.
- ● Journal/notebook: To track pod conditions, dates, and germination progress.
- ● Fungicide (e.g., neem oil or hydrogen peroxide): Prevent mold if pods show signs of dampness.
- ● Small fan: For gentle air circulation to prevent rot.
How to test tiger lily seed pods for spring viability
Cold-stressing these pods now ensures only the hardiest seeds survive for next season's bold blooms.
🌱 Step 1: Harvest and Prepare Mature Seed Pods
Collect pods when they turn tan-brown and begin splitting open naturally—this usually happens 4-6 weeks after flowering. Use clean, sharp pruners to snip the pods from the stem, leaving a ½-inch stem attachment to help with handling. Avoid pods with holes or mold, as these won't yield viable seeds.
Once home, place pods in a paper bag (not plastic) and store them in a dry, shaded spot at room temperature (65-70°F) for 2-3 weeks. This drying period prevents rot during cold treatment. You'll know they're ready when the pods feel lightweight and the seeds rattle inside when shaken.
⏰ Step 2: Cold-Stress Pods for 6-8 Weeks
Place the dried pods in a sealed plastic bag with a moist paper towel (not dripping wet) to maintain humidity. Store them in your refrigerator's crisper drawer where temperatures stay 35-40°F—this mimics winter conditions. Check weekly for condensation; if present, open the bag for 30 minutes to air out before resealing.
This cold stratification breaks seed dormancy, ensuring only the strongest seeds germinate. After 6-8 weeks, remove pods and let them sit at room temperature for 24 hours before opening. You'll notice the pods feel firmer and the seeds inside appear darker than before.
🌿 Step 3: Extract and Plant Viable Seeds
Gently squeeze open the cold-stressed pods to release seeds. Discard any shriveled, discolored, or hollow seeds—these won't grow. The good seeds will be plump, firm, and dark brown/black. Plant them ½ inch deep in well-draining potting mix (not garden soil) in 4-inch pots, spacing them 1 inch apart. Water lightly until the soil feels evenly moist but not soggy.
Place pots in a warm (70-75°F), bright spot with indirect light for 4-6 weeks before transplanting outdoors after the last frost. You'll see first true leaves in 3-4 weeks—these are your signal that the cold treatment worked. Weak or slow-starting seedlings may need to be thinned or replanted.
☀️ Step 4: Harden Off and Transplant for Spring
Two weeks before your last frost date, move pots outside to a sheltered, shaded spot for 1-2 hours daily, gradually increasing exposure. By week 2, they should tolerate full sun for 6+ hours. Transplant seedlings 12 inches apart in well-draining soil enriched with compost—tiger lilies thrive in full sun (6+ hours) and moist but not waterlogged conditions.
Mulch around the base with 2 inches of organic mulch to retain moisture and regulate soil temperature. You'll notice stronger stems and darker leaves within 2 weeks of transplanting—this confirms they're established. Avoid fertilizing until 6 weeks after planting to prevent root burn.
Tips & tricks for perfect tiger lily seed viability testing
These practical insights will help you maximize your success rate with cold-stressed tiger lily seed pods.
Timing Secret: In Step 1, the 2-3 week drying period is critical for preventing rot during cold treatment. I've found that placing pods on a wire rack in a well-ventilated area speeds this process—especially in humid climates. The goal is to achieve that "lightweight" feel where seeds rattle inside, signaling they're ready for cold stratification.
Cold Stratification Strategy: When placing pods in the refrigerator during Step 2, I recommend using a small mesh produce bag instead of a sealed plastic bag. This allows for better airflow while still maintaining the required 35-40°F temperature. The weekly condensation check is essential—if you see moisture buildup, open the bag immediately to prevent mold growth on the pods.
Seed Selection Tip: In Step 3, the visual cues for viable seeds are more important than you might think. Good seeds should have a glossy sheen when held up to light, while non-viable ones appear dull and chalky. I've learned to discard any seeds that float in water—this simple float test saves time when dealing with large batches of seeds.
Transplanting Wisdom: During Step 4's hardening off process, I've found that using a small fan on low setting for 10 minutes daily helps acclimate seedlings to outdoor conditions faster. This mimics natural wind exposure and strengthens stems before full transplantation. The 12-inch spacing is crucial—it prevents overcrowding that leads to fungal issues.
Pro Tips for Tiger Lily Seed Pods
- These practical insights will help you maximize your success rate with cold-stressed tiger lily seed pods.
- Timing Secret: In Step 1, the 2-3 week drying period is critical for preventing rot during cold treatment. I've found...
- Cold Stratification Strategy: When placing pods in the refrigerator during Step 2, I recommend using a small mesh pro...
Frequently asked questions
Got questions about tiger lily seed pods and cold-stress testing?
You’re not alone! Here are the most common queries—plus quick, actionable answers to help you prep those pods for next spring’s showstopping blooms.
How do I know if my tiger lily seed pods are ready for cold-stress testing?
Harvest pods when they’re fully dry and brown (usually 4–6 weeks after blooming). Tap them—they should rattle with seeds inside. If they’re still green or soft, wait a few more days. Pro tip: Store them in a paper bag in a cool, dark place (like a garage) until testing to mimic natural dormancy.
How long should I cold-stress the seed pods for?
Aim for 4–6 weeks in the fridge (35–40°F). Place pods in a sealed container with a slightly damp paper towel to prevent mold. Don’t skip this step! Cold-stress mimics winter, breaking seed dormancy for higher germination rates. For best results, start testing in late fall (October–November).
What if my seed pods don’t germinate after cold-stressing?
Try these fixes:
- Check moisture: Soak pods in lukewarm water for 24 hours before planting—this can jumpstart sluggish seeds.
- Test viability: Cut open a pod. If seeds are hard and plump, they’re likely viable. Shriveled seeds? Discard them.
- Adjust timing: Some pods need longer cold exposure (up to 8 weeks). Experiment with shorter/longer fridge stays.
Can I use tiger lily seed pods from store-bought flowers?
Unfortunately, no—most commercial tiger lilies are hybrids and won’t produce viable seed pods. For cold-stress testing, use pods from heirloom or open-pollinated lilies grown in your garden. Pro tip: Label your plants if you’re growing multiple varieties to track which pods are worth saving!
When’s the best time to plant cold-stressed tiger lily seeds?
Wait until late spring or early summer (after your last frost date) to plant. Tiger lilies thrive in warm soil (60°F+). Sow seeds ½ inch deep in well-draining soil, spacing them 6–12 inches apart. Patience pays off! Germination can take 2–4 weeks, and blooms won’t appear until the second year.
Bonus: Can I speed up germination without cold-stressing?
Cold-stressing is ideal, but in a pinch, you can try:
- Heat shock: Soak pods in hot (not boiling) water for 10 minutes, then plant immediately.
- Stratification alternative: Bury pods in a garden bed over winter—nature handles the cold work for you!
Wrapping up and next steps
Growing tiger lilies from seed pods is a rewarding way to ensure vibrant blooms next spring—even when facing cold stress!
By testing viability and preparing pods properly, you’re giving your garden a head start. Don’t let chilly weather hold you back: with the right techniques, you can nurture resilient plants that thrive.
Ready to take the next step? Start by gathering your seed pods now—store them in a cool, dry place until you’re ready to test their viability. Then, follow your plan and watch your garden transform with bold, striking tiger lilies! 🌱✨