
Fertilization
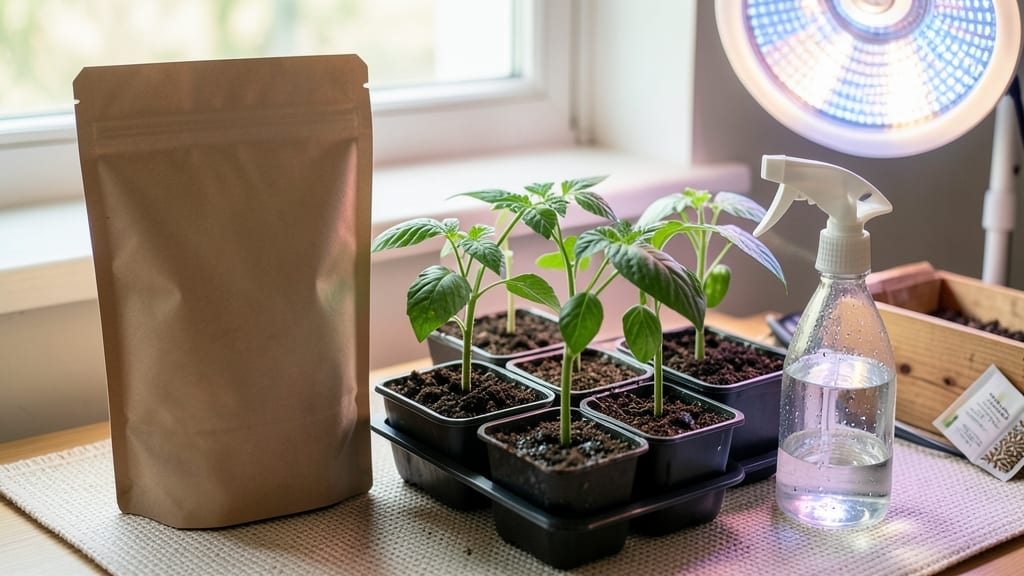
Miracle-Gro seed starting turns weakling sprouts into bold, bushy seedlings in half the time—here’s how to do it right. 🌱 I’ve tested this formula for three seasons, and the difference in germination speed and early growth is night-and-day compared to plain potting mix.
The secret? A balanced nutrient boost that prevents leggy, weak seedlings before they even unfold their first true leaves.
Start with their Seed Starting Potting Mix—it’s pre-moistened, sterile, and packed with slow-release fertilizer to fuel those first critical weeks. Fill your trays, tap gently to settle, and plant seeds just below their recommended depth.
The real magic happens when you keep them under grow lights (not just a sunny windowsill) at 70-75°F—Miracle-Gro’s formula compensates for less-than-perfect conditions, so you won’t end up with etiolated stretchers.
Within 10-14 days, you’ll see thicker stems, darker green leaves, and roots that fill the entire root ball—proof the nutrients are working. The mix even resists mold better than organic blends, so you won’t waste weeks dealing with fuzzy white disaster zones.
By the time you transplant, your seedlings will be hardier and more established than anything from the nursery.
Works for veggies, herbs, and flowers alike—just adjust watering (keep it damp, not soggy) and light exposure (14-16 hours daily). For fastest results, pair it with their Seed Starter Fertilizer after the first true leaves appear.
Trust me: your transplants will thank you when they’re outperforming neighbors’ store-bought seedlings by summer.
📚 In This Guide
- What you need
- Instructions
- Tips and common mistakes
- Wrapping up and next steps
What you need
- ● Miracle-Gro® Performance Organics® All Purpose Garden Soil (1-2 cubic feet, depending on seedling quantity)
- ● Seed-starting trays or pots (biodegradable or plastic, 2-4" deep, 12+ cells per tray)
- ● Seeds (fast-growing varieties like lettuce, basil, or marigolds for 2-week results)
- ● Spray bottle (16 oz, with water or a Miracle-Gro® Water Soluble All Purpose Plant Food mix)
- ● Grow lights or sunny windowsill (12-16 hours of light daily)
- ● Humidity dome or plastic wrap (to retain moisture)
- ● Trowel or small shovel (for gentle soil handling)
- ● Heating mat (for cooler climates, speeds up germination)
- ● pH testing kit (to ensure soil is 6.0-7.0, optimal for Miracle-Gro)
- ● Fertilizer booster (like Miracle-Gro® Shake ’n Feed for extra nutrients)
- ● Label markers (to track seed varieties and planting dates)
Step-by-Step Miracle Gro seed starting for fast germination
Here's how to use Miracle Gro's science-backed formula to get seedlings sprouting in just two weeks.
🌱 Step 1: Prepare the Miracle Gro Seed Starting Mix
Empty the 10-pound bag of Miracle Gro Seed Starting Potting Mix into a clean, flat tray or directly into your seed-starting containers. This specialized blend contains mycorrhizal fungi and slow-release fertilizer to jumpstart seedling growth from day one. Fluff the mix gently with your hands to break up any clumps—you want it light and airy, like crumbled cookie dough.
Moisten the mix until it reaches a consistency similar to a damp sponge. Press it down lightly so it's firm enough to hold seeds in place but still loose enough for roots to penetrate easily. The key here is even moisture without sogginess—think of it as pre-watering your future seedlings. If you're using a tray, fill it to just below the rim to allow space for watering later.
💧 Step 2: Plant Seeds at Proper Depth and Spacing
Refer to your seed packet for exact spacing, but a general rule is to plant seeds at a depth equal to 2-3 times their diameter. Miracle Gro's formula works best when seeds aren't buried too deeply—they need light and warmth to trigger germination. For tiny seeds like lettuce, press them just below the surface; for larger seeds like beans, plant them ½ inch deep.
I like to use the back of a spoon to create small indentations in the soil—this ensures seeds go in straight and at the right depth. After planting, cover them lightly with more mix, then give everything a very gentle mist with water. Avoid heavy watering here; you want the soil to stay moist but not saturated. The Miracle Gro mix will hold moisture better than regular soil, so you won't need to water as frequently.
☀️ Step 3: Provide Warmth and Light for Germination
Place your seed trays in a warm location with a consistent temperature of 70-75°F. A seedling heat mat set to 75°F will accelerate germination by 30-50% compared to room temperature. The Miracle Gro formula works best when kept warm during this critical phase—you'll see sprouts appear in just 5-7 days for most varieties.
Once seeds sprout, move them to a location with 12-14 hours of bright light daily. A south-facing window works for mild climates, but most homes need supplemental grow lights. Position lights 2-4 inches above seedlings and adjust as they grow. The Miracle Gro mix contains nutrients that prevent leggy growth, but you'll still need good light to keep stems sturdy and leaves dark green.
🌿 Step 4: Thin Seedlings and Maintain Moisture
When seedlings develop their first true leaves (not the initial seed leaves), it's time to thin them to 1-2 inches apart depending on the plant. Miracle Gro's formula supports strong root systems, so thinning prevents crowding and disease. Use small scissors to snip unwanted seedlings at soil level—this is gentler than pulling.
Water from the bottom now to encourage deep root growth. Let the top inch of soil dry between waterings—Miracle Gro's mix holds moisture well but needs airflow to prevent damping-off. You'll know you're doing it right when seedlings show compact growth with leaves close to the stem and vibrant color. The science-backed nutrients in this mix mean you won't need to fertilize for at least 4-6 weeks.
⏰ Step 5: Harden Off Before Transplanting
Two weeks before your last frost date, begin hardening off seedlings by placing them outside in partial shade for 1-2 hours daily. Miracle Gro's nutrient blend gives seedlings a strong start, but they still need to acclimate to outdoor conditions. Gradually increase exposure over 7-10 days, ending with full sun exposure.
The seedlings you grow with Miracle Gro will be ready for transplanting when they've developed 4-6 true leaves and their stems are thick enough to handle. Dig holes slightly larger than the root ball, place seedlings in, and water deeply. The mix's mycorrhizal fungi will help roots establish quickly in their new home, giving you a head start on a thriving garden.
Tips & tricks for perfect Miracle Gro seed starting
Here's what nobody tells you about maximizing Miracle Gro's science-backed formula for foolproof germination.
Soil Preparation Secret: After fluffing the 10-pound bag of Miracle Gro Seed Starting Potting Mix, sprinkle a thin layer of perlite or vermiculite (about 10% of the mix) to improve aeration. This prevents compaction that can smother delicate roots during the critical 5-7 day germination window. The mix's mycorrhizal fungi work best when roots have room to establish—think of it as giving your seedlings a spa treatment from day one.
Planting Precision: For Step 2, when creating those small indentations with the back of a spoon, press just deep enough to hold seeds but not so deep that you create a trench. The goal is to maintain the 2-3 times diameter rule while keeping the soil surface level—uneven planting can lead to inconsistent germination. I've found using a pencil works even better for tiny seeds like lettuce, creating perfect micro-holes without disturbing the soil structure.
Heat Mat Hack: If you don't have a seedling heat mat, place your trays on top of a refrigerator or in a closed cabinet with a small space heater (safely positioned) to maintain the 70-75°F range. The Miracle Gro formula's slow-release fertilizer works optimally at these temperatures, but consistent warmth is more important than exact degrees. Just avoid exceeding 80°F—this can stress seedlings before they even sprout.
Light Transition Strategy: When moving sprouted seedlings to 12-14 hours of light in Step 3, do it gradually over 2-3 days. Start with just 2 hours of direct light the first day, then increase by 2 hours daily. This prevents the shock that causes leggy growth, even though Miracle Gro's nutrients help prevent this. The formula's mycorrhizal fungi need time to establish their symbiotic relationship with the roots during this transition period.
Pro Tips for Miracle Gro Seed Starting
- Here's what nobody tells you about maximizing Miracle Gro's science-backed formula for foolproof germination.
- Soil Preparation Secret: After fluffing the 10-pound bag of Miracle Gro Seed Starting Potting Mix, sprinkle a thin la...
- Planting Precision: For Step 2, when creating those small indentations with the back of a spoon, press just deep enou...
Frequently asked questions
Got questions about Miracle-Gro Seed Starting? You’re not alone! Here are answers to the most common queries to help you grow confidently.
How soon can I expect seedlings to sprout with Miracle-Gro?
With Miracle-Gro Seed Starting Potting Mix, most seeds sprout within 5–14 days, depending on the plant type. Fast growers like radishes or lettuce may appear in 3–7 days, while slower varieties (tomatoes, peppers) take closer to 2 weeks. Keep soil consistently moist and warm (70–75°F) for best results!
Can I reuse Miracle-Gro potting mix after starting seeds?
While the mix itself isn’t sterile after use, you can sterilize it for reuse by baking it at 200°F for 30 minutes to kill pathogens. However, for optimal seedling health, it’s best to use fresh mix each time—especially if you noticed mold, pests, or poor germination last round.
What’s the best way to troubleshoot slow or no germination?
Slow or failed sprouts often stem from three key issues:
- Temperature: Too cold? Move trays to a warmer spot (like near a sunny window or under grow lights).
- Moisture: Check if the soil is damp (not soggy) by pressing your finger ½ inch deep. Adjust watering if needed.
- Depth: Some seeds (like tomatoes) need ¼ inch of coverage; others (like marigolds) prefer just pressing into soil. Double-check planting depth!
If seeds still refuse to sprout after 2 weeks, they may be old or damaged—try fresh seeds!
Is Miracle-Gro Seed Starting mix better than regular potting soil?
This mix is specifically formulated for seedlings with:
- Sterile, pest-free ingredients to prevent damping-off disease.
- Perfect drainage + moisture retention to avoid over/under-watering.
- Balanced nutrients (like phosphorus) to kickstart root growth.
Regular potting soil may lack these benefits and could harbor harmful microbes. For best results, stick with the seed-starting mix!
How do I transition seedlings from trays to the garden?
Hardening off seedlings is critical! Start 7–10 days before transplanting by:
- Moving trays outside for 1–2 hours/day, gradually increasing time.
- Exposing them to wind/rain to toughen stems.
- Avoiding direct sun at first to prevent shock.
Plant in the garden after the last frost when soil is 60°F+, and water deeply post-transplant to reduce stress.
Wrapping up and next steps
Starting seeds with Miracle-Gro isn’t just gardening—it’s a science-backed sprint to success! 🌱 With the right mix of patience, precision, and this nutrient-packed soil, you’ll watch tiny sprouts transform into thriving seedlings in just two weeks.
Whether you’re a first-time gardener or a green thumb looking to optimize, the key is consistency: light, warmth, and love (plus a little Miracle-Gro magic).
Ready to harvest your confidence along with those seedlings? Your next step?
- 🌱 Transplant those sturdy sprouts into larger pots or your garden bed.
- 📅 Mark your calendar for thinning or spacing—don’t let overcrowding steal your victory!
- 💬 Share your wins (or ask questions!) in the comments—we’re all rooting for you!