
Lawn
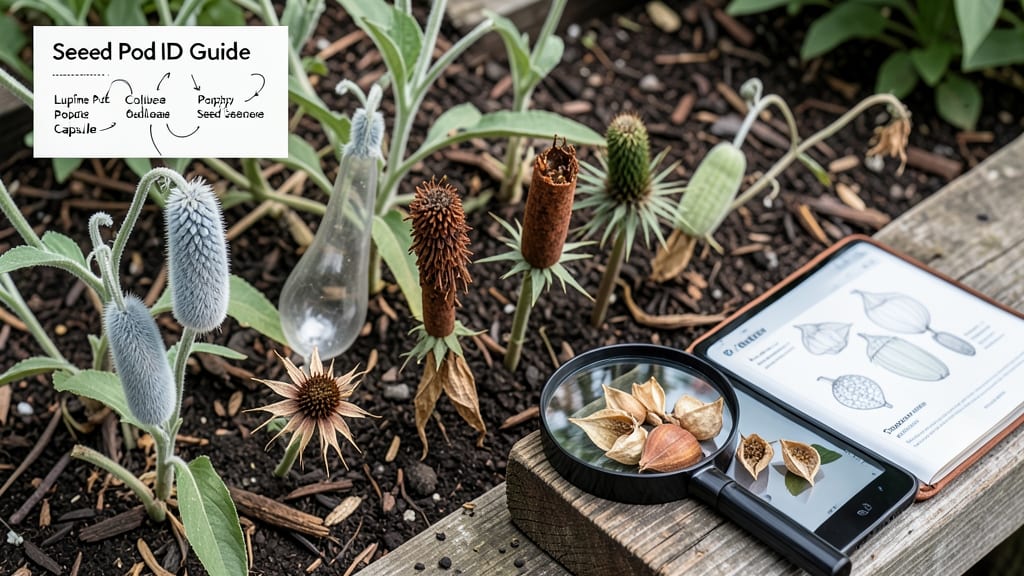
Seed pod identification lets you unlock the secrets of your garden's next generation. 🌱 Every pod tells a story—whether it's the classic pea pod, the spiky milkweed, or the papery poppy—each one holds the potential for new plants. Knowing their shapes and structures helps you save seeds, propagate favorites, and even spot invasive species before they spread.
The most common garden pods fall into three categories: legumes (like peas and beans), capsules (such as poppies and lilies), and follicles (found on plants like milkweed). Legumes split open along two seams, capsules burst or split irregularly, and follicles peel back from one side.
Once you recognize these patterns, you'll notice them everywhere—even in wildflower patches.
This knowledge isn't just for plant nerds. Seed saving becomes effortless when you know which pods to collect and when. A single milkweed pod can yield hundreds of seeds for next year's monarch butterflies, while a dried poppy capsule releases its seeds with a single touch.
You'll start seeing your garden as a seed library instead of just a collection of plants.
Grab a magnifying glass and a notebook—this skill sharpens with every plant you study. Start with familiar varieties, then branch out to wildflowers and shrubs. Before you know it, you'll be identifying pods in your sleep, and your garden will thank you with stronger, more resilient plants year after year.
📚 In This Guide
- What you need
- Instructions
- Tips and common mistakes
- Wrapping up and next steps
What you need
- ● Hand Lens or Magnifying Glass (3x–10x magnification, required for close-up details)
- ● Field Guide or Plant ID App (e.g., iNaturalist, PlantNet, or a printed guidebook like The Seed Identification Handbook)
- ● Notebook & Pencil (for recording observations like size, shape, color, and texture)
- ● Ruler or Measuring Tape (to document pod dimensions in inches or centimeters)
- ● Camera or Smartphone (with a macro mode or high-resolution camera for photos)
- ○ Gloves (Optional) (nitrile or latex gloves if handling prickly or unknown plants)
- ● Tweezers or Small Pruning Shears (for safely collecting or examining delicate pods)
- ● Pressing Board & Heavy Books (to flatten and preserve seed pods for long-term study)
- ● Herbarium Paper (acid-free paper for archiving specimens)
- ○ Portable UV Light (Optional) (to check for fluorescence in some seed coatings)
- ● Seed Pod Key Reference Chart (pre-made or DIY for quick comparisons)
Visual guide to identifying common garden seed pods
Here's how to recognize seed pods from popular garden plants—no botanical degree required.
🌱 Step 1: Examine Pod Shape and Structure
Start by observing the pod's overall form. Legumes like peas and beans produce elongated, flat pods that split open along two seams when mature. These pods often contain multiple rows of seeds inside. In contrast, plants like okra develop elongated, cylindrical pods with a leathery texture that never splits naturally.
Look for distinguishing features like ridges or spines. Okra pods, for example, have a distinct ribbed texture, while milkweed pods develop a fuzzy, cotton-like exterior when mature. Pay attention to whether the pod opens at all—some, like poppies, split open dramatically, while others, like tomatoes, remain closed until fully ripe.
🌿 Step 2: Check for Color and Surface Texture
Color changes dramatically as pods mature. Green beans start bright green and turn yellow or brown when ready for harvest, while okra develops from green to a deeper, almost purple hue. Milkweed pods begin green but turn tan and develop silky fibers as they dry.
Examine the surface texture closely. Smooth, glossy pods often belong to plants like tomatoes, while rough or hairy pods typically indicate wild varieties or plants like lamb's quarters. Run your fingers lightly over the pod—rough textures often indicate protective seed coatings, while smooth surfaces suggest thinner seed casings.
☀️ Step 3: Identify Opening Mechanisms
Some pods release seeds explosively when mature. Peony pods, for instance, split open suddenly, scattering seeds up to 10 feet away. Others, like poppies, open gradually along seams. Observe whether the pod splits vertically, horizontally, or remains intact until disturbed.
Look for tiny pores or valves on the pod surface. Plants like violets have small, circular openings that release seeds when dry. This characteristic helps distinguish them from closed pods like those of tomatoes, which require cutting open to access seeds. Note whether seeds are embedded in pulp or dry and free.
⏰ Step 4: Compare to Known Plant Families
Group pods by their botanical families. The Fabaceae family (legumes) produces pods that split into two halves, while the Brassicaceae family (mustards) often creates elongated, dehiscent pods. Compare your findings to reference images of common garden varieties like peas, beans, tomatoes, and okra.
Consider the plant's growth habit. Vining plants like peas and beans produce long, trailing pods, while bush varieties like tomatoes develop sturdier, upright pods. Observe whether pods grow in clusters or singly—this trait often correlates with the plant's reproductive strategy and can help narrow down identification.
🌱 Step 5: Verify with Seed Characteristics
Extract a few seeds from the pod and examine their shape, size, and texture. Legume seeds are typically round or kidney-shaped, while seeds from plants like tomatoes are flattened and have a distinct "eye" or germination spot. Compare these features to seed catalogs or botanical guides.
Check seed color variations. Some pods contain seeds of different colors, like the black-and-white seeds of certain beans. Note whether seeds are embedded in a gelatinous pulp (common in tomatoes) or completely dry. This final verification step helps confirm your identification and ensures you're working with the correct plant variety.
Tips & tricks for mastering seed pod identification
Here's what I've learned after years of helping gardeners get their identifications right—these tricks will help you spot the subtle clues that make all the difference.
Step 1: Lighting Makes All the Difference: Natural daylight is your best friend when examining seed pods. The subtle color variations and textures become much more visible under bright, diffused light. If you're indoors, position your pods near a north-facing window where the light is consistent. I've found that using a small handheld magnifying glass (3x magnification) can reveal tiny details like seed arrangement or surface pores that would otherwise go unnoticed. This is especially helpful when distinguishing between similar-looking pods like okra and milkweed.
Texture Test That Saves Time: The surface texture of a pod can tell you more than you might think. For Step 2, try this quick test: run your thumb lightly along the pod's surface. Smooth pods like tomatoes will feel almost silky, while rough pods like lamb's quarters will have a noticeable grain. I learned this the hard way when I initially misidentified a fuzzy milkweed pod as a young okra pod—until I touched them! Pay special attention to any raised veins or ridges, as these often indicate the plant family. For example, the prominent ribs on okra pods are a dead giveaway.
Opening Behavior is Key: In Step 3, watch how the pod behaves when you gently squeeze it. Legume pods (like peas) will split cleanly along their seams with minimal pressure, while others like tomatoes remain stubbornly closed. I keep a small notebook where I sketch how different pods open—this visual reference has helped me identify mysterious pods in my garden. Remember that some pods, like peony pods, release seeds with explosive force when mature, so handle them carefully if you're trying to preserve seeds for planting.
Family Traits to Memorize: For Step 4, focus on these family characteristics that never fail me: Fabaceae (legumes) pods always split into two halves, while Brassicaceae (mustard family) pods typically have a papery texture that splits along one seam. I've created flashcards with these key traits and review them before garden season starts. Another pro tip: note whether pods grow in clusters or singly—this is often a dead giveaway for the plant's reproductive strategy. For instance, tomato pods grow singly on the vine, while bean pods grow in clusters at the nodes.
Pro Tips for Seed Pod Identification
- Here's what I've learned after years of helping gardeners get their identifications right—these tricks will help you ...
- Step 1: Lighting Makes All the Difference: Natural daylight is your best friend when examining seed pods. The subtle ...
- Texture Test That Saves Time: The surface texture of a pod can tell you more than you might think. For Step 2, try th...
Frequently asked questions
Got questions about seed pod identification? You’re not alone—here are some of the most common ones, with quick answers to help you navigate the world of seed pods like a pro!
What’s the easiest way to identify an unknown seed pod?
Start with its shape, size, and texture. Compare it to a visual guide (like this one!) or use a plant ID app. If it’s still unclear, check the plant’s leaves or flowers for clues—they often match the pod’s parent plant.
When is the best time to harvest seed pods for planting?
Harvest when the pod is fully mature but not yet split open. For most pods, this means they’re dry and hard to the touch. Overripe pods may release seeds prematurely, while underripe ones won’t germinate well.
Can I plant seed pods directly from my garden?
Yes! Many seed pods (like those from sunflowers or okra) can be sown straight into the soil. Just ensure they’re clean, dry, and free of pests. For tropical or delicate seeds, consider indoor germination first to avoid weather risks.
What should I do if my seed pods won’t open naturally?
Some pods (like those from lotus or milkweed) need a little help! Try placing them in a paper bag for a few days—they’ll often release seeds from the gentle movement. Avoid forcing them open, as this can damage the seeds inside.
Are all seed pods safe to handle?
Most common garden pods (e.g., peas, beans) are harmless, but some wild varieties may irritate skin or contain toxins. When in doubt, wear gloves and research the plant before handling. If you’re unsure, skip it!
Wrapping up and next steps
Mastering seed pod identification unlocks a world of gardening possibilities—whether you're saving seeds, planning new plantings, or simply admiring nature’s intricate designs! 🌱 With this visual guide, you’ve got the tools to confidently recognize common varieties and make informed choices for your garden.
Ready to take the next step? Grab a notebook and document the seed pods you spot in your yard or local green spaces. Over time, you’ll build an even sharper eye—and who knows? You might just discover a hidden treasure of rare or heirloom seeds! 🌟